Looking for a quick, delicious, and family-friendly snack or appetizer that everyone will devour in seconds? This Beef Pepperoni Pizza Bombs Recipe might just be the best thing you bake this week. With gooey mozzarella, zesty pizza sauce, and a golden-brown biscuit shell seasoned with buttery Italian flavor, these bite-sized delights are perfect for parties, after-school snacks, or a fun twist on pizza night.
In this article, we’ll guide you through six essential parts covering everything from choosing the best ingredients to pro tips for baking and serving. Whether you’re a beginner or seasoned home cook, you’ll find insights to make every pizza bomb irresistibly perfect.
Choosing the Right Ingredients for Your Beef Pepperoni Pizza Bombs Recipe
Best Dough for Pizza Bombs: Biscuits vs. Pizza Dough
Your dough choice makes a huge impact on the final taste and texture. The classic recipe uses refrigerated biscuit dough, known for its buttery, flaky texture and convenience. These biscuits puff up in the oven, creating a soft yet slightly crispy crust that holds the fillings well.
If you’re not a fan of the biscuit flavor or want a chewier bite, pizza dough is an excellent alternative. It creates a stretchier texture and is ideal if you’re after a more traditional pizza experience in handheld form. You can buy it pre-made or make your own from scratch if you have the time.
Picking the Perfect Cheese and Beef Pepperoni Combo
Mozzarella cheese is the go-to for that classic, gooey pizza pull. Make sure to use shredded mozzarella, which melts evenly inside the dough and mixes well with the sauce. If you’re looking for variety, consider blending mozzarella with provolone or a sprinkle of cheddar for added flavor depth.
When it comes to Beef pepperoni, choose thin-sliced pieces that fit easily into the dough without overwhelming it. Use just enough to give a meaty, spicy kick without making the inside soggy. Opt for turkey-based Beef pepperoni if you prefer a leaner option.
The Sauce Matters: What to Look For
Not all pizza sauces are created equal. Look for a thick, well-seasoned pizza sauce with a balance of tomato tang, herbs, and garlic. Avoid overly watery sauces, as they can seep through the dough and cause sogginess.
Homemade sauce is always a plus, but store-bought varieties work great too. If you’re using a premade option, consider simmering it for a few minutes to thicken it further and intensify the flavors.
Flavor Enhancers: Butter, Parmesan, and Italian Seasoning
What takes this recipe over the top is the garlic butter brushing just before baking. Melted butter not only helps the bombs turn golden and crispy but also adds a rich, savory finish. Combine this with grated Parmesan cheese and a sprinkle of Italian seasoning, and you’ve got an irresistible topping with each bite.
Keep in mind that Parmesan adds both umami and a subtle crunch when baked. Italian seasoning, typically a blend of oregano, basil, thyme, and rosemary, delivers that classic pizza-shop aroma and taste.
Print
Beef Pepperoni Pizza Bombs Recipe
- Total Time: 30 mins
- Yield: 8 servings
Description
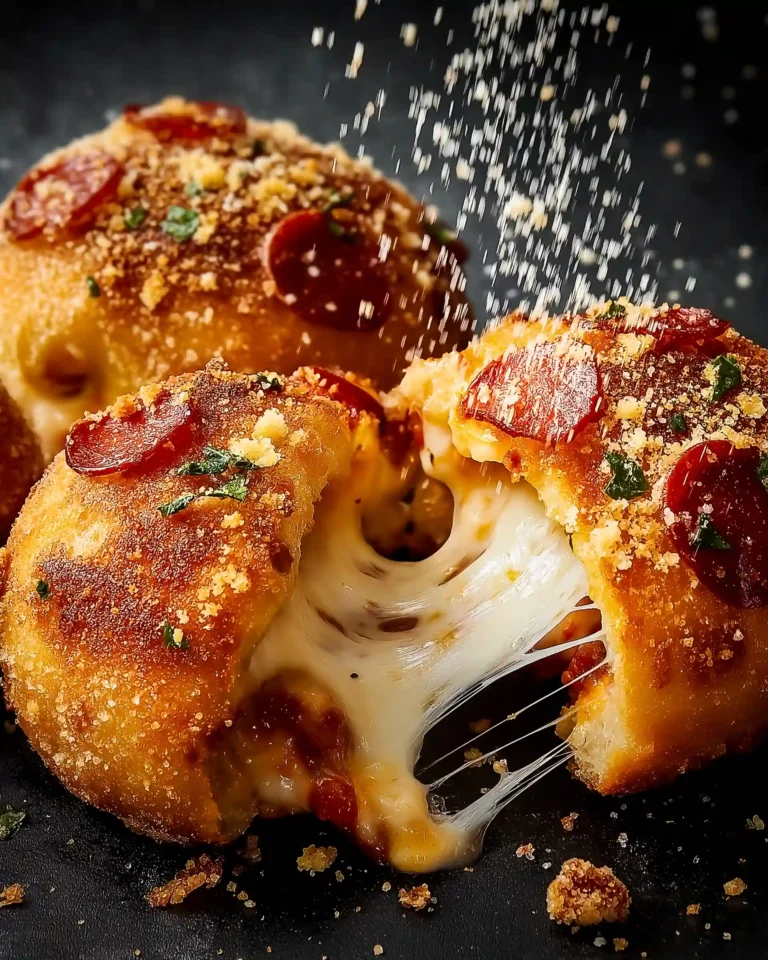
These Beef pepperoni pizza bombs are warm, cheesy, and wrapped in golden biscuit dough with a seasoned buttery topping. They’re perfect for parties, snacks, or weeknight cravings.
Ingredients
1 (16 ounce) can refrigerated biscuits (such as Pillsbury™ Grands!)
1/2 cup pizza sauce, or as needed
1/2 cup shredded mozzarella cheese, or as needed
1/2 cup Beef pepperoni, or as needed
1/4 cup melted butter
2 ½ tablespoons grated Parmesan cheese, or to taste
1 teaspoon Italian seasoning
Instructions
1. Preheat oven to 375°F (190°C) and line a baking sheet with parchment paper.
2. Pop open the biscuit can and divide into 8 biscuits. Flatten each into a 1/8-inch thick circle.
3. Spoon about 1 tablespoon of pizza sauce into the center of each dough circle, leaving a 1/4-inch edge clear.
4. Sprinkle about 1 tablespoon of mozzarella and 1 tablespoon of Beef pepperoni onto each circle.
5. Pull up the dough edges and pinch to seal, forming a ball. Roll to smooth.
6. Place seam-side down on baking sheet. Brush each with melted butter.
7. Sprinkle Parmesan and Italian seasoning on top.
8. Bake for 15 minutes, or until golden brown. Let cool slightly before serving.
9. Serve warm with extra pizza sauce for dipping.
Notes
Check bombs frequently during the last few minutes of baking to avoid over-browning.
If biscuit flavor isn’t your favorite, substitute with pizza dough and flatten accordingly.
- Prep Time: 15 mins
- Cook Time: 15 mins
- Method: Baking
- Cuisine: American
Step-by-Step Guide to Making the Best Beef Pepperoni Pizza Bombs
Step 1: Preheat and Prepare Your Baking Sheet
Before you begin assembling anything, preheat your oven to 375°F (190°C). This ensures a consistent baking temperature and helps the dough cook evenly. Line your baking sheet with parchment paper to prevent sticking and for easier cleanup. If you don’t have parchment, a light greasing with butter or oil works too.
Step 2: Flatten the Biscuit Dough
Open your can of refrigerated biscuits—the kind that gives you that satisfying pop when you peel back the label. Separate the dough into 8 individual biscuits. With your thumbs or palms, gently flatten each biscuit until it’s about 1/8-inch thick. You’re aiming for a smooth, even circle that can hold your fillings and still fold up into a tidy little ball.
Make sure to leave a slight thickness around the edges so the dough doesn’t tear when folding.
Step 3: Add the Fillings
Now comes the fun part. In the center of each dough circle, spoon in about 1 tablespoon of pizza sauce. Don’t spread it all the way to the edge—leave about 1/4 inch of space clear to prevent the sauce from leaking out during baking.
Next, sprinkle 1 tablespoon of shredded mozzarella cheese on top of the sauce, followed by 1 tablespoon of sliced Beef pepperoni. The key here is not to overfill. Too much stuffing makes it harder to seal and may cause the bombs to burst open while baking.
Step 4: Fold and Seal the Bombs
Gently pull up the edges of each biscuit and pinch them together to seal the fillings inside. You want to form a complete ball, so there are no open seams. Once sealed, roll each bomb lightly in your hands to shape and smooth them. Place each ball seal-side down on your prepared baking sheet. This position helps keep the seam from reopening during baking.
Step 5: Add the Flavor Topping
Melt 1/4 cup of butter and use a brush to coat each dough ball thoroughly. This step gives them a golden, crispy crust with rich flavor.
Then, sprinkle the tops with grated Parmesan cheese and Italian seasoning. The Parmesan melts into the butter and crisps on top, while the herbs infuse each bite with that classic pizzeria aroma.
Step 6: Bake to Golden Perfection
Place the baking sheet in your preheated oven and bake for about 15 minutes, or until the tops are golden brown. Keep an eye on them, especially during the last few minutes, to avoid over-browning.
If you notice uneven browning, rotate the baking sheet halfway through. That helps maintain consistent coloring and prevents the bottoms from getting too dark.
Step 7: Serve Hot with Extra Sauce
Once done, remove from the oven and let them cool for just a couple of minutes. These are best enjoyed warm, when the cheese is still melty and gooey. Serve with a side of warmed pizza sauce for dipping. It’s the perfect finishing touch that enhances every bite.
Expert Baking Tips and Common Mistakes to Avoid
Tip 1: Don’t Overfill the Dough
One of the most common mistakes in making Beef pepperoni pizza bombs is overstuffing the dough. While it’s tempting to pack in more cheese or sauce, doing so increases the risk of the dough tearing or bursting open during baking. Stick to about 1 tablespoon of each filling to maintain the right balance between flavor and structure.
Tip 2: Seal Tightly for a Perfect Bake
When folding the dough into a ball, always pinch the seams tightly. Gaps or loose folds allow steam and cheese to escape, which can create messes on your baking sheet and dry out the filling. After sealing, give each dough ball a gentle roll between your hands to double-check for any cracks.
Tip 3: Use Parchment Paper to Prevent Sticking
Lining your baking tray with parchment paper not only helps prevent the dough from sticking but also promotes even browning underneath. It also makes cleanup easier and keeps the bombs from becoming greasy if you’re using a metal tray.
Tip 4: Keep an Eye on Oven Time
Set a timer for 15 minutes, but start checking around the 12-minute mark. Some ovens run hotter than others, and since these are small dough balls, they can brown quickly. You want a golden brown top, not a burnt one. If needed, rotate the tray once during baking to ensure even color.
Tip 5: Use the Right Cheese Blend
Mozzarella is classic, but mixing in a small amount of provolone or part-skim cheese can help with melting and flavor. Avoid overly wet cheeses, as they may add moisture that makes the dough soggy. Pre-shredded mozzarella from the store often works best for quick prep and easy melt.
Tip 6: Prep Ingredients Before Assembly
Once the dough is flattened, you’ll want to work quickly to prevent it from drying out. Having your sauce, cheese, Beef pepperoni, and butter ready to go in separate bowls before assembly helps speed things up and ensures consistency across each pizza bomb.
Tip 7: Let Them Rest Before Serving
Right after baking, it’s best to let the pizza bombs sit for 2 to 3 minutes before serving. This short rest allows the cheese to settle slightly and prevents burns from hot fillings. It also firms up the dough just enough to hold everything together in that first delicious bite.
Tip 8: Reheat Like a Pro
If you have leftovers (unlikely, but possible), reheat them in the oven at 325°F for about 5–6 minutes to revive that crispiness. Avoid microwaving, which can make the dough rubbery and the filling unevenly hot.
Tip 9: Avoid Wet Fillings
If you’re experimenting with additional fillings like vegetables, make sure to cook and drain them first. Wet ingredients can release moisture during baking, leading to soggy or undercooked dough.
Tip 10: Adjust Seasoning to Taste
While the recipe calls for Italian seasoning and Parmesan, don’t be afraid to get creative. You can add a dash of garlic powder, crushed red pepper flakes, or onion powder to the melted butter for extra kick. Just be cautious not to overload with salt if your Parmesan is already salty.
Creative Variations of Beef Pepperoni Pizza Bombs Recipe
Mini Pizza Bombs for Parties and Kids
One of the best parts about this Beef Pepperoni Pizza Bombs Recipe is how adaptable it is. If you’re hosting a party or want a kid-friendly snack size, consider making mini pizza bombs. Instead of using full-size biscuits, cut each biscuit in half before flattening. Reduce the filling amounts proportionally and bake for around 10 to 12 minutes, watching closely for golden color.
These bite-sized versions are easier for small hands and make fantastic appetizers for gatherings, school lunches, or quick bites during movie nights.
Cheese-Lover’s Version
Want more cheese without going overboard? Try the triple cheese version. Add a small cube of mozzarella in the center, then surround it with shredded mozzarella and a light sprinkle of provolone or parmesan. The cube melts from the inside out, giving you a surprise burst of cheese in every bite.
Be sure not to use too much or you’ll risk leakage, but the triple cheese approach adds rich, melty flavor that takes these bombs to the next level.
Veggie Pizza Bombs
If you’re skipping meat or want to sneak in some veggies, go with a vegetarian twist. Try finely chopped bell peppers, mushrooms, olives, or spinach. Sauté them first to remove moisture and enhance their natural sweetness. Pat them dry before adding to the filling to avoid making the dough soggy.
A veggie version pairs beautifully with a mix of mozzarella and provolone, and a touch of garlic powder or Italian seasoning boosts the flavor.
Spicy Beef Pepperoni Bombs
Add a little heat by choosing spicy Beef pepperoni or mixing a pinch of crushed red pepper flakes into your pizza sauce. You can also sprinkle hot chili powder into the melted butter before brushing the tops.
Just a small change in the spice profile transforms these bombs into a bold snack with serious kick, perfect for those who love a little fire in their food.
Pizza Bombs with a Garlic Butter Crust
While the original recipe already uses melted butter, you can enhance the flavor with garlic-infused butter. Just heat butter with minced fresh garlic for a few minutes before brushing. This extra step infuses deep garlicky flavor into the crust and creates a pizzeria-style finish.
Top with extra Parmesan for a crispy, flavorful crust that cracks when you bite in, releasing a wave of savory, cheesy goodness.
Breakfast-Style Pizza Bombs
Transform this savory snack into a morning treat by using scrambled eggs and cheese as filling. Omit the Beef pepperoni and sauce, and instead add a touch of cooked Beef sausage substitute (like Beef or chicken sausage) or simply go with seasoned eggs and cheddar.
Serve with warm marinara or tomato-based dip for a breakfast-meets-pizza mashup that’s perfect for brunch or grab-and-go mornings.
Serving Ideas and Dipping Sauces for Beef Pepperoni Pizza Bombs Recipe
Best Ways to Serve Beef Pepperoni Pizza Bombs
These pizza bombs are incredibly versatile, making them suitable for everything from casual snacking to crowd-pleasing party trays. Serve them fresh out of the oven on a large platter, arranged in a circular pattern with a bowl of warm dipping sauce in the center. The golden, cheesy finish makes them visually appealing and ready to impress your guests.
For a more casual setting like movie night or after-school snack time, stack a few on a wooden cutting board or tray lined with parchment. You can also individually wrap leftovers in foil and keep them in a warm oven until ready to eat.
If you’re serving them at a gathering, include small appetizer picks or toothpicks to make grabbing each one easy and mess-free.
Top Dipping Sauce Options
A great dipping sauce elevates each bite of these Beef pepperoni pizza bombs. While warm pizza sauce is the most traditional and popular option, you can mix things up with other creative dips to cater to various tastes.
| Dipping Sauce | Flavor Profile | Best For |
|---|---|---|
| Warm Pizza Sauce | Classic, tomato-based, savory | Traditional flavor experience |
| Garlic Butter Sauce | Rich, buttery, garlicky | For an indulgent twist |
| Ranch Dressing | Creamy, tangy, cool | Perfect for kids and mild palates |
| Marinara Sauce | Chunky, herbed tomato | Great with veggie or cheesy bombs |
| Cheese Dip | Smooth, melty, extra cheesy | Cheese lovers’ top choice |
| Spicy Tomato Dip | Zesty with chili flakes or cayenne | For fans of heat and bold flavors |
Offering a trio of sauces allows guests to try different flavor combinations and makes the experience more interactive and fun.
Serving Temperature and Texture Tips
Beef Pepperoni pizza bombs are at their best when served warm, just a few minutes out of the oven. If you’re making them in advance, keep them in a 200°F oven lightly covered with foil to retain moisture and warmth.
Avoid refrigerating them unless absolutely necessary. Reheated pizza bombs lose some of their original texture, though they can still be delicious if warmed properly in a low oven.
If you need to transport them, pack them in an insulated container or wrap them in foil and keep them in a pre-warmed food carrier to hold their temperature.
Creative Presentation Ideas
For kids’ parties, place each bomb in a colorful cupcake liner for easy grabbing and less mess. Use mini chalkboard signs or tags to label each variation (classic, cheesy, spicy, etc.).
At adult gatherings or family events, serve them alongside a small charcuterie-style board with dipping sauces, roasted veggies, or fresh fruit to offer a balanced snack spread.
You can also build a “pizza bomb bar” at your next get-together, where guests can choose fillings and help assemble their own bombs before baking. It’s a fun way to involve kids and make the cooking part of the event.
Nutrition Facts, Storage Tips, and Make-Ahead
Nutritional Breakdown Per Serving
Each Beef pepperoni pizza bomb packs serious flavor into a small, satisfying portion. If you’re watching your daily intake, here’s a detailed look at the nutrition per serving (based on a batch of 8 bombs):
| Nutrient | Amount (Per Serving) |
|---|---|
| Calories | 301 |
| Total Fat | 17g |
| Saturated Fat | 8g |
| Cholesterol | 29mg |
| Sodium | 859mg |
| Total Carbohydrates | 28g |
| Dietary Fiber | 1g |
| Total Sugars | 5g |
| Protein | 8g |
| Vitamin C | 2mg |
| Calcium | 94mg |
| Iron | 2mg |
| Potassium | 183mg |
These pizza bombs are indulgent, cheesy, and satisfying, making them a great occasional treat or game-day snack. To lighten them up, consider using low-fat cheese, reduced-sodium sauce, or lean turkey pepperoni.
How to Store Leftovers
If you end up with extras (rare, but it happens), you’ll want to store them properly to preserve flavor and texture.
- Cooling: Allow pizza bombs to cool completely before storing.
- Refrigerator: Store in an airtight container in the fridge for up to 3 days.
- Freezer: For longer storage, freeze them individually wrapped in foil, then place in a resealable freezer bag. They’ll stay fresh for up to 2 months.
To reheat, place them in a preheated 325°F oven for 6–8 minutes. This restores crispiness and melts the cheese evenly. Avoid microwaving, as it tends to make the dough rubbery.
Make-Ahead Preparation Tips
These pizza bombs are perfect for prepping in advance, especially for parties or busy weeknights. Here are two smart make-ahead options:
1. Assemble and Refrigerate
Prepare the dough balls with all the fillings, then store them unbaked in the refrigerator for up to 24 hours. Cover the tray tightly with plastic wrap. When ready to bake, take them out about 15 minutes before baking so they come to room temperature.
2. Assemble and Freeze (Unbaked)
Flash-freeze the prepared dough balls on a baking sheet for 1 hour, then transfer them to a freezer-safe bag. Bake from frozen at 350°F for 20–25 minutes or until golden and heated through.
This method is great for batch prepping snacks for school, work lunches, or spontaneous entertaining.
Portion Control and Serving Sizes
Since each pizza bomb is packed with rich ingredients, one to two per person makes a great snack or side. For a full meal, serve with a green salad or roasted vegetables to balance out the richness of the dough and cheese.
You can also slice them in half and serve as mini sandwich bites, great for sharing at events or as part of a buffet.
Conclusion: Why This Beef Pepperoni Pizza Bombs Recipe Deserves a Spot in Your Weekly Rotation
Whether you’re cooking for family, hosting friends, or just craving something warm and cheesy, this Beef Pepperoni Pizza Bombs Recipe delivers every time. With its buttery golden crust, gooey melted cheese, zesty sauce, and punch of Beef pepperoni, it’s everything you love about pizza in a neat, hand-held package. It’s quick to make, easy to customize, and stores well for future snacking. Plus, with options to go mini, veggie, or spicy, it fits just about any taste or occasion.
Once you try them, you’ll want to keep biscuit dough and pizza sauce on hand at all times. Because nothing satisfies quite like biting into a soft, cheesy, flavor-packed pizza bomb made fresh in your own kitchen.


