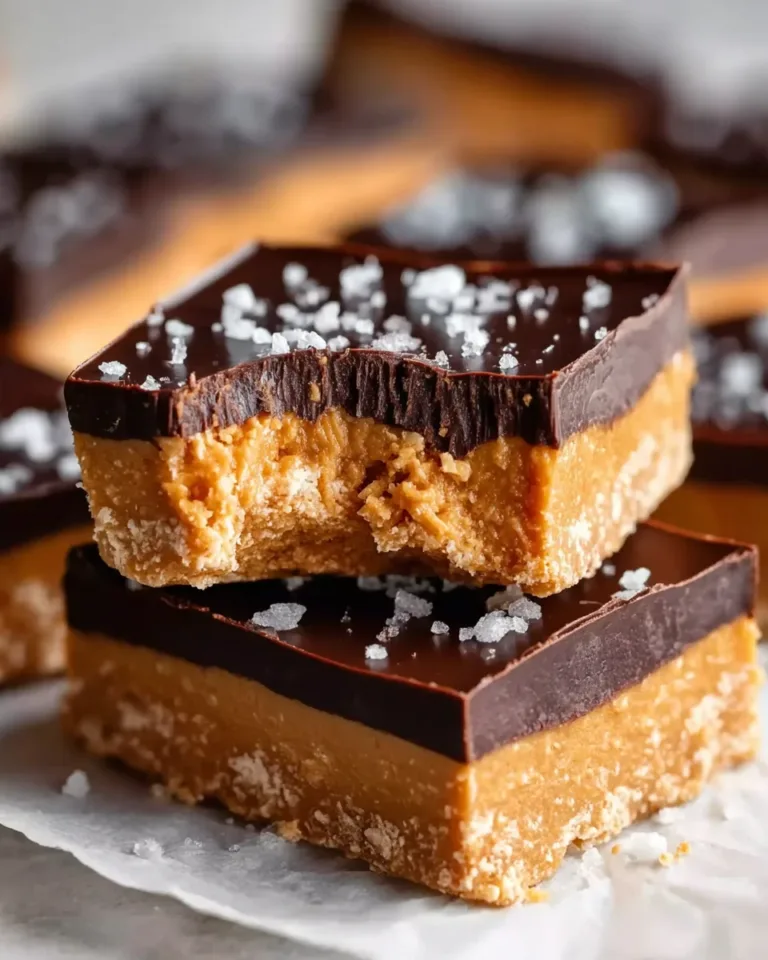
No Bake Chocolate Peanut Butter Protein Bars are one of the easiest snacks to prepare at home, offering a rich and satisfying blend of wholesome flavor and balanced nutrition. This simple treat requires no oven time and comes together with pantry ingredients that are widely available in the United States. These bars are perfect for fueling busy mornings, recharging after workouts, or enjoying as a better-for-you dessert. In this guide, you will learn how to make these nutritious bars with clean ingredients, using alcohol free vanilla flavor options and high quality protein sources to achieve great taste and texture.
Step by step
To make No Bake Chocolate Peanut Butter Protein Bars that hold together firmly and deliver consistent flavor in every bite, start with a medium mixing bowl and gather your ingredients so the process flows smoothly. Add natural creamy peanut butter to the bowl since it offers the best balance of creaminess and structure. Follow with honey for sweetness and binding power, then pour in melted coconut oil which helps the mixture set without becoming too stiff. Instead of standard vanilla extract, use an alcohol free vanilla flavor such as Alcohol Free Simply Organic or Watkins Clear Vanilla Flavor. These maintain a warm, aromatic note without altering the texture or taste.
Stir the peanut butter, honey, coconut oil, and vanilla flavor until the mixture becomes smooth and cohesive. At this stage, sprinkle in ground flaxseed meal, which adds fiber and provides a slight nutty note that pairs beautifully with chocolate and peanut butter. Select a protein powder that suits your dietary preference, whether plant based or whey. Plain or vanilla varieties blend most seamlessly with the flavors used here. Gradually mix in the protein powder. The mixture will thicken quickly as the powder absorbs moisture.
Continue stirring until the spoon becomes difficult to move. When the dough becomes dense, switch to your hands. Work the ingredients together by gently pressing and folding. The texture should resemble soft cookie dough that holds its shape. If it feels slightly dry or crumbly, add half a tablespoon of melted coconut oil, then reassess. Add the second half only if necessary.
Once the dough is ready, prepare an 8 by 4 inch loaf pan by lining it with parchment paper, letting the paper hang over the sides so you can lift the bars out easily later. Transfer the dough into the pan and press firmly using clean hands or the back of a flat spatula. Create an even layer that fills the corners since this ensures clean slices after chilling.
Next, prepare the chocolate topping. Break an 85 percent dark chocolate bar into small pieces and place them in a small saucepan to melt over low heat. Stir frequently until the chocolate becomes smooth and glossy. Alternatively, melt it in short microwave intervals, stirring each time. Once melted, pour the chocolate over the peanut butter layer and tilt the pan gently so the chocolate spreads and coats the surface evenly. This creates a firm top that enhances both flavor and presentation.
Sprinkle coarse sea salt lightly across the chocolate to enhance the contrast between sweet and savory notes. Transfer the pan to the refrigerator and chill for thirty minutes to one hour until the chocolate firms and the base sets fully. When the mixture is solid, lift it out by the parchment edges and slice into bars or squares. These No Bake Chocolate Peanut Butter Protein Bars will stay fresh in the refrigerator for up to two weeks when stored in an airtight container.
Tips and tricks
To make your No Bake Chocolate Peanut Butter Protein Bars even more enjoyable, focus on choosing ingredients that enhance flavor and texture. Use natural peanut butter made only from peanuts and salt because stabilizers can change how the mixture sets. When selecting protein powder, remember that different brands absorb moisture differently, so start with the listed amount and adjust as needed.
Vanilla flavored protein powder will add extra sweetness while plain protein powder keeps the bars more neutral. If you prefer a softer bar, increase the honey slightly or add a touch more coconut oil. For a firmer bar, add a spoon of extra flaxseed meal. When melting chocolate, keep the heat low to prevent scorching. If you like a thicker chocolate layer, melt an additional ounce.
Adding a pinch of sea salt helps brighten all the flavors and balances the richness of the chocolate and peanut butter. You can also sprinkle toppings like crushed peanuts or a dusting of cocoa powder before the chocolate hardens for added texture. Using parchment paper that overhangs the edges of the pan simplifies removal and slicing. A warm knife dipped quickly in hot water will give you cleaner cuts through the chocolate layer.
Notes
These bars are incredibly versatile and can be adjusted based on your needs. They work well with plant based protein powders, whey protein, or collagen peptides, which blend smoothly without affecting the structure. Choose an 85 percent dark chocolate bar since it melts smoothly and provides a deep chocolate flavor without excess sugar.
If the mixture seems too dry during preparation, add a small amount of melted coconut oil until the dough resembles soft cookie dough. If it seems too sticky, add an extra spoon of flaxseed meal or a small scoop of protein powder. Always taste the mixture before pressing it into the pan to ensure the sweetness level works for you since different honey varieties can vary in intensity.
Keep the chocolate topping thin or thick depending on your preference. Remember that the bars will continue to firm up as they chill. You can cut them into rectangles or squares depending on how you plan to serve them. They make an excellent grab and go option for busy days or post workout refueling.
Storage
Proper storage ensures that your No Bake Chocolate Peanut Butter Protein Bars stay fresh and maintain their satisfying texture. Once the bars have fully chilled and been sliced, store them in a sealed container in the refrigerator to keep the chocolate from softening and to preserve the chewy consistency of the base. Separate layers with small squares of parchment paper if stacking to prevent sticking. These bars can last up to two weeks in the fridge without losing quality.
If you prefer to make a larger batch, they freeze well for longer storage. Place the sliced bars in a freezer safe container, using parchment between layers, and freeze for up to two months. When ready to enjoy, thaw them in the refrigerator or at room temperature for a few minutes until the texture softens slightly. Keep them away from warm spots in the kitchen to prevent the chocolate from melting. Since the bars contain natural peanut butter and honey, storing them chilled keeps them firm and easy to slice. Avoid leaving them in lunch bags without an ice pack on hot days since they may soften.
Conclusion
No Bake Chocolate Peanut Butter Protein Bars offer a simple, delicious, and nourishing snack that requires minimal effort and no baking at all. With wholesome ingredients, balanced flavor, and a smooth chocolate topping, these bars deliver convenience and satisfaction in every bite. Whether you enjoy them as a quick breakfast addition, an afternoon pick me up, or a post workout option, they remain reliable, flavorful, and easy to customize. Keeping a batch in the fridge ensures you always have a tasty, ready to eat treat that supports your busy routine.
No Bake Chocolate Peanut Butter Protein Bars
- Total Time: 40 minutes
- Yield: 10 bars
Description
Soft and chewy no bake bars made with peanut butter, honey, coconut oil, protein powder, and a smooth dark chocolate topping.
Ingredients
3/4 cup natural creamy peanut butter
1/4 cup honey
1 tablespoon melted coconut oil
1 teaspoon alcohol free vanilla flavor such as Alcohol Free Simply Organic or Watkins Clear Vanilla Flavor
1/3 cup ground flaxseed meal
1/2 cup vanilla or plain protein powder
2.5 ounces 85 percent dark chocolate
Coarse sea salt for topping
Instructions
1. Mix peanut butter, honey, melted coconut oil, and alcohol free vanilla flavor in a medium bowl until smooth.
2. Add ground flaxseed meal and protein powder. Stir until thick, then use hands to form a soft dough.
3. Press dough firmly into an 8 by 4 inch pan lined with parchment paper.
4. Melt dark chocolate in a small saucepan over low heat until smooth.
5. Pour melted chocolate over the peanut butter layer and tilt the pan to coat evenly.
6. Sprinkle coarse sea salt on top.
7. Refrigerate for 30 minutes to 1 hour until firm.
8. Lift from pan and slice into bars or squares. Store in the fridge.
Notes
If the batter feels dry, add 1/2 to 1 tablespoon melted coconut oil.
Plant based protein, whey protein, or collagen peptides all work well.
Bars keep for up to two weeks when stored covered in the refrigerator.
Freeze for longer storage and thaw lightly before enjoying.
- Prep Time: 10 minutes
- Cook Time: 30 minutes
- Category: Snack
- Method: No Bake
- Cuisine: American


