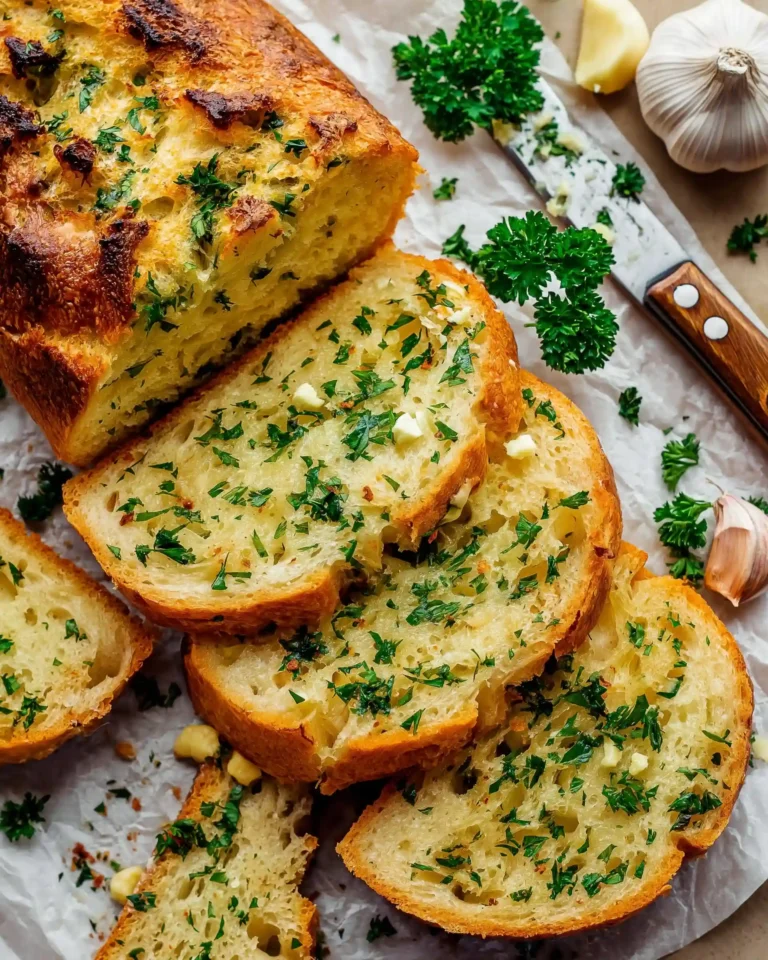
If you’re looking for a simple yet flavor-packed side dish, Herbed Garlic Bread is a classic you can never go wrong with. Whether it’s paired with a hearty pasta, a fresh salad, or enjoyed as a standalone snack, its buttery garlic richness and herby aroma are sure to please any crowd. What makes it even better is how quick and easy it is to prepare. With only a few ingredients like fresh parsley, minced garlic, and your choice of bread, you can create a side that’s golden, crispy, and bursting with flavor.
In this article, we’ll break down everything you need to know about making herbed garlic bread from scratch, from selecting the right bread to customizing it to fit your diet. You’ll also get tips on how to achieve the perfect crispiness, creative ways to serve it, and methods for storing and freezing leftovers. Plus, we’ll tackle common questions people ask about garlic bread and give you a step-by-step guide you can follow with confidence.
Choosing the Right Bread for Herbed Garlic Bread
Why the Bread Matters
The foundation of a delicious Herbed Garlic Bread starts with choosing the right kind of bread. Texture, thickness, and density all influence how well the bread holds the butter, garlic, and herbs without turning soggy.
Best Types of Bread to Use
- Italian Loaf: Its slightly chewy inside and crusty exterior make it perfect for absorbing all that flavorful butter while maintaining structure.
- French Loaf: Crispier on the outside, lighter on the inside, French loaves toast beautifully in the oven and give your garlic bread a more airy texture.
Avoid using sandwich bread or soft rolls, which tend to fall apart or turn mushy under the garlic butter mixture.
Slicing the Bread Correctly
Slice the loaf lengthwise so you have two long halves with flat surfaces. This ensures even butter distribution and gives more surface area for the garlic herb topping to melt and caramelize during baking. Keep the slices thick enough to hold their shape when picked up but not so thick that they overpower the topping.
Print
Herbed Garlic Bread
- Total Time: 20 minutes
- Yield: 8 servings
- Diet: Vegetarian
Description
This Herbed Garlic Bread is buttery, crisp on the edges, and bursting with the flavors of garlic and fresh herbs. It’s a quick side dish perfect for pasta, salads, or soup nights.
Ingredients
1 pound Italian or French loaf, sliced lengthwise
1/2 cup unsalted butter, softened
4 cloves garlic, finely minced
1 tablespoon finely chopped fresh parsley
⅛ teaspoon sea salt
Optional: ¼ cup grated parmesan cheese OR ½ cup shredded mozzarella cheese
For garnish: Extra parsley and chopped chives
Instructions
1. Preheat oven to 425°F and line a baking sheet with parchment paper or foil.
2. Slice the loaf in half lengthwise and place both halves cut side up on the baking sheet.
3. In a bowl, mix softened butter, minced garlic, parsley, and sea salt until well combined.
4. Spread the garlic herb butter evenly over the cut sides of the bread.
5. Bake for 10–15 minutes, or until the edges begin to turn golden.
6. If adding cheese, sprinkle it on during the last 2 minutes of baking.
7. For extra crispiness, bake an additional 3–5 minutes until golden brown.
8. Remove from the oven and garnish with extra parsley and chives before serving.
Notes
To make this recipe vegan, use plant-based butter and omit cheese or use vegan cheese.
Avoid refrigerating leftovers as it can dry out the bread; instead store at room temperature for up to 2 days or freeze for later.
You can prepare the garlic herb butter ahead of time and refrigerate it for up to one week.
- Prep Time: 5 minutes
- Cook Time: 15 minutes
- Category: Bread
- Method: Baking
- Cuisine: American
Making the Perfect Garlic Herb Butter Spread
The Key Ingredients for Flavor
The star of Herbed Garlic Bread is, without a doubt, the garlic herb butter. This simple spread infuses every bite with savory richness, herbal notes, and just the right touch of salt. Here’s what you’ll need:
- Unsalted or Salted Butter: Using softened butter ensures it spreads smoothly and melts evenly during baking. Unsalted butter gives you more control over the final saltiness, but if salted is all you have, reduce the added sea salt slightly.
- Fresh Garlic: Finely minced garlic adds bold flavor. Avoid using garlic powder—it lacks the punch of fresh cloves.
- Fresh Parsley: Brings color, freshness, and a mild bitterness that balances the richness of butter.
- Sea Salt: A small pinch enhances all the other flavors without overpowering them.
How to Mix and Prepare the Butter
In a medium bowl, combine the softened butter, minced garlic, chopped parsley, and sea salt. Use a fork or rubber spatula to mash and blend until the garlic and herbs are evenly distributed. The consistency should be soft, almost like a thick paste.
This garlic herb butter can be made in advance and stored in the fridge for up to a week. Just let it sit at room temperature for 10 minutes before spreading to soften again.
Optional Add-Ins for Extra Flavor
If you want to level up your Herbed Garlic Bread, consider mixing in one of the following before baking:
- Grated Parmesan Cheese: Adds a nutty, salty layer of flavor. Sprinkle on top during the last 2 minutes of baking so it melts slightly.
- Shredded Mozzarella Cheese: Melts into a gooey layer that pairs beautifully with the crispy edges of the bread.
Adding cheese is totally optional, but it’s a great way to turn this side into something more indulgent.
Baking Techniques for Perfect Texture
How to Bake for Crispiness and Color
Achieving that signature crunch on the edges with a warm, soft center is all about baking technique. Here’s how to get it right every time:
- Preheat Your Oven: Always start by preheating your oven to 425°F. A hot oven is key to toasting the bread evenly and creating that golden crust.
- Line Your Baking Sheet: Use parchment paper or foil to prevent sticking and make cleanup easier. Place the bread halves cut-side up so the buttered surface faces the heat directly.
Bake for 10 to 15 minutes until the edges begin to turn golden brown. Watch closely, as every oven behaves differently.
For Crispier Garlic Bread Lovers
If you like your garlic bread extra crispy, extend the bake time by 3 to 5 minutes, but keep a close eye on it. The garlic in the butter can burn quickly if overcooked, so you want to aim for golden brown, not dark brown.
This method adds a beautiful crunch and enhances the toasty, nutty flavors in the butter and bread.
When to Add the Cheese
If you’re adding cheese, timing is everything. For:
- Parmesan: Sprinkle it on the buttered surface during the last 2 minutes of baking. It will melt slightly and cling to the surface without burning.
- Mozzarella: Add it in the same way, but consider broiling for an extra 30–60 seconds to create bubbly, golden patches on top.
Be cautious not to overbake, especially with cheese, as it can become rubbery or overly browned.
Customizing Herbed Garlic Bread for Special Diets
Making Vegan Garlic Bread
Want to enjoy Herbed Garlic Bread without any animal-based ingredients? It’s simple. The only non-vegan element in the classic recipe is the butter, and that’s easy to swap out:
- Use Vegan Butter: Choose a plant-based butter that’s made for baking and spreading. Look for ones with a similar fat content to dairy butter for best results.
- Skip the Cheese or Use Vegan Cheese: You can either leave out the cheese entirely or use a dairy-free shredded mozzarella alternative. Choose one that melts well, especially if you want that gooey, golden layer.
These tweaks make the bread 100% plant-based without sacrificing flavor or texture.
Making It Gluten-Free
While traditional garlic bread is made with wheat-based loaves, you can still make it gluten-free:
- Choose a Gluten-Free Loaf: Look for gluten-free baguettes or artisan-style loaves that are firm and crusty. Avoid sandwich-style breads as they may turn soggy.
- Adjust Baking Time: Gluten-free bread often browns faster, so check it a couple of minutes earlier to avoid overbaking.
Reducing Sodium
If you’re watching your salt intake, it’s easy to cut back without compromising too much on taste:
- Use Unsalted Butter and reduce the added sea salt or omit it completely.
- Skip the Cheese: Both parmesan and mozzarella add extra salt, so leaving them out will reduce sodium levels significantly.
Herbed garlic bread can be tailored to many dietary needs with just minor adjustments, making it an inclusive option for most occasions.
Serving Suggestions and Pairing Ideas
Perfect Occasions to Serve Herbed Garlic Bread
Herbed Garlic Bread isn’t just a side dish, it’s a crowd-pleaser that fits into a variety of meals and events. Here are some perfect moments to bring it to the table:
- Family Dinners: It’s a favorite with kids and adults alike, especially when served with hearty dishes.
- Holiday Meals: Serve it alongside traditional comfort foods for added flair.
- Potlucks and Picnics: Easy to transport and serve at room temperature, making it a hit at casual gatherings.
- Game Day or Movie Night: Cut into smaller strips or squares for an irresistible finger food.
No matter the occasion, garlic bread adds a homey, comforting touch to any menu.
What to Serve It With
The beauty of garlic bread lies in its versatility. Try pairing it with:
- Hearty Soups: Tomato basil, minestrone, or creamy vegetable soups make a perfect match.
- Salads: A crisp green salad or a tangy vinaigrette-based pasta salad balances out the richness of the bread.
- Casseroles: Baked pasta, veggie lasagna, or cheesy gratins all benefit from a garlic bread sidekick.
- Roasted Vegetables: Garlic bread can round out a veggie-heavy meal by adding a savory carb element.
You can even serve it as a starter by slicing it into bite-sized portions and offering it with a dipping sauce like olive oil and herbs.
Creative Presentation Tips
If you want to take things up a notch for guests or events, try one of these ideas:
- Herb Garnish: Sprinkle extra chopped parsley or chives after baking for a fresh, vibrant finish.
- Cut Diagonally: Slicing diagonally gives a gourmet touch and makes it easier to portion.
- Serve on a Wooden Board: Place slices on a rustic wooden board with a bowl of dipping sauce or olive oil on the side.
The aroma alone will have people reaching for a slice before you even finish plating.
Storing, Freezing, and Reheating Garlic Bread
How to Store Leftover Herbed Garlic Bread
Leftover Herbed Garlic Bread is easy to save and even easier to enjoy later. If you plan to eat it within a day or two:
- Wrap It Tightly: Use foil or an airtight container to store the bread at room temperature for up to 2 days.
- Avoid the Fridge: Refrigerating can dry it out and dull the flavor. Stick to room temp if you’re planning to eat it soon.
For longer storage, freezing is the way to go.
Freezing Garlic Bread for Later
Whether you want to prep ahead or save extras, garlic bread freezes well. Here’s how:
- Freeze Before Baking: After spreading the garlic butter on sliced bread, wrap it tightly in foil, then in plastic wrap. Store in the freezer for up to 3 months.
- Freeze After Baking: Let the bread cool completely. Wrap and freeze as above. It may lose some crispiness, but flavor will stay intact.
To avoid freezer burn, always use two layers of protection—foil and plastic wrap or a freezer-safe bag.
How to Reheat for Best Texture
Want that same crispy-on-the-outside, soft-on-the-inside feel when reheating? Try these methods:
- Oven Reheat: Preheat to 350°F and place bread (unwrapped) directly on the oven rack or baking sheet. Heat for 10–12 minutes if frozen, 5–7 minutes if refrigerated.
- Toaster Oven: A good option for individual slices. Heat at 350°F for 4–6 minutes.
- Avoid the Microwave: It may soften the bread but won’t bring back the crispy texture. Use only if you’re in a rush.
Proper reheating brings garlic bread back to life, making it taste like it just came out of the oven.
Conclusion: Bringing Flavor and Simplicity Together with Herbed Garlic Bread
Herbed Garlic Bread is more than just a side dish—it’s a timeless comfort food that brings together rich, buttery goodness with the boldness of fresh garlic and herbs. Whether you’re making it for a family dinner, customizing it for dietary needs, or preparing it in advance to freeze for later, it’s one of the most adaptable and rewarding recipes you can keep in your kitchen rotation.
We’ve walked through how to choose the right bread, create the perfect herb butter spread, bake it to crispy perfection, and store it for future enjoyment. With optional cheese toppings and easy variations, this garlic bread can go from a simple side to a show-stealer. The best part? You only need a handful of ingredients and less than 30 minutes to make it happen.
So the next time you want to add a touch of warmth, crunch, and flavor to your meal, make Herbed Garlic Bread your go-to choice. It’s easy, satisfying, and always a hit-no matter the crowd.


