Making gluten free bread that tastes like the real thing can be a game changer for so many of us. With the right flour blend, a few simple ingredients, and proper technique, you can bake a loaf that is moist, soft, and full of flavor. This Gluten Free Bread Recipe is designed to deliver excellent results using accessible ingredients and straightforward steps. We’ll explore why ingredient choices matter, how to avoid common pitfalls, and build up each part of the recipe to reach 1800 words across six parts plus a solid conclusion. Let’s dive in.
Mastering the Dry Ingredients and Ingredient Selection
Why flour blend matters
In the first 10% of this section, our focus keyword Gluten Free Bread Recipe appears early. Not all gluten free flours behave the same. For example, some blends like Bob’s Red Mill 1‑for‑1 or King Arthur Measure for Measure are not recommended for yeast baking. They often lack the right protein structure to trap air pockets. I prefer using Pillsbury gluten free flour because it gives consistent rise and structure in yeast‑based bread.
Role of xanthan gum and leaveners
Xanthan gum is key in gluten free baking, acting as a binding agent that mimics the elasticity of gluten. Use 1 teaspoon unless your flour already contains it. Also include 1 teaspoon gluten free baking powder to help the bread lift. Instant or rapid rise yeast—one packet or 2¼ teaspoons—goes in with the dry ingredients, saving the extra step of proofing. Make sure your yeast is fresh and still active.
Salt and its timing
Adding 1 teaspoon of salt helps flavor the bread and gives structure. It also regulates yeast activity. You’ll add salt with the egg whites rather than with the water and oil, ensuring it doesn’t slow yeast too early during the initial mixing.
Preparing the dry mixture
Combine 2½ cups all‑purpose gluten free flour, 1 teaspoon xanthan gum (if needed), 1 teaspoon gluten free baking powder, and the packet of rapid rise yeast in a large bowl. Stir to make a uniform mix. This step ensures that the leavening is evenly distributed before any wet ingredients are added. A well‑mixed dry base leads to consistent crumb and rise.
Why ingredient temperature matters
Egg whites, water, and yeast all perform best at room temperature. Let them sit out for about five minutes before starting. Warm water between 100–110°F is essential. Hotter water kills the yeast, colder water won’t activate it. Using room temp egg whites helps the batter maintain a smooth, airy consistency during mixing and baking.
Summary of dry setup
This part sets the stage. You’ve selected the proper flour, added necessary binders and leaveners, and prepared everything at the right temperature. In the next part we’ll tackle mixing the wet ingredients, controlling moisture levels, and understanding batter consistency.
Print
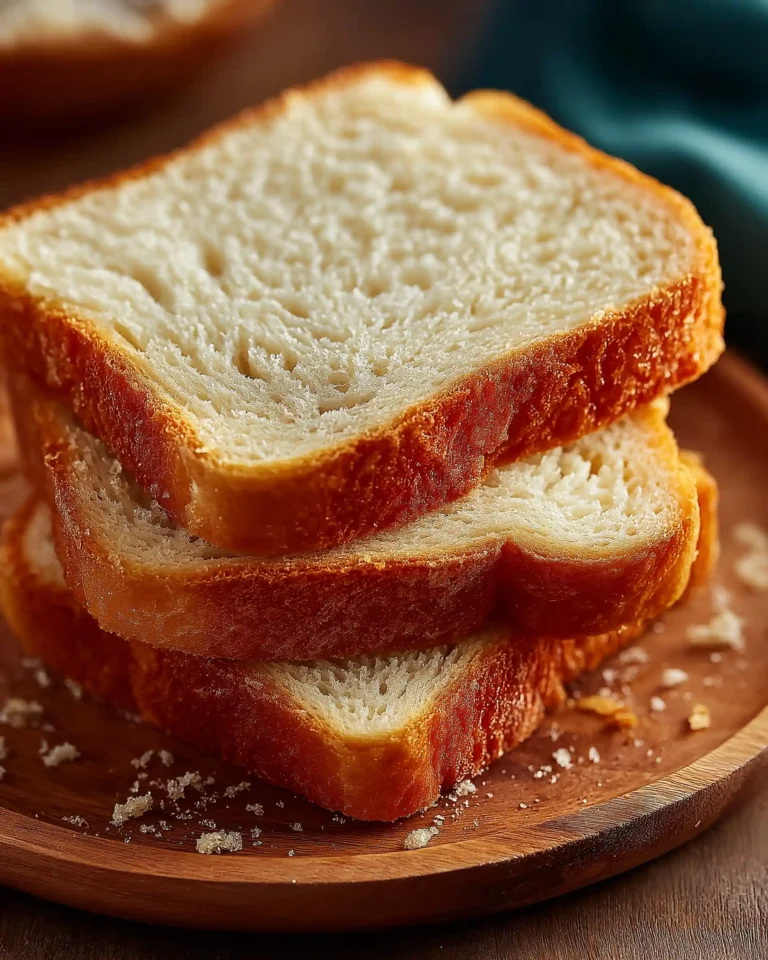
Gluten Free Bread Recipe
- Total Time: 1 hour 15 minutes
- Yield: 1 loaf
Description
A foolproof Gluten Free Bread Recipe that’s soft, moist, and full of flavor — perfect for toast or sandwiches and easy to customize.
Ingredients
2½ cups gluten free all-purpose flour (Pillsbury recommended)
1 tsp xanthan gum (omit if in flour)
1 tsp gluten free baking powder
2¼ tsp instant/rapid rise yeast (1 packet)
1 tsp salt
¼ cup extra virgin olive oil
¼ cup honey (or agave/maple syrup)
1 tsp apple cider vinegar
1½ cups warm water (100°F–110°F)
3 large egg whites (room temperature)
Gluten free cooking spray
Instructions
1. In a large bowl, mix gluten free flour, xanthan gum, baking powder, salt, and yeast.
2. Add olive oil, honey, vinegar, and warm water. Mix on low speed with paddle for 1 minute.
3. Add egg whites and mix on medium speed for 1 more minute until smooth and airy.
4. Transfer dough to a greased 9×4 Pullman loaf pan. Smooth top with spatula.
5. Cover with sprayed plastic wrap and a towel. Let rise in a warm area for 30 minutes.
6. Preheat oven to 350°F. Bake for 30 minutes or until internal temp is 205°F.
7. Cool in pan for 10 minutes. Remove and cool fully on a wire rack before slicing.
8. Store in an airtight container at room temp for 3-4 days or freeze up to 3 months.
Notes
Use room temperature ingredients for best results.
Avoid over-mixing or kneading—this dough is batter-like.
Use a thermometer to check bread doneness.
Optional: add chia, sunflower seeds, or herbs to customize.
- Prep Time: 15 minutes
- Cook Time: 30 minutes
- Method: Baking
- Cuisine: American
Mixing the Wet Ingredients and Understanding Dough Texture
Incorporating wet ingredients properly
With your dry mix ready, it’s time to bring in the wet ingredients to start forming the dough for your Gluten Free Bread Recipe. Begin by adding 1/4 cup of extra virgin olive oil, which lends moisture and richness. Then stir in 1/4 cup honey. If you prefer alternatives, agave nectar or maple syrup work just as well. These sweeteners help activate the yeast and add subtle depth of flavor.
You’ll also add 1 teaspoon of apple cider vinegar. This ingredient reacts with the baking powder and helps tenderize the loaf, leading to a better crumb. It may seem small, but it plays a big role in balancing pH and helping the bread structure set properly.
The critical role of warm water
Next, pour in 1½ cups of warm water heated to between 100°F and 110°F. This temperature range is vital for activating the rapid-rise yeast mixed into the dry ingredients. Anything hotter can destroy the yeast. Water that’s too cool won’t wake it up at all. Use a kitchen thermometer if needed to check accuracy.
As you add these ingredients into the dry mixture, use a stand mixer on low speed for about one minute. Make sure to use the paddle attachment—not a dough hook. Unlike wheat-based bread, this dough won’t form a ball. Instead, you’re aiming for a thick batter-like consistency.
Adding egg whites and salt
Once the initial wet ingredients are blended in, add 3 room-temperature egg whites and 1 teaspoon of salt. Mix again at medium speed for one minute. The mixture should become smooth and airy. Egg whites provide protein and stability, helping the bread rise without becoming overly dense. The salt, added at this stage, flavors the dough while also strengthening its structure without suppressing the yeast too early.
Recognizing the right texture
Unlike traditional bread dough, gluten free bread dough should not be kneaded. It’s more like a thick cake batter—sticky, glossy, and slightly elastic from the xanthan gum. Don’t worry if it doesn’t look like typical dough. This consistency is exactly what you want for optimal oven spring.
Why over-mixing is a mistake
It’s easy to think more mixing equals better structure, but that’s not true here. Over-mixing can deflate the air bubbles already forming, making your bread dense. A minute or so on each speed level is enough.
Summary of wet mix and dough prep
By correctly incorporating warm water, olive oil, honey, apple cider vinegar, and egg whites, your dough is now active and ready for rising. The next part will focus on proofing your bread, choosing the right pan, and setting up your baking environment for the best rise.
Proofing the Dough and Choosing the Right Pan
Importance of proper proofing
In the Gluten Free Bread Recipe, proofing is a crucial step that affects the final rise and texture. Once your dough has reached a smooth, thick, and airy consistency, it’s time to let it rest and expand. This process activates the yeast, allowing it to produce carbon dioxide, which causes the bread to rise. Gluten free dough doesn’t always rise as dramatically as wheat dough, but this step is still essential for achieving a soft, well-structured loaf.
Cover your dough with plastic wrap that has been sprayed with gluten free cooking spray. This prevents sticking while maintaining moisture. Then place a kitchen towel over the wrap to trap warmth and keep out any drafts.
Finding the right place to rise
Gluten free dough is sensitive to temperature changes, so choose a warm, stable location. A good place is your microwave or oven (turned off) with the light on. The gentle heat creates a cozy environment for the yeast to do its work. Avoid areas near air vents, open windows, or cold countertops.
Let the dough rise for about 30 minutes. It won’t double in size like wheat-based dough, but you should notice a slight puffing and smooth surface tension. Don’t overproof—too long in a warm space can cause the dough to collapse during baking.
Choosing the best pan
Pan choice impacts how your bread bakes, rises, and even tastes. For this Gluten Free Bread Recipe, I strongly recommend using a 9-inch x 4-inch Small Pullman loaf pan. Its straight sides help guide the rise and create a uniform, bakery-style shape. The taller, narrower shape promotes better structure in gluten free bread, which lacks gluten’s built-in support.
If a Pullman pan isn’t available, a standard 9-inch x 5-inch bread pan will also work. Just know the bread might be a little shorter and wider in appearance. Whichever pan you choose, be sure to spray it generously with gluten free cooking spray to prevent sticking.
Final pre-bake checklist
Before placing your bread in the oven, do a quick check. Has the dough risen slightly and filled out the corners of the pan? Is the plastic wrap slightly domed from expansion? If so, it’s ready to bake.
Remove the wrap and towel gently so you don’t deflate the dough. This is a delicate phase. Even minor disruptions can cause your loaf to lose its lift. Set your oven to 350°F and position your top rack in the center for even heat circulation.
Why this step can’t be skipped
Skipping or rushing the proofing step means you risk ending up with a dense, heavy loaf. Proper rise results in a soft interior with small, even air pockets and a pleasing texture. It’s also essential for flavor development.
Summary of the proofing process
Now your bread is in prime condition to go into the oven. In Part 4, we’ll move into baking techniques, how to check for doneness, and ensuring your crust turns out golden and perfect.
Baking the Bread and Achieving a Golden Crust
Preheating and oven placement
Now that your dough has proofed, it’s time to bake your Gluten Free Bread Recipe. Preheat your oven to 350°F and ensure the top rack is placed in the center. This helps the heat distribute evenly, which is vital for gluten free bread since it can bake unevenly if positioned too high or low in the oven.
Place the pan horizontally on the center rack. This orientation allows the loaf to bake uniformly from edge to edge. Always avoid placing it near the sides or corners of the oven where the heat may be inconsistent.
Understanding the baking time
Set your timer for 30 minutes. Gluten free bread often looks done on the outside before it’s fully baked inside, so resist the urge to take it out early. At the end of the baking time, the crust should be golden brown. To be certain it’s done, use a food thermometer to check the internal temperature—it should read between 205°F and 210°F. This range ensures the center is cooked through and the structure is set.
What happens inside the oven
As it bakes, the rapid rise yeast continues to work until the temperature rises enough to deactivate it. Meanwhile, the heat activates the baking powder, giving the loaf an extra boost. Egg whites solidify, creating structure, while the olive oil and honey help the crust caramelize slightly.
You’ll notice the bread rises a little more during the first 10–15 minutes in the oven. This is called oven spring and is completely normal. It’s a sign your yeast was active and your proofing time was just right.
Cooling it correctly
Once baked, let the bread cool in the pan for 10 minutes. This allows the crust to firm up slightly and makes it easier to release from the pan without breaking. However, don’t let it cool completely in the pan. Trapped steam can soften the crust and make the bottom soggy.
After 10 minutes, gently remove the loaf and place it on a cooling rack. Let it cool fully before slicing. Cutting into hot gluten free bread often results in gummy or sticky centers. A full cool-down allows the interior to set properly and gives you clean, even slices.
Tools that help
A serrated knife is your best friend here. Unlike smooth-bladed knives, a serrated one will slice cleanly without compressing the soft crumb. If you want uniform slices, a bread slicer guide can also help—but it’s optional.
Summary of the baking process
With careful temperature control, even baking, and the right cooling method, your loaf will come out soft inside with a golden crust outside. In Part 5, we’ll focus on slicing, storing, and freezing your gluten free bread to maximize freshness and flavor.
Slicing, Storing, and Freezing Your Gluten Free Bread
When and how to slice it
Patience is key when it comes to slicing your Gluten Free Bread Recipe. Even if it smells irresistible, you should always let the loaf cool completely on a wire rack. This can take an hour or more, but it’s crucial. Cutting while warm can lead to a gummy or undercooked-looking center, even if your bread is fully baked.
Once cool, use a serrated bread knife to slice. These knives saw through the tender crumb without squishing it. Avoid using smooth-edged blades—they tend to compress the bread, especially at the top where it’s most delicate.
Cut the slices to your preferred thickness. For toast, slightly thicker slices hold up better. For sandwiches, thinner slices work well and are easier to manage.
Best practices for storing
After slicing what you need, store the remaining loaf in an airtight container. A plastic bread box or sealed storage bag will do. Avoid refrigerating gluten free bread—it tends to dry out quickly in cold temperatures. Instead, store it at room temperature in a cool, dry place.
Also, it’s best not to pre-slice the entire loaf. Exposure to air can make the slices stale faster. Only cut what you’ll eat within a day or two and keep the rest whole.
How long does it last?
At room temperature, your bread should stay fresh for about 3 to 4 days. If your kitchen is particularly warm or humid, you might notice it starts to soften or get sticky sooner. In that case, move to freezing to maintain freshness.
Freezing instructions
This Gluten Free Bread Recipe freezes beautifully. Once the loaf has fully cooled, wrap it tightly in plastic wrap, followed by aluminum foil or freezer paper. Place the wrapped loaf into a resealable freezer-safe bag. This triple layer keeps out moisture and freezer burn.
You can store it in the freezer for up to 3 months. For convenience, you can also pre-slice the loaf before freezing and place parchment paper between slices. That way, you can pull out just one or two slices at a time without defrosting the entire loaf.
Thawing and reheating tips
To thaw, place the loaf in the refrigerator overnight. For faster thawing, you can leave it at room temperature for a few hours. If you’re toasting slices straight from the freezer, no need to thaw first. Gluten free bread toasts beautifully from frozen and maintains a good texture.
Summary of storage and slicing
Handling your gluten free bread properly after baking ensures it stays fresh, tasty, and easy to use. In Part 6, we’ll look at customizing this recipe to suit your preferences or dietary needs.
Customizing Your Gluten Free Bread Recipe
Swapping sweeteners and oils
One of the best things about this Gluten Free Bread Recipe is how easily you can customize it to fit your dietary needs and taste preferences. If honey isn’t your preferred sweetener, you can swap it out with agave nectar or maple syrup. These alternatives offer a similar moisture profile and sweet flavor that still helps activate the yeast.
For the oil, extra virgin olive oil adds richness and a subtle flavor, but you can also use other neutral oils like avocado oil or light olive oil if you prefer something milder. Just avoid oils with strong flavors that might overwhelm the bread’s delicate taste.
Adjusting flour blends
Different gluten free flour blends perform in various ways. If Pillsbury isn’t available, choose a blend that doesn’t list bean flours high on the ingredient list, as they can create an earthy or bitter taste. Always check if your blend includes xanthan gum—if it does, leave it out of the recipe.
Also, remember that not all gluten free flours are created equal. Some absorb more liquid, while others are too light and may need more xanthan gum to hold structure. You may need to adjust slightly based on the brand you use.
Making it egg-free
If you’re avoiding eggs, you can experiment with egg white substitutes. Options like aquafaba (liquid from canned chickpeas) can provide a similar structure, though the bread may be slightly denser. Use 3 tablespoons of aquafaba per egg white as a starting point. Keep in mind that results can vary depending on the substitution, so some trial and error might be necessary.
Adding seeds or herbs
Want to add extra flavor or texture? You can mix in a tablespoon or two of your favorite seeds like chia, sunflower, or pumpkin for a nutty crunch. Dried herbs like rosemary, thyme, or oregano can bring an earthy aroma and pair wonderfully with savory toppings.
Just be cautious not to overload the dough. Add-ins should be dry and well-distributed. Too many wet or heavy ingredients can weigh down the loaf and impact the rise.
Shaping into rolls or flatbread
This dough can also be used to make smaller bread formats like dinner rolls or flatbreads. For rolls, scoop the dough into muffin tins greased with gluten free spray. Reduce the baking time to about 20 minutes but check the internal temp to ensure doneness.
For flatbreads, spread the batter onto parchment paper and bake as a thin layer for 15–20 minutes. These variations are great for quick snacks, sandwiches, or dipping.
Keeping it allergen-friendly
This recipe is naturally free from gluten, dairy, and soy if you choose the right flour blend and avoid soy-based cooking sprays. For those with additional dietary needs, always read the labels closely and test any substitutes in small batches.
Summary of customization options
With simple swaps and creative add-ins, this Gluten Free Bread Recipe can be tailored to fit many lifestyles and tastes. In the conclusion, we’ll recap the full process and offer tips for success every time you bake.
Conclusion: Your Go-To Gluten Free Bread Recipe
Baking gluten free bread at home might seem intimidating at first, but with the right ingredients, techniques, and a little practice, it becomes second nature. This Gluten Free Bread Recipe gives you a reliable, foolproof method to create a soft, flavorful loaf that rivals anything store-bought.
You’ve now learned how to choose the right flour blend, why xanthan gum and rapid rise yeast matter, and how to mix your ingredients to achieve that perfect batter-like consistency. Proofing the dough in a warm, draft-free environment helps it rise beautifully without collapsing, and baking it in a Pullman loaf pan ensures that signature shape and structure.
From slicing to storage and even freezing, this recipe is designed to be both convenient and delicious. You also have the flexibility to personalize your loaf by swapping ingredients, adding seeds or herbs, or even transforming it into dinner rolls or flatbread.
Whether you’re new to gluten free baking or looking to improve your current methods, this recipe offers a solid foundation for making bread that’s moist, airy, and satisfying. Enjoy every slice knowing that you’ve made something wholesome, customizable, and entirely gluten free—right from your own kitchen.


