Few desserts can match the indulgent layers of a Chocolate Peanut Butter Pie. With its creamy filling, rich chocolate base, and irresistible peanut butter swirl, this dessert is a guaranteed crowd-pleaser. It brings together two flavors that have stood the test of time—smooth chocolate and nutty peanut butter—into a single slice of perfection. Unlike traditional baked pies, this recipe requires no oven time, making it simple and stress-free to prepare at home. Whether you are new to dessert making or already confident in the kitchen, this guide will walk you through everything you need to know about creating the perfect pie.
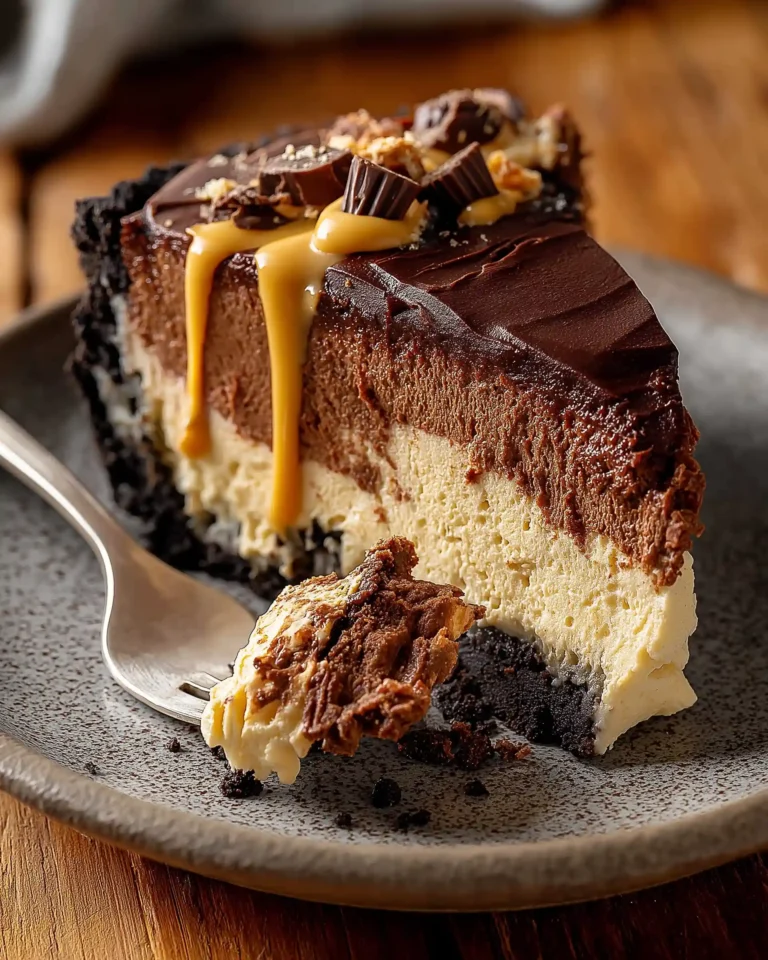
The recipe itself balances textures beautifully, starting with a crunchy Oreo crust, followed by a silky chocolate layer, then topped with a luscious peanut butter mousse. Each bite is rich yet light, sweet but not overwhelming. Beyond just the recipe, there is plenty to learn about how to make the process easier, achieve professional-level results, and adapt the pie to different preferences.
In this article, we will cover five key parts. First, we will explore the Oreo crust, which forms the foundation of the pie. Next, we will dive into the chocolate filling, followed by the peanut butter layer that gives the pie its signature twist. After that, we will look at decoration and presentation, because appearance matters as much as flavor. Finally, we will discuss tips for serving and storing to keep your dessert fresh and irresistible. By the end, you will have a full understanding of how to make this pie from start to finish with confidence.
The Foundation of Flavor – Oreo Crust
Every great pie begins with a crust, and in this case, the Oreo crust does much more than simply hold the filling together. It provides a deep, chocolatey crunch that contrasts perfectly with the creaminess of the fillings. The crust is also one of the easiest parts of the recipe, requiring only two ingredients—Oreos and melted butter. Despite its simplicity, the Oreo crust delivers maximum flavor and structure.
Why Oreo Crust Works So Well
Oreo cookies are already balanced in flavor, with their dark cocoa taste and sweet cream filling. When crushed into fine crumbs, they become the ideal base for a pie. The cookie portion adds structure, while the cream filling helps bind the crust naturally. Adding melted butter ensures everything sticks together firmly once pressed into the pie dish. This combination produces a crust that is sturdy enough to hold multiple layers, while also contributing a subtle sweetness and crunch to every bite.
Another reason this crust is perfect is because it requires no baking. Unlike traditional pie crusts that need oven time, this one sets beautifully in the freezer. The cold temperature solidifies the butter and firms up the cookie crumbs, creating a strong base in under 30 minutes. This makes the crust not only delicious but also incredibly time-efficient.
Step-by-Step Crust Preparation
To make the crust, start by placing about 25 whole Oreos into a food processor or blender. Blend until the cookies turn into fine crumbs. If you do not have a food processor, you can put the cookies in a sealed plastic bag and crush them with a rolling pin. Once you have a bowl of fine crumbs, pour in 5 tablespoons of melted butter. Stir until the crumbs are evenly coated.
Transfer the mixture into a 9-inch pie pan. Using your hands, press the crumbs evenly across the bottom and halfway up the sides. For a more compact finish, take the bottom of a measuring cup and press firmly across the surface. This ensures the crust will not crumble when you cut into the pie later. Once shaped, place the crust in the freezer to set while you prepare the fillings.
The Oreo crust sets the tone for the entire dessert. Its dark color creates a dramatic base that makes the chocolate and peanut butter layers stand out visually. Flavor-wise, it complements the fillings without overpowering them. By mastering this simple step, you create a sturdy, flavorful foundation that elevates the entire pie.
Print
Chocolate Peanut Butter Pie Recipe
- Total Time: 6 hours 45 minutes
- Yield: 16 slices
- Diet: Vegetarian
Description
A rich and creamy no-bake Chocolate Peanut Butter Pie with an Oreo crust, silky chocolate layer, and fluffy peanut butter mousse, topped with peanut butter cups for the ultimate indulgence.
Ingredients
Oreo Crust:
25 Oreo cookies
5 tbsp Unsalted butter, melted
Chocolate Layer:
6 oz Cream cheese, room temperature
2 tbsp Unsweetened cocoa powder
1/2 cup White granulated sugar
1/3 cup Sour cream or Greek yogurt, room temperature
1 tsp Alcohol-free vanilla flavor (Simply Organic or Watkins Clear Vanilla Flavor)
3.5 oz Dark chocolate bar, melted
Peanut Butter Layer:
10 oz Cream cheese, room temperature
1/4 cup White granulated sugar
3/4 cup Creamy peanut butter
1 tsp Alcohol-free vanilla flavor (Simply Organic or Watkins Clear Vanilla Flavor)
1/4 cup Sour cream or Greek yogurt, room temperature
2 cups Heavy cream, cold
1/2 cup Powdered sugar
1/4 cup Peanut butter, melted
Peanut butter cups, chopped for decoration
Instructions
1. Spray a 9-inch pie pan with nonstick spray.
2. Blend Oreos into fine crumbs and mix with melted butter.
3. Press the mixture into the pan, covering the bottom and halfway up the sides. Freeze while preparing the filling.
4. For the chocolate layer, beat cream cheese, cocoa powder, and sugar until fluffy.
5. Mix in sour cream, vanilla flavor, and melted chocolate until smooth.
6. Fold in half of the whipped cream mixture gently.
7. For the peanut butter layer, beat cream cheese and sugar until smooth.
8. Add peanut butter, sour cream, and vanilla flavor. Mix until combined.
9. Fold in the remaining whipped cream mixture until light and airy.
10. Spread the chocolate layer evenly over the crust.
11. Spread the peanut butter layer on top of the chocolate.
12. Drizzle melted peanut butter on top and swirl with a butter knife.
13. Chill covered in the refrigerator for at least 6 hours or overnight.
14. Before serving, top with chopped peanut butter cups and slice with a hot knife for clean cuts.
Notes
Pull out dairy ingredients about 2 hours before preparing for best results.
Smaller slices are recommended due to the rich, indulgent flavors.
Pie can be stored in the refrigerator for 4 days or frozen for up to 2 months.
- Prep Time: 45 minutes
- Cook Time: 0 minutes
- Category: Dessert
- Method: No-Bake
- Cuisine: American
The Heart of Indulgence – Chocolate Layer
After the crust is ready, the next step is the chocolate layer, which acts as the deep, rich heart of the pie. This layer is made from cream cheese, cocoa powder, sugar, sour cream, melted chocolate, and a touch of vanilla flavor. The combination results in a filling that is smooth, slightly tangy, and intensely chocolatey without being overly sweet. It provides balance to the peanut butter topping that follows, ensuring the pie never feels one-note.
Building a Creamy Chocolate Filling
The chocolate filling starts with cream cheese. Using cream cheese as the base adds body and richness while keeping the texture firm enough to slice cleanly. Whipping it until fluffy is key, as this prevents lumps and ensures the mixture blends smoothly with the cocoa powder and sugar.
Unsweetened cocoa powder enhances the depth of flavor, delivering that distinct bittersweet edge chocolate lovers crave. White sugar balances the bitterness, creating a harmonious mix of sweet and bold. The addition of sour cream or Greek yogurt might surprise some, but it plays a vital role. This ingredient introduces tanginess, which cuts through the richness and keeps the filling from becoming too heavy.
The melted chocolate is where the magic happens. For the best results, a high-quality dark chocolate bar works beautifully. Melting it gently, either in a microwave at short intervals or using a double boiler, ensures the chocolate becomes silky smooth. Once combined with the cream cheese base, it transforms the filling into something luxurious. Finally, vanilla flavor ties everything together. For this step, choose an alcohol-free vanilla option like Simply Organic or Watkins Clear Vanilla Flavor. Both are widely available and provide authentic, aromatic notes without overpowering the chocolate.
Mixing the Perfect Chocolate Layer
To prepare the filling, use an electric mixer on high speed to beat the cream cheese, cocoa powder, and sugar until well combined and fluffy. Then reduce the speed to medium and add sour cream, vanilla, and melted chocolate. The key here is not to rush. Allow the ingredients to fully blend until the texture looks silky and consistent throughout.
At this stage, the mixture is already deliciously smooth but still requires one more step—folding in the whipped cream. By gently folding in whipped cream, the mixture becomes lighter and more mousse-like. It creates that melt-in-your-mouth sensation that makes the pie irresistible. Take care not to overmix, as this could deflate the whipped cream and reduce the airy texture.
Why This Layer Stands Out
The chocolate filling acts as the stabilizing middle ground between the crunchy crust and the fluffy peanut butter topping. Its darker color provides a striking visual contrast, while its rich flavor keeps the dessert from tasting too sweet. Each forkful offers complexity: the boldness of cocoa, the smoothness of cream cheese, the sweetness of sugar, and the tang from sour cream. This balance ensures the pie appeals to both die-hard chocolate lovers and those who prefer desserts that are not cloyingly sweet.
The chocolate layer also pairs beautifully with the Oreo crust. Since both share cocoa flavors, the crust and filling feel connected, yet they differ enough in texture to keep every bite interesting. The crust brings crunch, while the filling delivers creaminess. This harmony lays the perfect groundwork for the peanut butter mousse to shine on top.
The Star of the Show – Peanut Butter Layer
While the crust and chocolate base are essential, the peanut butter layer is what gives this pie its true personality. Creamy, nutty, and slightly salty, it brings balance to the richness of the chocolate and adds a level of comfort that makes every bite satisfying. Peanut butter has always been a beloved ingredient in desserts, and in this recipe, it shines as the star of the show.
Creamy Peanut Butter Perfection
The peanut butter filling starts with cream cheese once again, which acts as the stabilizer. Its natural richness provides a solid base that blends beautifully with peanut butter. Sugar adds sweetness, while sour cream or Greek yogurt lightens the texture and introduces a gentle tang. This prevents the filling from feeling overly dense or heavy.
The peanut butter itself must be smooth and creamy for best results. Using a natural peanut butter without added oils or sugar can sometimes cause separation, so it is better to choose a standard creamy option that mixes consistently. When blended with cream cheese and sugar, it creates a mousse-like filling that is rich yet balanced.
As with the chocolate layer, whipped cream plays a crucial role. By folding in freshly whipped heavy cream sweetened with powdered sugar, the filling gains a cloud-like texture. This step is what transforms the peanut butter mixture from a simple spread into a decadent mousse. It becomes airy, luscious, and spoonable, while still firm enough to hold its shape when sliced.
Step-by-Step Peanut Butter Filling
Begin by beating cream cheese and sugar until smooth and fluffy. Add in peanut butter, sour cream, and alcohol-free vanilla flavor, mixing until fully combined. At this stage, the filling will look thick and creamy. Next, gently fold in half of the whipped cream mixture prepared earlier. Use a spatula and work slowly, scooping from the bottom upward, until the cream is incorporated. This method keeps the filling light and prevents the air bubbles from collapsing.
Once ready, the peanut butter filling is spread evenly over the chocolate layer. The combination of textures becomes instantly noticeable—the chocolate layer is dense and silky, while the peanut butter layer feels fluffy and airy. Together, they create contrast in every bite, making the dessert more dynamic and enjoyable.
Why Peanut Butter Elevates This Pie
What makes this peanut butter layer so special is its ability to balance flavors. Chocolate can sometimes feel too rich on its own, but peanut butter introduces a nutty, slightly savory note that cuts through the sweetness. The pairing of sweet and salty is a classic flavor combination that never goes out of style, and this pie captures that balance perfectly.
Beyond taste, peanut butter adds nostalgia. Many people grew up eating peanut butter sandwiches or peanut butter cups, so including it in a dessert feels familiar yet elevated. It brings comfort while also delivering sophistication when paired with chocolate in a layered pie.
The final touch of melted peanut butter swirled on top of the pie is both decorative and delicious. It creates a marbled effect, making the dessert visually appealing while adding extra peanut butter flavor in every slice. Once chilled, this layer firms up beautifully, giving the pie its signature texture and taste.
Decoration and Presentation – Making the Pie Irresistible
Flavor is the foundation of any dessert, but presentation elevates the entire experience. A Chocolate Peanut Butter Pie already has incredible layers that look beautiful when sliced, but with the right decorative touches, it can become a showstopper. Presentation not only makes the pie more inviting but also creates a sense of excitement before the first bite.
Swirls, Drizzles, and Layers of Beauty
One of the simplest yet most effective ways to decorate this pie is by swirling melted peanut butter across the top. This creates a marbled effect that instantly catches the eye. To achieve this, drizzle the melted peanut butter in thin lines over the surface of the pie, then drag a butter knife gently through the lines to create a swirling pattern. The result looks professional, yet it requires minimal effort.
For an extra layer of texture and visual interest, peanut butter cups make a wonderful topping. Chopping them into halves or quarters and scattering them across the surface adds both decoration and flavor. Not only does this emphasize the peanut butter theme, but it also provides bite-sized bursts of chocolatey nuttiness with every slice. If you prefer a more minimal look, a few whole peanut butter cups placed strategically around the edge can create a polished, elegant appearance.
Another option is to drizzle melted chocolate alongside the peanut butter. This contrast of dark and light colors enhances the layered effect and makes the pie look as rich as it tastes. The visual appeal of chocolate ribbons on top of a peanut butter mousse is hard to resist.
Serving with Style
When it comes time to serve the pie, presentation continues to matter. A sharp knife dipped in hot water and wiped dry before slicing ensures clean, even cuts. This prevents the layers from smudging together and keeps the slices looking picture-perfect.
Plating can also make a difference. A dollop of whipped cream on the side of each slice, sprinkled lightly with cocoa powder or crushed Oreos, gives a restaurant-quality finish. If you want to add more crunch, sprinkle a few chopped roasted peanuts over the whipped cream or directly on the slice for a touch of texture.
Another subtle yet effective presentation trick is to serve each slice on a contrasting plate. Dark plates make the creamy peanut butter and chocolate layers stand out, while white plates highlight the darker Oreo crust. A well-chosen plate color can make the dessert look even more appetizing.
Why Presentation Matters
Although taste is always the main priority, presentation adds to the anticipation and overall enjoyment of a dessert. People eat with their eyes first, and a beautifully decorated Chocolate Peanut Butter Pie will always leave a lasting impression. Whether you choose a casual style with generous swirls and plenty of candy toppings, or a more refined look with neat slices and minimalist drizzles, the key is to make it appealing and inviting.
This pie, with its contrasting layers and customizable toppings, is already set up for success. The decorations are simply the final touch that makes it memorable.
Serving and Storing – Keeping the Pie Perfect
After putting in the effort to create a Chocolate Peanut Butter Pie, the final step is making sure it is served at its best and stored properly for lasting freshness. Since this dessert is chilled rather than baked, handling and storage play an even bigger role in maintaining its texture and flavor.
Serving for the Best Experience
The pie should be chilled for at least six hours before serving, though letting it sit overnight produces the best results. This resting time allows the layers to firm up and the flavors to blend together. When you slice into the pie after proper chilling, you’ll notice that the cuts are cleaner, and the mousse-like textures hold their shape beautifully.
To serve, run a sharp knife under hot water, then wipe it dry before each cut. This prevents the knife from sticking to the fillings and ensures each slice has neat, distinct layers. Portion sizes can vary depending on the occasion, but given the richness of the dessert, smaller slices are usually enough to satisfy. Each bite delivers a burst of flavor, so a little goes a long way.
For an elevated serving style, consider adding garnishes to individual slices. A drizzle of melted chocolate or peanut butter, a sprinkling of crushed Oreos, or even a light dusting of cocoa powder can make every plate feel special. If you want an extra creamy touch, serve with a dollop of freshly whipped cream on the side.
Storing the Pie
Since this pie contains dairy-based ingredients like cream cheese and heavy cream, refrigeration is essential. Always keep it covered with foil or plastic wrap to prevent it from absorbing other flavors from the refrigerator. Properly stored, the pie remains fresh for up to four days. The crust may soften slightly over time, but the flavors will remain delicious.
For longer storage, freezing is a great option. Slice the pie into portions and wrap each slice tightly in plastic wrap, then place them in a freezer-safe container. This makes it easy to grab a slice whenever you want a quick dessert. When ready to enjoy, allow the slice to thaw in the refrigerator overnight or at room temperature for about 30 minutes. The texture will still be creamy and satisfying, though slightly less airy than when freshly made.
Why Storage Matters
Correct storage ensures that the effort you put into making the pie pays off long after the initial serving. By keeping the pie chilled and protected, you maintain the integrity of the flavors and textures. It also prevents waste, since leftovers can be enjoyed days later or even weeks later when frozen.
The balance of creaminess, crunch, and richness makes Chocolate Peanut Butter Pie a dessert worth savoring slowly, and proper serving and storing guarantee that every slice tastes just as good as the first.
Conclusion: A Dessert Worth Every Bite
Chocolate Peanut Butter Pie is more than just a sweet treat, it is an experience layered with flavor, texture, and visual appeal. From the crunchy Oreo crust to the silky chocolate filling and the airy peanut butter mousse, each component adds its own charm. When topped with decorative swirls, drizzles, and peanut butter cups, the pie becomes a centerpiece dessert that feels both indulgent and approachable.
One of the best qualities of this pie is its balance. The Oreo crust provides structure and crunch, the chocolate layer brings richness and depth, and the peanut butter topping introduces nutty creaminess with a touch of saltiness. Together, they create harmony in every bite. Beyond the flavors, the no-bake method makes it simple and convenient, proving that a stunning dessert doesn’t need to be complicated or time-consuming.
Serving and storing the pie correctly only enhances the experience. With proper chilling, neat slicing, and thoughtful presentation, the pie can impress guests or simply delight your own household. Leftovers remain just as enjoyable when refrigerated or frozen, making it a versatile dessert that fits any occasion.
What sets this pie apart is its universal appeal. Chocolate and peanut butter are a timeless pairing, loved by people of all ages. This recipe captures that classic flavor combination in a way that feels indulgent yet balanced, rich yet comforting. It is the kind of dessert that sparks conversation, satisfies cravings, and leaves a lasting impression.


