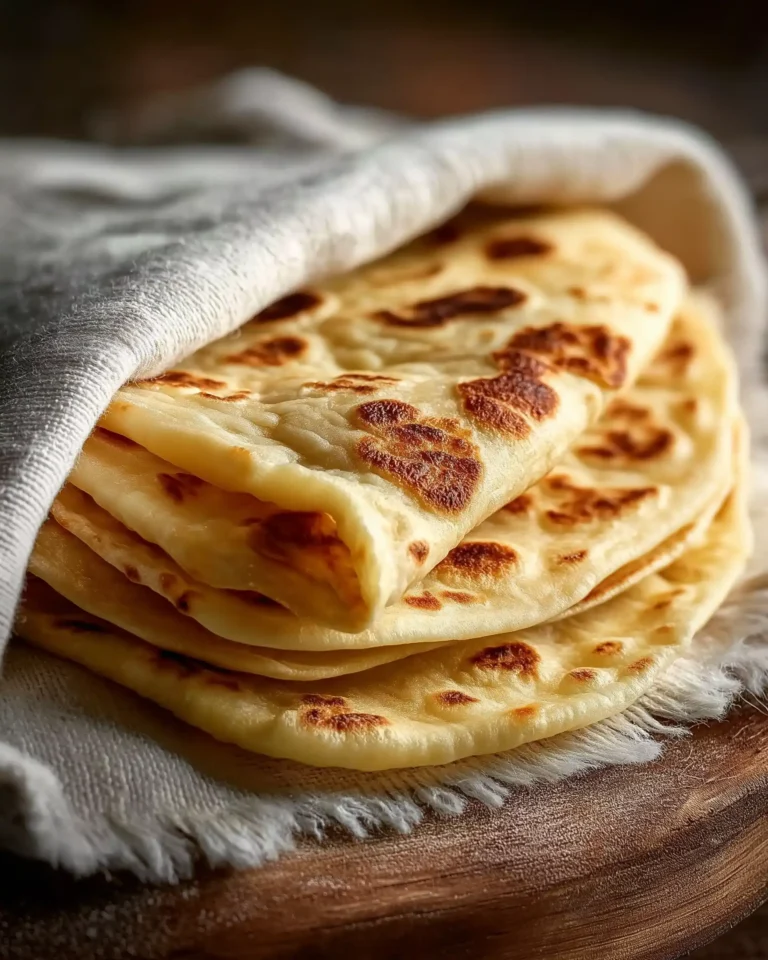
If you’ve ever found yourself craving warm, pillowy flatbreads but didn’t want to deal with yeast or long rising times, then this is the go-to recipe you’ve been looking for. These quick flatbreads (no yeast) come together in less than an hour and require just a few pantry staples. Whether you’re planning to pair them with dips, wrap them around grilled veggies or meats, or use them as a side for hearty curries, this flatbread recipe delivers every time.
In this detailed guide, we’ll walk you through every essential step, from ingredients and preparation tips to storage methods and creative ways to serve them. Plus, we’ll explore easy variations including vegan and gluten-free options that make this recipe a true staple in any kitchen.
Understanding the Basics of Quick Flatbreads (No Yeast)
What Are Quick Flatbreads and Why Make Them?
Quick flatbreads are unleavened breads that don’t require yeast or a long fermentation process. The lack of yeast means no waiting for dough to rise, making them ideal for busy weeknights or spontaneous meal prep. Unlike traditional flatbreads that rely on fermentation for texture and flavor, these use a simple blend of flour, butter, salt, and milk to deliver a soft yet pliable bread with crisp edges and golden-brown bubbles.
The best part? These flatbreads require minimal kneading, no special equipment, and they’re cooked on a stovetop. That means no preheating ovens or advanced baking skills needed.
Ingredients That Make the Difference
Each component in this recipe has a role in creating the ideal texture and flavor:
- All-purpose flour provides structure and a soft base. It’s the most accessible flour and gives the flatbreads a light but chewy texture.
- Salt enhances flavor without overpowering. It brings balance to the richness of the dough.
- Butter adds tenderness and a subtle depth of flavor. When melted into the milk, it creates a warm liquid mixture that helps the dough stay moist and supple.
- Milk gives the flatbread richness and softness. The milk fats contribute to a tender crumb and a smooth texture when kneading.
This mix is designed to be flexible. You can swap in whole wheat flour for added nutrition, or go fully dairy-free by using plant-based milk and oil substitutes.
Why No Yeast?
Removing yeast from the recipe cuts down the resting time significantly and reduces the chance of error. Yeast can be temperamental, especially for beginners. By removing it, you get more reliable results with fewer steps.
This recipe’s structure comes from a balance of milk fats, flour proteins, and a short rest period which lets the gluten relax. This gives the flatbread just enough elasticity to puff when cooked, resulting in those desirable air pockets.
Texture and Taste
Expect a flatbread that is:
- Soft in the center with slightly crisp edges
- Lightly golden with darker charred spots
- Mildly buttery with a hint of salt
- Flexible enough for wraps but sturdy enough for dipping
The pan cooking process mimics the high heat of a tandoor oven, giving you the restaurant-quality finish in your own kitchen.
No Oven Needed
These flatbreads are made entirely on the stovetop. Just a non-stick or cast-iron pan will do the trick. High heat allows the dough to puff and form its signature golden bubbles. In fact, the high heat is what gives the bread its restaurant-style finish. No baking, no broiling—just flip once and serve.
This makes the process simple, fast, and nearly foolproof. Plus, the stovetop method ensures you’re always in control, adjusting the heat as needed to get the perfect browning on every side.
Print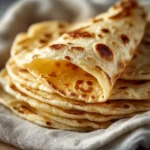
Quick Flatbreads (No Yeast)
- Total Time: 45 minutes
- Yield: 6 flatbreads
- Diet: Vegetarian
Description
Soft, warm flatbreads made without yeast. Ready in under 1 hour with just four simple ingredients. Perfect as a side, wrap, or dipping bread.
Ingredients
2 cups all-purpose flour (plus extra for dusting)
1/2 tsp salt
3 1/2 tbsp unsalted butter
3/4 cup milk
Instructions
1. Combine butter and milk in a saucepan or microwave until butter is just melted.
2. In a large bowl, mix flour and salt.
3. Pour warm butter-milk mixture into flour and mix until a rough dough forms.
4. Knead on a floured surface for about 2 minutes until smooth.
5. Wrap the dough in cling wrap and rest at room temperature for 30 minutes.
6. Divide dough into 6 pieces, roll into balls, and flatten into 8″ rounds.
7. Heat a non-stick pan over high heat.
8. Cook each flatbread 1–1.5 minutes on one side until golden and puffed.
9. Flip and cook the other side for 45 seconds to 1 minute.
10. Wrap cooked flatbreads in a clean tea towel to stay soft.
11. Optionally brush with melted butter or olive oil before serving.
Notes
Resting the dough is essential for softness.
For vegan version, replace butter with olive oil and use almond or oat milk.
Store cooked flatbreads in the fridge up to 3 days or freeze for later.
Dough can be made ahead and stored in fridge up to 3 days.
Whole wheat flour works well. Gluten-free flour also works with adjustments.
Use for wraps, dips, curries, or breakfast roll-ups.
- Prep Time: 5 minutes
- Cook Time: 10 minutes
- Category: Bread
- Method: Stovetop
- Cuisine: Greek, Mediterranean
How to Make Quick Flatbreads (No Yeast) Step by Step
Step-by-Step Instructions for Perfect Results
Making these quick flatbreads (no yeast) takes less than 45 minutes, from mixing to serving. Here’s how to get it just right, even on your first try:
Step 1: Warm the Milk and Melt the Butter
Combine ¾ cup of milk and 3½ tablespoons of unsalted butter in a small saucepan or microwave-safe bowl. Warm the mixture just until the butter is fully melted. It should feel warm to the touch, not hot. Overheating can affect the flour and make the dough harder to handle.
Step 2: Mix the Dry Ingredients
In a large bowl, combine 2 cups of all-purpose flour and ½ teaspoon of salt. Stir to evenly distribute the salt through the flour.
Step 3: Add Wet to Dry and Mix
Slowly pour the warm milk and butter mixture into the flour. Stir with a wooden spoon or your hands until a rough dough forms. If the dough feels sticky, sprinkle in a little more flour, up to ¼ cup.
Step 4: Knead the Dough Gently
Turn the dough out onto a floured surface and knead it for about 2 minutes. It should feel soft and slightly tacky but not wet. The dough doesn’t need heavy kneading, just enough to come together smoothly.
Step 5: Let the Dough Rest
Wrap the dough in plastic wrap and let it rest at room temperature for 30 minutes. This helps relax the gluten, making the flatbreads easier to roll and softer when cooked.
Step 6: Shape the Flatbreads
Once rested, cut the dough into 6 equal pieces. Roll each piece into a ball. Then, using a rolling pin, flatten each ball into a 20 cm (8-inch) round, about 2–3 mm thick. Dust the surface and rolling pin with flour to prevent sticking.
Step 7: Cook on a Hot Pan
Preheat a non-stick skillet or cast-iron pan over high heat. Do not add oil to the pan. Place one round of dough in the hot pan and cook for 1 to 1½ minutes, or until golden patches form and it puffs slightly. Flip and cook the other side for 45 seconds to 1 minute.
Step 8: Keep Flatbreads Soft
As you cook each one, stack them and wrap them in a clean tea towel. This traps steam, keeping the flatbreads warm and pliable.
Tips for Best Results
- Don’t over-knead: This dough comes together quickly. Overworking it can make it tough.
- Use high heat: A very hot pan ensures puffing and those signature golden-brown spots.
- Keep them wrapped: Wrapping flatbreads in a towel right after cooking keeps the moisture in and prevents drying out.
- Brush with flavor (optional): For extra taste, brush with melted butter, olive oil, or garlic butter while still warm.
Common Mistakes to Avoid
- Too much flour: Avoid packing your flour when measuring. Use level cups and add flour gradually while kneading only if needed.
- Undercooking: If the bread isn’t puffing, your pan might not be hot enough. Raise the heat and give it another try.
- Skipping the rest period: This short rest is essential. It makes the dough easier to roll and improves texture.
How to Adjust Dough Consistency
The ideal dough should be:
- Soft, not stiff
- Slightly tacky, not sticky
- Stretchable without tearing
If your dough feels too dry, add a splash of warm milk. If it’s too wet, dust with extra flour gradually. Work gently to keep the dough smooth.
This part of the process is forgiving, making it beginner-friendly and perfect for spontaneous cooking.
Delicious Ways to Use Quick Flatbreads (No Yeast)
The Perfect Side for Curries, Soups, and Stews
One of the best ways to enjoy quick flatbreads (no yeast) is as a side dish to warm, comforting meals. Their soft yet slightly crisp texture makes them ideal for scooping, dipping, and soaking up sauces.
Pairing Ideas:
- Lentil curry or vegetable stew – Tear the flatbread and use it to mop up rich, spiced gravies.
- Chickpea curry – The bread’s mild flavor balances spicy chickpea dishes perfectly.
- Creamy soups – Serve alongside tomato bisque, potato leek soup, or carrot ginger soup for added bite and texture.
- Stewed beans – Use the bread as a soft, edible utensil for thick bean-based dishes.
Flatbreads provide a satisfying, hearty alternative to rice or noodles when served with saucy main dishes.
Wrap It Up: Sandwiches and Roll-Ups
Flatbreads can easily replace tortillas or sandwich bread for quick, filling wraps. Their flexibility makes them ideal for both warm and cold fillings.
Creative Wrap Fillings:
- Grilled vegetables with hummus – A plant-based combo that’s full of flavor and fiber.
- Chicken or tofu with fresh greens and yogurt sauce – Roll in crisp lettuce, cucumber, and herbs for a Mediterranean vibe.
- Scrambled eggs and cheese – Great for breakfast or a midday snack.
- Falafel or bean patties – Flatbreads can hold heavier fillings without tearing.
Because they’re soft and pliable, these flatbreads won’t crack or fall apart like some store-bought wraps do.
Flatbread Pizzas: A Quick Crust Alternative
You can easily turn these flatbreads into individual pizzas. Their slightly crispy outside provides a perfect base.
How to Make:
- Lightly toast one side of the flatbread in a skillet or under the broiler.
- Add toppings: tomato sauce, shredded cheese, and your favorite vegetables.
- Return to the pan or oven just until cheese melts and bubbles.
This shortcut pizza crust is great for busy weeknights, and it’s a fun way to involve kids in the kitchen.
Dipping Delight: Appetizer Platters and Party Boards
Slice the flatbreads into triangles and serve them with:
- Hummus
- Baba ganoush
- Yogurt cucumber dip
- Roasted red pepper spread
These quick breads hold up well to thick dips and spreads, offering a satisfying chew and mild buttery flavor that complements bold, tangy ingredients.
You can also crisp the flatbreads in the oven for a few minutes if you prefer a chip-like texture.
Breakfast Ideas with Flatbread
Who says flatbread is only for lunch or dinner? These quick breads shine during breakfast too.
Morning Favorites:
- Flatbread with nut butter and banana slices
- Egg and spinach wraps
- Sweet yogurt and berry roll-ups
- Avocado with sea salt and chili flakes
The balance of carbs and fat in each flatbread makes them a filling option to start the day.
On-the-Go Meals and Snacks
Thanks to their quick prep and minimal ingredients, flatbreads are great for weekly meal prep.
Tips for Grab-and-Go:
- Store rolled flatbreads in the fridge and assemble wraps as needed.
- Pre-make veggie or protein wraps and store in foil.
- Slice into small pieces for kids’ lunchboxes or picnics.
They hold up well to a range of textures and temperatures, so you can confidently pack them with fresh or cooked ingredients.
Flatbread Variations – Vegan, Gluten-Free & Whole Wheat Options
Vegan Flatbreads Without Compromise
Going dairy-free doesn’t mean giving up on soft, flavorful flatbreads. With just a couple of smart swaps, you can make vegan quick flatbreads (no yeast) that are just as delicious as the original.
How to Make It Vegan:
- Butter substitute: Use olive oil, coconut oil, or plant-based margarine instead of butter.
- Milk substitute: Use almond milk, soy milk, or oat milk. Choose unsweetened versions to keep the flavor neutral.
Result: The dough is still soft and easy to work with, while the cooked flatbreads have a gentle chew and golden finish. Readers have reported great success using both olive oil and coconut oil for fat. Almond milk gives the best neutral taste, while oat milk adds a hint of sweetness.
Gluten-Free Flatbreads That Actually Work
Gluten-free baking can be tricky, but this recipe adapts well using a high-quality gluten-free all-purpose flour blend.
Tips for Success:
- Choose a blend that includes xanthan gum or guar gum. These act as binders and help replicate the elasticity of gluten.
- You may need to add slightly more flour while rolling to prevent sticking.
- Expect the texture to be a bit chewier and the shapes to be less perfect.
Though the dough might be harder to roll into perfect rounds, the flavor and performance remain solid. These versions are best used for dipping or layering rather than folding into wraps.
Whole Wheat Flatbreads for a Nutty Twist
If you want more fiber and nutrients, whole wheat flour is a simple and healthy swap. The dough remains soft, and the flavor gets a slightly nutty, earthy tone.
How to Use Whole Wheat Flour:
- Substitute whole wheat flour for all-purpose in equal parts.
- The dough may be slightly denser, so add a splash more milk if it feels dry.
- Let the dough rest a bit longer, up to 45 minutes, to allow the bran in whole wheat to absorb more moisture.
Whole wheat flatbreads pair beautifully with roasted vegetables, chickpeas, and strong sauces. They’re also more filling, making them ideal for meal prep or hearty dinners.
Flavor Boosts and Custom Add-Ins
Once you’ve nailed the base recipe, you can customize it to suit your taste. Here are easy mix-in ideas:
- Minced garlic or garlic powder – knead into the dough or mix with melted butter for brushing.
- Fresh herbs like parsley, cilantro, or thyme.
- Chili flakes or ground cumin for a bit of heat or warmth.
- Finely grated cheese for richness (not for vegan versions).
- Sesame or nigella seeds pressed into the dough before cooking.
Just be careful not to overstuff or overwork the dough—simple additions go a long way.
Texture and Appearance with Different Flours
| Flour Type | Texture | Color | Flavor |
|---|---|---|---|
| All-purpose flour | Soft, chewy | Pale golden | Neutral, buttery |
| Whole wheat flour | Dense, hearty | Deep golden-brown | Nutty, earthy |
| Gluten-free flour | Slightly chewy, delicate | Light golden | Mild, varies by blend |
| Vegan version (with oil) | Soft, pliable | Pale golden | Depends on oil used (mild if olive or coconut) |
These variations offer endless ways to keep your flatbread game exciting and adaptable to every dietary need.
How to Store, Reheat, and Freeze Quick Flatbreads (No Yeast)
Best Practices for Storing Flatbreads
These quick flatbreads (no yeast) store surprisingly well, which makes them an excellent option for meal prepping. Whether you’re planning to enjoy them tomorrow or next month, storing them right keeps their texture soft and flavor intact.
Short-Term Storage (Up to 3 Days):
- Let flatbreads cool completely before storing.
- Stack them with a piece of baking paper or parchment between each one to prevent sticking.
- Wrap the stack tightly in plastic wrap or store in an airtight zip-top bag.
- Keep refrigerated to preserve freshness.
Stored properly, they’ll remain soft and pliable for up to 3 days. To prevent them from drying out, avoid leaving them exposed to air.
Reheating Flatbreads for Freshness
Bringing stored flatbreads back to life is easy, and reheating can even improve the texture slightly by restoring warmth and flexibility.
Reheating Methods:
- Skillet (Best Method): Heat a dry pan over medium heat. Warm each flatbread for 20 to 30 seconds per side. This method revives texture and restores that slight crispness.
- Microwave: Wrap the bread in a slightly damp paper towel and microwave for 10–15 seconds. This keeps it soft and steamy.
- Oven: Wrap in foil and heat at 350°F (175°C) for 5–8 minutes.
To keep flatbreads from drying during reheating, avoid overcooking, especially in the microwave. A light mist of water before reheating helps restore moisture too.
How to Freeze Flatbreads for Longer Storage
Freezing is a great way to make sure you always have flatbreads on hand. This recipe freezes very well, either as raw dough or fully cooked.
Freezing Raw Dough (Pre-Rolled):
- Roll the dough into rounds and place parchment paper between each piece.
- Wrap the entire stack tightly with cling wrap or foil, then place in a freezer-safe zip bag.
- Label and date. Use within 2 months for best results.
Freezing Cooked Flatbreads:
- Let cooked flatbreads cool completely.
- Stack with parchment paper between each one.
- Wrap tightly in plastic or foil, then store in an airtight container or zip bag.
To Use From Frozen:
- For raw dough: Let thaw completely in the fridge or at room temperature, then cook as usual.
- For cooked flatbreads: Reheat directly from frozen using the skillet or oven method for best texture.
These make excellent staples to keep on hand for emergency lunches or last-minute dinners. You’ll always be prepared to whip up a wrap, side, or snack.
Tips to Maintain Texture and Taste
- Use parchment paper, not wax paper, when stacking – it won’t stick or leave residue.
- Avoid storing hot or warm flatbreads – trapped steam will make them soggy.
- Freeze in small batches if you plan to take out only a few at a time.
With the right techniques, your flatbreads will be just as good days or weeks later, saving you time and reducing waste.
Conclusion
Quick flatbreads without yeast are a true kitchen essential. With just four basic ingredients—flour, butter, salt, and milk—you can create soft, pliable, golden flatbreads in under an hour. This recipe proves that you don’t need yeast or long rise times to enjoy fresh, homemade bread. From hearty wraps and flavorful dips to side dishes for soups and curries, these flatbreads fit into any meal of the day.
They’re easy to adapt for vegan, gluten-free, and whole wheat diets, and they store beautifully, whether in the fridge for a few days or frozen for weeks. You can reheat them in minutes, and even customize them with herbs, spices, or garlic for a flavorful twist. Whether you’re a beginner or an experienced cook, these flatbreads are reliable, versatile, and delicious every single time.


