Baking bread at home doesn’t have to be complicated. If you’re craving something rustic, full of savory flavor, and beautifully crusty without any fancy equipment or long kneading sessions, this No-Knead Olive Bread Recipe will be your go-to. Whether you’re a beginner or just looking for a low-effort recipe with incredible payoff, this bread brings the Mediterranean essence straight to your kitchen with minimal work.
In this article, we’ll walk through everything from selecting the right ingredients to shaping and baking your loaf. We’ll also include variations, troubleshooting tips, and practical storage options. By the time you finish, you’ll not only master this no-knead olive bread but have a reliable recipe that fits both weeknight dinners and weekend meals.
Why No-Knead Olive Bread Is So Popular
The Appeal of No-Knead Recipes
The beauty of no-knead bread lies in its simplicity. Traditional breadmaking usually involves a series of precise kneading and resting stages. In contrast, no-knead recipes depend on time rather than effort. You combine a handful of ingredients, give it time to ferment, and let the dough develop flavor and structure on its own.
This hands-off method is ideal for beginners or anyone who doesn’t have the time to deal with traditional dough. It requires no mixers, no complicated techniques, and absolutely no kneading, yet still delivers that artisan texture with a crisp crust and soft, airy interior.
What Makes Olive Bread Unique
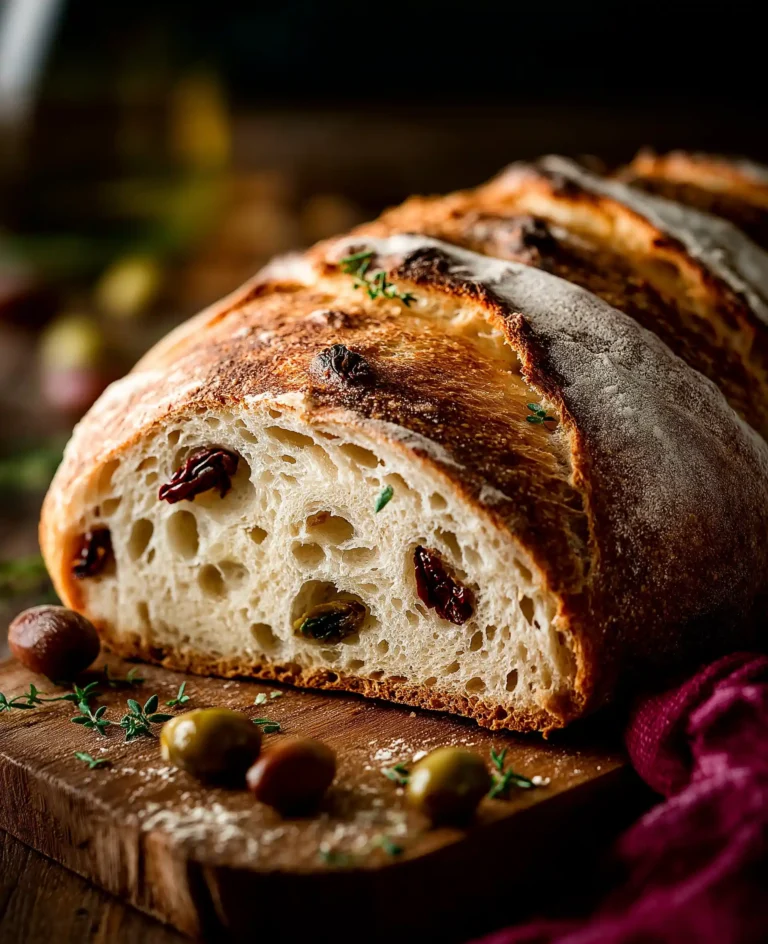
Olive bread is a savory masterpiece. The olives bring saltiness, tanginess, and a chewy bite to each slice. When mixed into the dough, they create little pockets of briny goodness that contrast beautifully with the chewy crumb and rustic crust. It’s the kind of loaf that stands alone with a drizzle of olive oil or complements simple meals like salads, soups, or roasted vegetables.
This no-knead olive bread recipe adds garlic powder and dried oregano, giving the bread a subtle, herby depth that complements the olives perfectly. The ingredients are pantry staples, and the process doesn’t require specialty tools, making it accessible and flexible for any home cook.
Essential Ingredients and Why They Matter
Bread Flour: The Base of Structure and Texture
The main ingredient in this no-knead olive bread is bread flour, and for good reason. Bread flour has a higher protein content than all-purpose flour, which helps create a strong gluten network during the long fermentation period. That’s what gives this bread its chewy bite and airy crumb. While you can substitute with all-purpose flour in a pinch, the texture won’t be quite as chewy or hearty.
Flour also plays a role in shaping. Because the dough is sticky, dusting your hands and surface with extra flour is crucial when forming the loaf. It keeps the dough workable without overloading it with extra dry ingredients.
Yeast: The Power Behind the Rise
This recipe calls for instant or active dry yeast. Either one works, but instant yeast will speed up the rise. Yeast not only leavens the bread, but during the long resting phase, it ferments the dough, developing flavor and strength without kneading.
Using the right amount of yeast—2 teaspoons—ensures a steady, even rise. More yeast might speed up the process but can lead to off flavors or over-proofing. Less yeast slows it down and can make the dough dense.
Salt, Oregano, and Garlic Powder: Flavor Foundations
Salt is essential for both flavor and dough performance. In this recipe, coarse sea salt is preferred over table salt because it offers a cleaner, less harsh salty flavor. Table salt is too fine and can make the dough overly salty unless you reduce the quantity.
Dried oregano and garlic powder add warmth and complexity to the bread. These pantry staples bring a Mediterranean twist without overpowering the olives. If you have fresh oregano or roasted garlic, those can be used for an even more aromatic result, but the dried versions work wonderfully for simplicity and balance.
Olives: The Star Ingredient
The heart of this recipe is roughly chopped olives. Use about 1 heaping cup (135g). You can choose green, black, Kalamata, or a mix, depending on your taste. Chop them roughly so they retain texture and distribute evenly throughout the dough.
Olives release moisture and brine into the dough as it rests, contributing to the flavor while helping keep the crumb moist. They also add beautiful dark flecks and a burst of umami in every bite.
Water: Just the Right Temperature
Hydration is everything in no-knead bread. The dough uses 1 and 1/2 cups (360ml) of water, ideally around 70°F (21°C). This temperature is warm enough to activate the yeast without speeding up the fermentation too quickly.
Too hot, and the yeast might overproof. Too cold, and it might not rise enough. If you don’t have a thermometer, just aim for lukewarm, not hot.
Optional Cornmeal: A Touch of Texture
Dusting your baking sheet with cornmeal adds a nice texture to the bottom of the loaf and helps prevent sticking. If you don’t have cornmeal, you can simply use flour, but cornmeal adds a rustic, bakery-style touch to the final result.
Print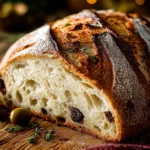
No-Knead Olive Bread Recipe
- Total Time: 4 hours 35 minutes
- Yield: 1 loaf (10–12 servings)
- Diet: Vegetarian
Description
An easy no-knead olive bread recipe with garlic, oregano, and a crispy crust. Perfect for beginners who want delicious homemade bread without kneading.
Ingredients
3 and 1/4 cups (430g) bread flour
2 teaspoons instant or active dry yeast
2 teaspoons coarse salt
2 teaspoons dried oregano
1 and 1/2 teaspoons garlic powder
1 heaping cup (135g) roughly chopped olives
1 and 1/2 cups (360ml) water, around 70°F (21°C)
Optional: cornmeal for dusting
Instructions
1. In a large ungreased mixing bowl, whisk together flour, yeast, salt, oregano, and garlic powder.
2. Stir in chopped olives with a silicone spatula.
3. Pour in water and mix until no dry flour remains. Dough will be sticky.
4. Cover bowl tightly and let rise at room temperature for 2–3 hours until doubled in size.
5. (Optional: Refrigerate the dough for 12–72 hours for more flavor.)
6. Turn dough onto a floured surface, shape into a ball using floured hands.
7. Transfer dough to a floured or cornmeal-dusted nonstick baking sheet.
8. Loosely cover and let rest for 45 minutes.
9. Preheat oven to 425°F (218°C) during resting time.
10. Score the top of the dough with a sharp knife or bread lame.
11. (Optional: Add steam by placing a pan of boiling water on bottom rack.)
12. Bake on center rack for 35–40 minutes until golden brown or internal temp is 195°F.
13. Cool for 10–20 minutes before slicing and serving.
Notes
To store, keep covered at room temperature for 3 days or refrigerate up to 10 days.
Dough can be made ahead and refrigerated up to 3 days.
Freeze dough after first rise or freeze baked bread for up to 3 months.
Use all-purpose flour if needed, but bread flour yields better texture.
You may bake this bread using a Dutch oven or pizza stone if preferred.
- Prep Time: 4 hours
- Cook Time: 35 minutes
- Category: Bread
- Method: No-Knead
- Cuisine: Mediterranean
Step-by-Step Mixing and First Rise Explained
Combining the Dry Ingredients
Start by grabbing a large mixing bowl. It doesn’t need to be greased. Whisk together your bread flour, yeast, salt, oregano, and garlic powder until everything is evenly distributed. This ensures that the salt doesn’t come into direct contact with the yeast, which can affect its performance, and that the herbs are mixed throughout for balanced flavor in every bite.
Once the dry mix is ready, fold in the chopped olives. Stir them in thoroughly so they’re coated with the flour mixture. This helps them suspend evenly in the dough instead of sinking to the bottom.
Adding the Water and Forming the Dough
Next, pour in the lukewarm water and stir everything together using a wooden spoon or silicone spatula. You’ll notice the dough looks dry, ragged, and sticky at first. That’s normal. Keep stirring and folding until no dry flour remains. Don’t worry about achieving a perfectly smooth dough.
If the dough feels too dry and there’s still loose flour at the bottom, add a splash of water—just a tablespoon at a time. If it’s too wet and soupy, sprinkle in a little more flour. You’re looking for a shaggy, sticky dough that holds together but is still too soft to knead.
Use floured hands to shape it roughly into a ball right in the bowl. It won’t be perfect, and it shouldn’t be—it’s a rustic dough that thrives on time, not perfection.
Covering and Letting It Rise
Now, cover the bowl tightly with plastic wrap or aluminum foil. Leave it out at room temperature for 2 to 3 hours. During this time, the yeast will ferment the dough, making it rise and fill with air bubbles. It should almost double in size and feel jiggly and soft to the touch.
You can move on to shaping and baking at this stage, but if you want maximum flavor and better crust texture, this is the moment to refrigerate the dough. Letting the dough rest in the fridge for 12 to 72 hours deepens the flavor and gives you a better rise in the oven. The cold temperature slows down fermentation, allowing the flavor to mature gradually. Just keep it covered the whole time.
Even if you only have a few hours, that rest period in the refrigerator will make a difference in both taste and structure.
Shaping, Second Rise, and Prepping for the Oven
Preparing the Surface and Baking Sheet
Once your dough has completed its first rise—whether after a few hours at room temperature or following a cold fermentation in the fridge—it’s time to shape it. Lightly flour a large nonstick baking sheet, or line it with parchment paper if your sheet isn’t nonstick. For an extra rustic touch and a bit of crunch, sprinkle cornmeal over the surface too. This prevents sticking and adds a subtle texture to the bottom crust.
Also, flour your work surface generously. This dough will be very sticky, especially if you allowed it to rest for an extended period.
Handling and Shaping the Dough
Turn the dough out onto your floured surface. Don’t punch it down—you want to retain as many air bubbles as possible. With floured hands, gently form it into a loose ball. Don’t worry if it’s not a perfect round. A rustic shape is part of the charm.
Transfer the shaped dough ball to your prepared baking sheet. If it flattens a bit during transfer, reshape it gently with your floured hands. Avoid overworking the dough to maintain its airy texture.
Second Rise: Letting the Dough Rest
Cover the shaped dough loosely with a clean kitchen towel or lightly with plastic wrap. Let it sit at room temperature for about 45 minutes. This second rise allows the dough to relax and puff up again, making it light and airy after baking.
During this resting period, preheat your oven to 425°F (218°C). If you’re using a pizza stone or a Dutch oven, this is when you want to place it in the oven to preheat as well. A properly preheated baking vessel is crucial for achieving that golden crust and solid rise.
Scoring the Dough for Better Oven Spring
Right before baking, it’s time to score the dough. Use a very sharp knife, kitchen shears, or a bread lame to make a shallow cut—about ½ inch deep—across the top of the loaf. You can slash an “X” or a single straight cut. This isn’t just for looks. Scoring allows the steam inside the dough to escape and prevents uncontrolled cracking as the bread expands in the oven.
If the dough has flattened a bit while resting, feel free to reshape it again using floured hands before scoring.
Baking, Testing Doneness, and Cooling the Bread
Creating Steam for a Crispier Crust (Optional Step)
For those who love a crusty loaf, adding steam to your oven is a game changer. Once the oven is fully preheated to 425°F (218°C) and your dough is scored and ready, take an oven-safe metal or cast iron baking pan or skillet (a 9×13-inch metal pan works great) and place it on the bottom oven rack.
Carefully pour 3 to 4 cups of boiling water into the pan right before placing your bread in the oven. Close the oven door immediately to trap the steam. The hot steam helps gelatinize the surface of the dough, resulting in a golden, crisp crust. While this step is optional, it makes a noticeable difference in the texture of your bread.
If you prefer a softer crust, feel free to skip the steam. The bread will still bake beautifully.
Baking the Dough to Golden Perfection
Place your dough—on the floured and/or cornmeal-dusted baking sheet—onto the middle rack of your preheated oven. Bake for 35 to 40 minutes until the crust is deeply golden and firm.
You can tell the bread is done using a few simple tests:
- Tap the crust with your fingers. If it sounds hollow, it’s ready.
- For accuracy, insert an instant-read thermometer into the center of the loaf. The internal temperature should read 195°F (90°C).
If the bread isn’t done yet, continue baking in 2-3 minute intervals. Avoid overbaking, which can make the interior dry and crumbly.
Resting and Cooling the Bread
Once baked, remove the bread from the oven and let it cool for at least 10 to 20 minutes before slicing. This step is critical. Cutting into hot bread can ruin the texture, making it gummy and dense. Letting it rest allows the steam inside to escape and the crumb to set properly.
Place the loaf on a cooling rack or a clean towel to cool evenly. Once cool enough to handle, you can slice and enjoy it as is, or pair it with your favorite dips, spreads, or vegetable-based toppings.
Storage, Make-Ahead Tips, and Freezing Instructions
Storing Freshly Baked Olive Bread
After cooling, your no-knead olive bread is ready to store if you’re not eating it all at once. For best results, keep it loosely covered at room temperature. Use a paper bag, a clean kitchen towel, or foil. Avoid airtight plastic containers, as they trap moisture and can make the crust soft and chewy.
Stored properly, the bread stays fresh at room temperature for up to 3 days. After that, move it to the refrigerator where it can last up to 10 days, though the texture of the crust will soften slightly.
To re-crisp the crust, simply reheat slices in the oven or toaster for a few minutes. You’ll bring back that fresh-baked feel without compromising flavor.
Make-Ahead Dough for Easy Baking
One of the biggest perks of this recipe is its flexibility. You can prepare the dough in advance and let it ferment in the refrigerator for up to 3 days. This slow fermentation improves both flavor and texture, making your final loaf more complex and satisfying.
If you’re planning a meal or gathering, mix the dough a day or two ahead. Then all you need to do is shape, rest, and bake when you’re ready. Even just 2 hours in the fridge enhances the loaf noticeably.
Freezing the Dough or Baked Bread
If you want to go even further ahead, the dough is freezer-friendly:
- After the first rise, wrap the dough in plastic wrap, place it in a freezer-safe container, and freeze for up to 3 months.
- When ready to use, thaw overnight in the fridge, or for 2–3 hours at room temperature.
- Continue with shaping, the second rise, and baking as usual.
You can also freeze the baked and cooled bread:
- Wrap the loaf or slices tightly in plastic wrap or foil, then place it in a freezer bag.
- Freeze for up to 3 months.
- To serve, thaw at room temperature and reheat in the oven to restore crispness.
Portioning and Serving Ideas
This recipe yields one large loaf, which serves 10 to 12 slices, depending on how thickly you cut it. For easier storage or portion control, you can slice it first before freezing. This way, you can toast individual slices straight from the freezer for breakfast or lunch.
The rich olive and herb flavor stands on its own, making this bread ideal for dipping into olive oil, spreading with dairy-free butters or hummus, or pairing with soups and salads.
Conclusion
Making this no-knead olive bread recipe at home proves that you don’t need to be an experienced baker to create something truly special. With minimal effort and a handful of simple, flavorful ingredients, you can achieve a rustic, golden loaf that’s crisp on the outside and soft, aromatic on the inside. Whether served warm with dinner, sliced for sandwiches, or simply enjoyed on its own, this bread delivers deep flavor and a satisfying bite every time.
Its make-ahead flexibility, freezer-friendliness, and no-fuss process make it perfect for busy households or anyone looking to expand their homemade bread skills without stress. Once you try it, this easy olive bread will become a trusted favorite in your kitchen for years to come.


