Mini pizzas are a fun, fast, and customizable meal idea perfect for any occasion. Whether you’re planning a party, a quick lunch, or a kid-friendly dinner, this mini pizza recipe lets you get creative with toppings while keeping prep simple. From homemade dough to tasty combinations of cheese, meats, and veggies, you’ll have bite-sized pizzas ready in no time.
PART 1: Why Mini Pizzas Are the Ultimate Crowd-Pleaser
Mini pizzas are fun, flexible, and family-friendly
People love mini pizzas because they’re easy to customize. Everyone gets their own, so there’s no fighting over toppings. You can make them vegetarian, meat-packed, cheesy, or spicy whatever suits your taste.
Homemade means better flavor and healthier choices
Store-bought options can’t match the freshness of homemade mini pizzas. You control the ingredients, reduce processed stuff, and add your favorite cheeses, meats, or vegetables. It’s a simple way to eat better without giving up flavor.
Print
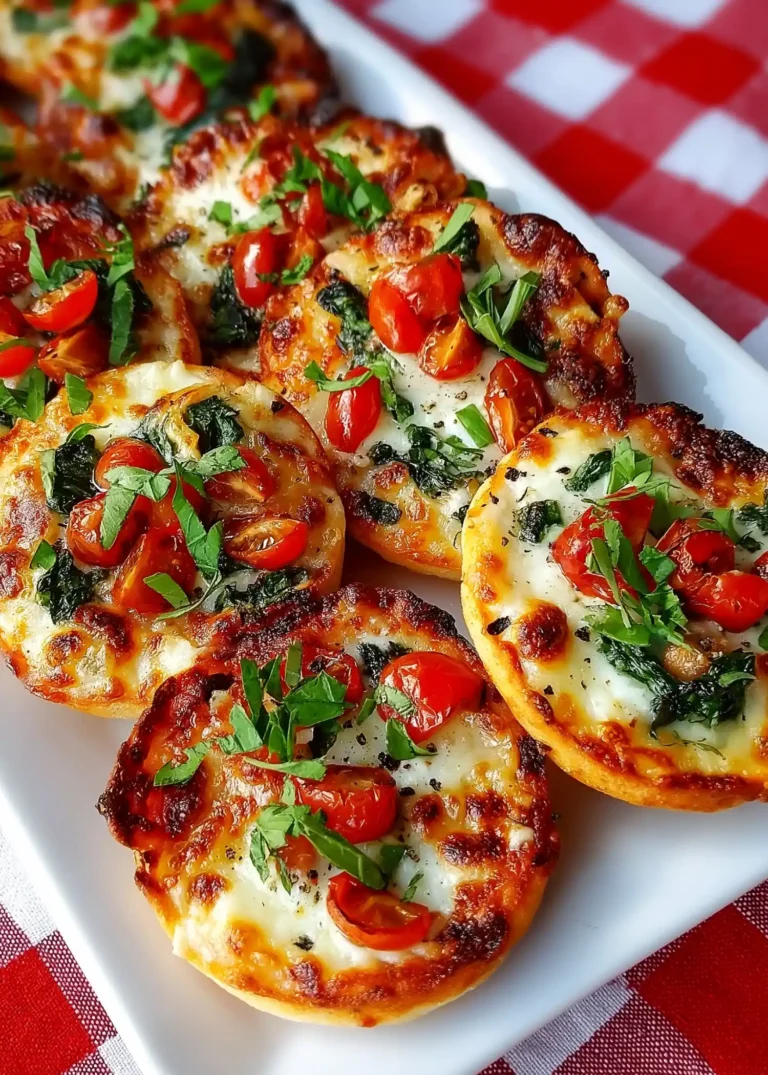
Homemade Mini Pizza Recipe
- Total Time: 25 minutes
- Yield: 18 mini pizzas
Description
Mini pizzas are the perfect mix of fun, flavor, and flexibility. Whether for parties, family dinners, or quick snacks, these customizable bite-sized delights will please everyone.
Ingredients
1 packet (1 1/4 oz.) active dry yeast
1 1/3 cups warm water
3 1/2 cups all-purpose flour
2 tsp salt
1 tsp sugar
2 tbsp extra-virgin olive oil
1 1/2 cups pizza sauce
2 cups shredded mozzarella cheese
Toppings of choice: pepperoni, sausage, mushrooms, olives, spinach, feta, etc.
Extra-virgin olive oil for drizzling
Instructions
1. In a small bowl, mix yeast with warm water and let sit for 5 minutes until foamy.
2. In a large bowl, combine flour, salt, and sugar.
3. Add olive oil and yeast water to the flour mixture; stir to form dough.
4. Knead for 5 minutes until soft and springy.
5. Divide dough in two, place in oiled bowls, cover, and let rise for 2 hours.
6. Preheat oven to 400°F and line baking sheet with parchment.
7. Roll dough into a 12×8-inch rectangle; cut into small rounds.
8. Place dough rounds on sheet, add sauce, cheese, and toppings.
9. Drizzle lightly with olive oil if desired.
10. Bake 8–10 minutes until edges are golden and cheese is bubbly.
Notes
Add herbs like oregano or basil to dough for extra flavor.
Use parchment for crisp crust and easy cleanup.
Try different cheese blends for variety.
- Prep Time: 15 minutes
- Cook Time: 10 minutes
- Category: Lunch Recipes
- Method: Baking
- Cuisine: Italian-American
Ingredients for the Best Mini Pizza Recipe
Core ingredients you need
Making great mini pizzas starts with quality ingredients. The base essentials are simple, but each one plays a key role in taste and texture.
- Pizza Dough: You can use store-bought dough for convenience or make it at home. Homemade dough often brings a fresher, chewier texture and more flavor.
- Pizza Sauce: Choose a rich tomato-based pizza sauce or pasta sauce. Jarred sauces are fine, but homemade gives you more control over spices and sweetness.
- Cheese: Mozzarella is the most common pick, but you can mix in options like provolone, Parmesan, Asiago, or even feta for different textures and bold flavors.
- Olive Oil: A drizzle of extra-virgin olive oil enhances the dough’s flavor and helps with crisping.
Creative topping combinations for every taste
Toppings are where mini pizzas really shine. You can mix and match based on what you love or what’s in your fridge.
Cheese Lovers:
- Mozzarella and Parmesan with a touch of blue cheese
- Feta, provolone, and Romano for a sharp mix
Vegetarian Options:
- Roasted red peppers, mushrooms, spinach
- Cherry tomatoes, olives, and squash
Other Bold Flavors:
- Pineapple and jalapenos
- Shrimp with garlic and artichokes
- Capers, sprouts, or sweet corn for something different
Mini pizzas let you play around and find your favorite mix. You can even let everyone build their own for a fun meal that’s part dinner, part activity.
Great, let’s continue with PART 3: Homemade Pizza Dough Recipe Breakdown:
Homemade Pizza Dough Recipe Breakdown
Step-by-step guide to perfect dough
Homemade pizza dough is easier than you think. With just a few ingredients and a little time, you’ll get a soft, chewy base that crisps up beautifully in the oven.
Here’s how to make it:
- Activate the yeast
In a small bowl, mix 1 packet (1 1/4 oz.) of active dry yeast with 1 1/3 cups of warm water. Let it sit for 5 minutes until it becomes foamy. This step helps the dough rise properly. - Mix the dry ingredients
In a large bowl, combine 3 1/2 cups of all-purpose flour, 2 teaspoons of salt, and 1 teaspoon of sugar. - Add olive oil and yeast water
Pour in 2 tablespoons of extra-virgin olive oil and the yeast mixture. Stir everything together until a rough dough forms. - Knead the dough
Use a stand mixer with a dough hook or knead by hand on a floured surface for about 5 minutes. The dough should be soft and slightly springy. - Divide and rest
Split the dough into two equal pieces. Shape each into a ball and place them in two lightly oiled bowls. Coat the tops with a little oil and cover with plastic wrap or a clean towel. - Let rise
Place the bowls in a warm area and let the dough rise for 2 hours. Once it has doubled in size, it’s ready to use or store.
Tips for dough texture, rise, and flavor
- Warm environment: Dough rises best in a warm, draft-free space. A turned-off oven that was briefly heated works well.
- Add dried herbs: Stir chopped dried basil, oregano, or rosemary into the dough for extra flavor.
- Use immediately or store: Once risen, use the dough right away or wrap it tightly and refrigerate or freeze for later.
This simple dough yields a soft yet crisp base for mini pizzas and makes about 18 to 20 rounds. Making it fresh at home takes your mini pizza recipe to the next level.
Step-by-Step Assembly of Mini Pizzas
Prepping, cutting, and shaping the dough
Once your dough is ready, it’s time to shape it into mini pizza rounds.
- Preheat your oven to 400°F so it’s ready when your pizzas are assembled.
- Prepare your baking sheet by lining it with parchment paper or nonstick foil. This helps prevent sticking and ensures even baking.
- Roll out the dough on a floured surface. Stretch it gently into a 12-by-8-inch rectangle. Press it firmly with your fingers to create a flat, even layer.
- Cut out rounds using a round cutter. Aim for about 18 to 20 small circles. Place each one on the baking sheet about an inch apart to allow room for rising and crisping.
The small size of these pizzas makes them ideal for parties, snack platters, or personal servings.
How to apply sauce, cheese, and toppings evenly
Now comes the fun part topping your mini pizzas.
- Spoon on the sauce: Add a small spoonful of pizza or pasta sauce to each dough round. Spread it gently, leaving a small border to avoid overflow while baking.
- Sprinkle the cheese: Add shredded mozzarella or your preferred mix of cheeses. A small handful is usually enough for each pizza.
- Add toppings: Choose from meats, vegetables, or unique options like pineapple, olives, or feta. Don’t overload each pizza—too many toppings can weigh down the dough and cause sogginess.
- Optional olive oil drizzle: A light drizzle of extra-virgin olive oil on top can help everything brown and add flavor.
Once everything’s in place, your pizzas are ready to go into the oven. You’re just minutes away from delicious, personalized bites.
Baking the Perfect Mini Pizzas
Optimal oven temperature and baking time
Getting the right bake is crucial for delicious mini pizzas. You want a crispy crust, melted cheese, and hot toppings all without overcooking.
- Preheat your oven to 400°F. A hot oven helps the dough cook quickly and evenly.
- Bake for 8 to 10 minutes, depending on your oven and how loaded your pizzas are.
- Keep an eye on them. You’ll know they’re ready when the edges are golden brown and the cheese is fully melted with light bubbling on top.
Mini pizzas bake fast because of their size, so don’t walk away. Checking around the 8-minute mark is a good idea to avoid burning.
Tips for crispy crust and melted cheese
- Use parchment or foil: This prevents sticking and helps distribute heat under the crust.
- Don’t overload toppings: Heavy toppings can keep the dough from baking through and make it soggy.
- Even spacing: Make sure pizzas don’t touch on the baking sheet. This allows heat to circulate, resulting in a crispier crust.
- Finish with broil (optional): For a slightly blistered cheese top, switch your oven to broil for the final 30 seconds. Watch closely to avoid burning.
Serve your mini pizzas hot right out of the oven for the best taste and texture. They’re perfect as-is or paired with a simple salad or dipping sauce.
Make-Ahead, Freezing, and Storage Tips
How to prep mini pizzas in advance
Mini pizzas are great for meal prep, party planning, or busy weeknights. You can prepare them ahead and store them in a few simple ways:
- Assemble and refrigerate: Build your mini pizzas on a baking sheet, cover with plastic wrap, and refrigerate for up to 24 hours before baking.
- Make the dough early: Pizza dough can be made a day or two ahead. Wrap it in plastic wrap and store it in the refrigerator until ready to use.
- Pre-bake the crusts: For extra crispness and convenience, bake the dough rounds for 4–5 minutes before adding sauce and toppings. Let them cool, then top and bake later.
This kind of preparation saves time and keeps things stress-free when cooking for a group.
Freezing both raw and baked versions correctly
Freezing mini pizzas is an easy way to keep a batch ready for quick meals.
To freeze before baking:
- Assemble the pizzas on a tray but don’t bake.
- Freeze them uncovered for 1 hour until firm.
- Transfer to an airtight container or freezer bag with parchment between layers.
To freeze after baking:
- Let baked pizzas cool completely.
- Place in a single layer on a tray to freeze for 1 hour.
- Store in freezer bags or containers, layering with parchment paper.
Reheating tips:
- Bake frozen unbaked pizzas at 400°F for 10–12 minutes.
- Reheat baked ones at 375°F for 8–10 minutes or until warmed through.
These storage methods keep your mini pizzas fresh, crisp, and ready to enjoy any time with zero fuss.
Conclusion: Master the Mini Pizza Recipe for Every Occasion
Mini pizzas aren’t just fun to make, they’re also one of the most flexible and satisfying meals you can serve. Whether you’re using homemade dough or a quick store-bought base, these bite-sized delights offer endless topping combos for all tastes and diets. From crispy edges to gooey cheese centers, mastering this mini pizza recipe means you’ve always got a crowd-pleaser up your sleeve.
They’re perfect for weeknights, weekend get-togethers, or even lunchbox surprises. Plus, with make-ahead and freezer-friendly options, you can always be prepared for unexpected cravings or last-minute guests.
If you haven’t tried customizing mini pizzas at home yet, now’s the time. Get creative, involve the family, and turn pizza night into an experience everyone will look forward to.


