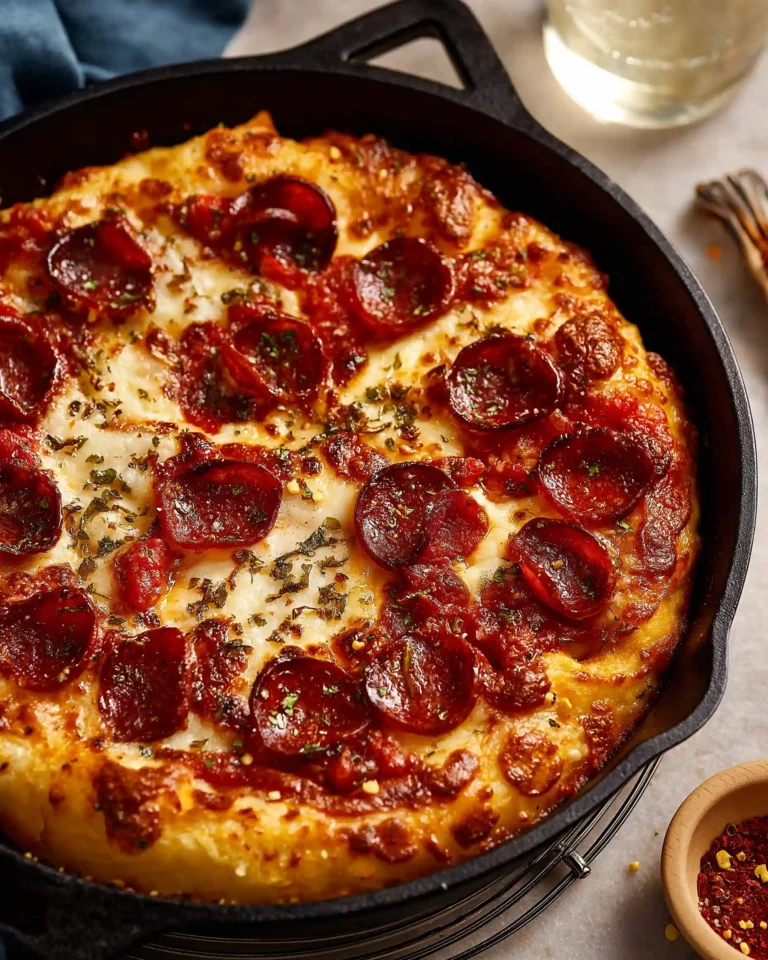
Few dishes bring the comfort and joy of a perfectly baked pizza—especially when it’s made in a sizzling hot cast iron skillet. The result? A thick, golden-brown crust with irresistibly crispy edges and a gooey, cheesy center. Cast iron skillet pizza brings together the convenience of home cooking with the flavor and texture that rivals your favorite pizzeria. Whether you’re new to cast iron cooking or a seasoned home chef, this guide walks you through every step for making a delicious, foolproof skillet pizza in your own kitchen.
In this article, you’ll learn how to prepare cast iron skillet pizza from scratch, what ingredients work best, how to choose your toppings wisely, and expert tips for the perfect finish. We’ll also cover what tools you need, common mistakes to avoid, and offer practical FAQs to troubleshoot your pizza-making adventures.
What Makes Cast Iron Skillet Pizza So Special
The Cast Iron Advantage
The hallmark of cast iron skillet pizza lies in the skillet’s ability to conduct and retain heat evenly. When properly preheated, it crisps the bottom crust beautifully while locking in steam to make the inside of the dough soft and chewy. Unlike a baking sheet or pizza stone, cast iron creates the same crust consistency every time.
A cast iron pan’s weight keeps the temperature stable, which is essential when you’re cranking up the heat to 450 degrees Fahrenheit. The high sides of the skillet also support the dough structure, allowing it to puff up while still maintaining its shape.
Better Than Delivery: Texture and Flavor
Why order out when you can have a bubbling, golden-edged pizza fresh from your own oven? Skillet pizza has a thick, bakery-style crust that’s crunchy on the outside, soft on the inside, and kissed by melted cheese that reaches all the way to the pan’s edges. Unlike fresh mozzarella which tends to release moisture and make the dough soggy, low moisture mozzarella ensures a balanced texture throughout.
Additionally, when sauce is spooned over the cheese—as it should be in this method—it doesn’t soak into the dough. This technique preserves the integrity of the base and creates layers of taste in every bite.
Perfect for Weeknight Meals
With just a few simple steps, minimal prep, and a cook time of under 20 minutes, cast iron skillet pizza is a family-friendly dinner that’s both fast and fun. You can go as simple or creative as you like with toppings, as long as you don’t overload it. The structure of the dough can only support so much without turning soggy, so moderation is key.
This method is ideal for those evenings when you want the indulgence of pizza without leaving your house or waiting for delivery.
Print
Cast Iron Skillet Pizza Recipe
- Total Time: 23 minutes
- Yield: 8 small slices
- Diet: Vegetarian
Description
Make a crispy, cheesy cast iron skillet pizza at home in just 23 minutes. A golden crust and gooey top baked to perfection in your oven.
Ingredients
1 tbsp olive oil
12 ounces pizza dough (room temperature)
2 cups shredded low moisture mozzarella cheese
1/2 cup pizza sauce
Your favorite pizza toppings (keep it light and simple)
Instructions
1. Place one oven rack at the very bottom and another at the top. Preheat oven to 450°F (230°C).
2. Grease the bottom and sides of a 12-inch cast iron skillet with olive oil.
3. Stretch the pizza dough to fill the bottom of the pan and dimple it with your fingertips.
4. Sprinkle mozzarella cheese over the entire surface, right up to the edges.
5. Dot the pizza sauce over the cheese, spreading it out to the edges.
6. Add your desired toppings, avoiding too many to prevent sogginess.
7. Bake the pizza on the bottom oven rack for 18–20 minutes until the crust is golden brown.
8. Check the bottom of the crust with a spatula. If not browned, bake for 2–3 more minutes.
9. For extra browning on top, move the skillet to the top rack for 2–3 minutes.
10. Remove from oven and place skillet on a wire rack. Let cool for 1 minute.
11. Run a knife around the edge to loosen the crust. Use a spatula to transfer pizza to a cutting board.
12. Slice and serve hot.
Notes
Use a 12-inch cast iron skillet for best results. If using a 9-inch skillet, reduce ingredients.
Avoid fresh mozzarella—it releases too much moisture and prevents crispiness.
Let your dough come to room temperature before using.
Keep toppings light to ensure the crust cooks through.
If large bubbles form while baking, pop them with a knife to prevent uneven texture.
- Prep Time: 5 minutes
- Cook Time: 18 minutes
- Method: Baked
- Cuisine: American
Mastering the Dough and Crust Technique for Cast Iron Skillet Pizza
Choosing the Right Dough
The foundation of an excellent cast iron skillet pizza is the dough. You can use either homemade or store-bought dough, but the key detail is room temperature. Cold dough straight from the fridge is stiff, difficult to stretch, and bakes unevenly. Let it sit at room temperature for about 30 to 60 minutes before using it. This relaxes the gluten structure, making the dough pliable and easy to shape into your pan.
If you’re making your own dough, aim for one that’s slightly more hydrated, which helps form those beautiful air pockets while baking. If using store-bought, opt for a plain pizza dough ball rather than a rolled-out crust, which may lack the elasticity and flavor of freshly risen dough.
Prepping the Dough in the Skillet
Start by greasing your cast iron skillet with olive oil—don’t skip this step. Use about 1 tablespoon of oil for a 12-inch skillet and evenly coat both the bottom and sides. This not only prevents sticking but also fries the edges slightly for that golden crust.
Gently stretch your dough to fit the bottom of the pan. Dimple it with your fingertips to prevent large bubbles from forming during the bake. Avoid rolling it too thin at the edges—this pizza style thrives on a thicker, focaccia-like border.
Tips for Getting a Crispy Bottom
The magic happens when the skillet meets high heat. Baking the pizza on the bottom oven rack ensures maximum contact between the skillet and the heating element. This method gives the crust a rich, golden color and an audible crunch.
Want a crispier base? You can preheat your skillet in the oven before placing the dough inside, although this step is optional. If you do preheat, be cautious—hot cast iron is no joke. Always handle it with oven mitts and be prepared to move quickly when placing the dough.
To check doneness, lift the crust edge with a spatula near the end of the bake. It should be a deep golden brown with no pale spots. If it’s still light, leave it on the bottom rack for another 2 to 3 minutes before checking again.
Avoiding Common Crust Mistakes
- Using Cold Dough: Leads to uneven baking and a tough texture.
- Overloading Toppings: This may weigh down the dough and prevent it from cooking fully.
- Skipping the Oil: Without oil, you miss out on the fried, crispy bottom.
- Using Fresh Mozzarella: As tempting as it may be, fresh mozzarella adds moisture, which can result in a soggy crust. Stick with low moisture block mozzarella for optimal results.
With the right dough technique and skillet prep, you’re already halfway to achieving that irresistible, restaurant-style skillet pizza at home.
Building the Pizza — Sauce, Cheese, and Toppings That Work
Why Sauce Goes on Top of Cheese
It might feel counterintuitive if you’re used to layering sauce first, but with cast iron skillet pizza, the cheese goes directly on the dough and the sauce goes on top of the cheese. This prevents the dough from absorbing moisture from the sauce, which can lead to a soggy center. The cheese acts like a moisture barrier, helping to keep the crust light, fluffy, and crisp.
Use about ½ cup of pizza sauce for a 12-inch pan. Dot it gently over the mozzarella with a spoon, spreading it to the edges. This technique also helps avoid watery pockets from forming beneath the toppings. You want balance, not puddles.
Whether you’re using store-bought or homemade pizza sauce, opt for one that isn’t too watery. A thick, well-seasoned sauce contributes significantly to the pizza’s flavor without compromising its structure.
Using the Right Cheese for Texture and Flavor
Low moisture block mozzarella is the secret weapon of cast iron skillet pizza. Grated fresh at home, it melts evenly, browns beautifully, and creates that signature pizza stretch without releasing too much moisture. That’s something fresh mozzarella can’t promise.
Use 2 cups of shredded low moisture mozzarella for a 12-inch skillet. Make sure to sprinkle the cheese all the way to the edges of the pan. This causes the cheese to caramelize against the cast iron, forming that coveted crispy edge that fans of Detroit-style pizza know and love.
Want to mix things up? You can add small amounts of parmesan or provolone, but make sure they don’t dominate. Keep it simple, especially for your first skillet pizza, so you can master the bake before experimenting.
Picking the Right Toppings
Here’s the golden rule: less is more. While it’s tempting to pile on mushrooms, olives, peppers, or even pineapple, too many toppings will weigh the dough down and trap steam, leaving you with an undercooked crust. Choose one to three toppings, and make sure they’re sliced thinly or pre-cooked if necessary.
Some great topping ideas that won’t compromise the bake:
- Thin-sliced bell peppers
- Sautéed mushrooms
- Spinach (lightly cooked or fresh)
- Red onion slivers
- Fresh tomato slices (lightly dried with a paper towel)
Avoid high-moisture vegetables unless you cook them down first. And never cover the entire surface with toppings. Always leave space for steam to escape and for the cheese to bubble through.
The Final Touch Before Baking
Once you’ve layered your cheese, dotted the sauce, and added toppings, your pizza is ready for the oven. No need for resting or preheating with this method—just slide it into the bottom rack of your oven preheated to 450°F (230°C).
Bake for 18 to 20 minutes, checking the crust with a spatula. If you want extra browning on top, move the pan to the top rack for 2-3 minutes at the end of the baking time. Just keep an eye on it to avoid burning.
In the next section, we’ll walk through the oven setup, baking times, and insider tricks that guarantee a perfect skillet pizza every time.
Oven Setup and Baking Strategy for the Perfect Finish
Positioning the Racks for Best Results
One of the secrets behind a successful cast iron skillet pizza is your oven setup. You’ll want to place one oven rack at the very bottom and another at the top. The reason? The bottom rack maximizes direct heat to crisp the crust, while the top rack helps you finish off with a bubbly, golden layer of cheese and toppings, if desired.
When you first put your pizza in the oven, always start on the bottom rack. This ensures that the thick dough gets the intense heat it needs to develop that golden, slightly crunchy base. Without it, your crust might stay pale or undercooked while the top browns too fast.
How Long to Bake Your Skillet Pizza
Once your pizza is built and the oven is preheated to 450°F (230°C), slide the skillet directly onto the bottom rack. Bake for 18 to 20 minutes, or until:
- The edges of the crust are browned and crispy
- The cheese is melted and starting to brown
- The bottom of the crust (check with a spatula) is a deep golden color
Depending on your oven’s performance, you might need to extend the bake time by a couple of minutes. Be patient—better to check and wait than remove it too early.
If you’re craving an extra bubbly top, transfer the skillet to the top rack for the last 2 to 3 minutes. This step is optional, but it can give your pizza that irresistible pizzeria look with golden cheese bubbles and slightly crisped toppings.
How to Handle a Hot Skillet Safely
Cast iron retains heat extremely well, which makes it great for baking—but also dangerous if handled carelessly. Always use thick oven mitts when removing the skillet from the oven. Place it on a wire rack or heat-safe surface to cool slightly.
Don’t rush to cut your pizza in the pan. Let it sit for a minute or two so the cheese sets slightly and doesn’t slide around. Then, run a sharp knife around the edges to release the crust and ensure it doesn’t stick to the sides.
Using a flat spatula, carefully lift the pizza from the skillet onto a cutting board. This move helps prevent the crust from getting soggy at the bottom due to trapped steam. Cutting it on the board instead of in the pan also protects your skillet’s seasoning.
What If You See Bubbles During Baking?
It’s common for air bubbles to form during baking, especially in the center. If you see a bubble growing while it’s in the oven, open the door briefly and use a sharp knife or the edge of a spatula to pop the bubble gently. This allows steam to escape and helps maintain a flat surface for your toppings.
These small adjustments during the baking process can make a big difference in your final result. With the oven strategy locked in, it’s time to talk about how to serve, store, and reheat your skillet pizza for the best texture and flavor.
Serving, Storing, and Reheating Tips for Cast Iron Skillet Pizza
The Best Way to Serve Skillet Pizza
Once your cast iron skillet pizza is baked and the crust has crisped to perfection, serving it properly is the final key to an unforgettable meal. After cooling the skillet for a minute or two on a wire rack, run a sharp knife around the edges to loosen the crust. This simple move prevents sticking and ensures a clean release.
Next, carefully slide a flat spatula under the pizza and transfer it to a large cutting board. Avoid cutting the pizza in the skillet, as it can damage both your knife and the cast iron’s seasoning. Once on the board, use a pizza cutter or sharp knife to slice it into eight small slices.
Serve the pizza hot and fresh while the cheese is melty and the edges are still crisp. A side salad or simple vegetable dish makes a great complement, and the pizza pairs well with sparkling water or lemonade for a balanced meal.
How to Store Leftovers Without Losing Texture
Got leftovers? You’re in luck—skillet pizza keeps well if stored the right way. Let any remaining slices cool completely before storing. Placing hot pizza in containers will cause steam buildup, which makes the crust soggy.
Wrap slices individually in parchment paper or place them in a single layer in an airtight container. If stacking slices, place a sheet of parchment or wax paper between each to prevent sticking.
Refrigerated, your skillet pizza will stay fresh for up to 3 days. For longer storage, wrap slices in plastic wrap and foil, then freeze for up to 2 months.
How to Reheat Without Ruining the Crust
Reheating pizza can be tricky—microwaving often turns crusts rubbery, and ovens can dry out the toppings. The best method for reheating cast iron skillet pizza is actually in a skillet or oven.
To reheat in a skillet:
- Place a slice in a nonstick or cast iron pan.
- Heat over medium-low heat with the lid on for 3–5 minutes.
- This brings back the crispy bottom while melting the cheese on top.
To reheat in the oven:
- Preheat to 375°F.
- Place slices on a baking sheet and bake for 8–10 minutes.
- For a crispier crust, place the sheet on the lower rack.
Avoid the microwave unless you’re in a hurry and don’t mind a softer crust.
Reviving Frozen Skillet Pizza Slices
If you froze your leftovers, thaw them overnight in the fridge for the best results. Then follow one of the reheating methods above. You can also reheat straight from frozen by baking at 375°F for 12–15 minutes on a baking sheet.
When stored and reheated properly, your cast iron skillet pizza will taste nearly as good as fresh—crispy bottom, melty cheese, and all.
Now that you’ve mastered prep, baking, and reheating, let’s explore how to customize this pizza for different preferences and dietary needs.
Customizing Your Cast Iron Skillet Pizza for Any Preference
Scaling the Recipe for Different Pan Sizes
The original recipe is designed for a 12-inch cast iron skillet, which comfortably serves eight small slices. But if you’re cooking for one or two or simply using a smaller 9-inch skillet, you’ll need to scale down your ingredients accordingly to avoid overflow or an overly thick crust.
Here’s how to adjust the portions:
- Oil: Use 2 teaspoons instead of 1 tablespoon
- Dough: Use 10 ounces instead of 12
- Mozzarella: Use 1½ cups
- Pizza sauce: Use 1/3 cup
These scaled-down amounts keep the crust balanced, fully cooked, and still full of flavor. Using the same layering and baking technique ensures it turns out just as crispy and cheesy as the larger version.
Vegetarian, Dairy-Free, and Gluten-Free Options
One of the great things about cast iron skillet pizza is how easily it can be adapted for various dietary preferences.
Vegetarian Pizza: Stick with veggies like mushrooms, peppers, onions, spinach, or tomatoes. Lightly cook high-moisture veggies first to prevent sogginess.
Dairy-Free Pizza: Use a dairy-free mozzarella-style cheese that melts well. Many plant-based cheeses are designed for baking and can achieve similar stretch and melt. Make sure it’s a low-moisture option to mimic the original texture.
Gluten-Free Pizza: Substitute the dough with a gluten-free pizza dough from the store or make your own. Just ensure the dough is room temperature before pressing it into the pan, and don’t skip the oil, which helps gluten-free crusts crisp properly.
Making It Kid-Friendly or Crowd-Pleasing
For kids:
Keep toppings simple. Cheese and a touch of sauce may be all you need. You can even let kids press the dough into the pan or sprinkle on the cheese to get them involved.
For parties or gatherings:
Make a few different versions at once by preparing multiple skillets or baking in shifts. Offer one classic version (cheese and tomato), one veggie-packed option, and one with bold flavors like caramelized onions or roasted garlic. You can slice pizzas into small squares or wedges for easy sharing.
Creative Topping Combinations (That Still Bake Well)
Just because you’re skipping the meats and alcohol-based pairings doesn’t mean you can’t go bold with flavors. Try combinations like:
- Roasted red peppers + spinach + feta (dairy or non-dairy)
- Artichokes + olives + sun-dried tomatoes
- Zucchini ribbons + caramelized onions + a pinch of red pepper flakes
Just remember the golden rule—don’t overload the toppings, and make sure to keep the cheese layer beneath the sauce for best results.
Make-Ahead and Meal Prep Tips
You can prep several portions of dough in advance and freeze them. To do this:
- Portion out dough into 10–12 ounce balls
- Wrap each tightly in plastic wrap, then foil
- Store in a freezer bag for up to 2 months
To use, thaw in the refrigerator overnight, then let the dough come to room temperature before pressing into the pan.
You can also pre-shred your cheese and store it in a sealed bag in the fridge, and portion out your sauce ahead of time. This makes it easy to pull together a skillet pizza on busy nights with hardly any prep.


