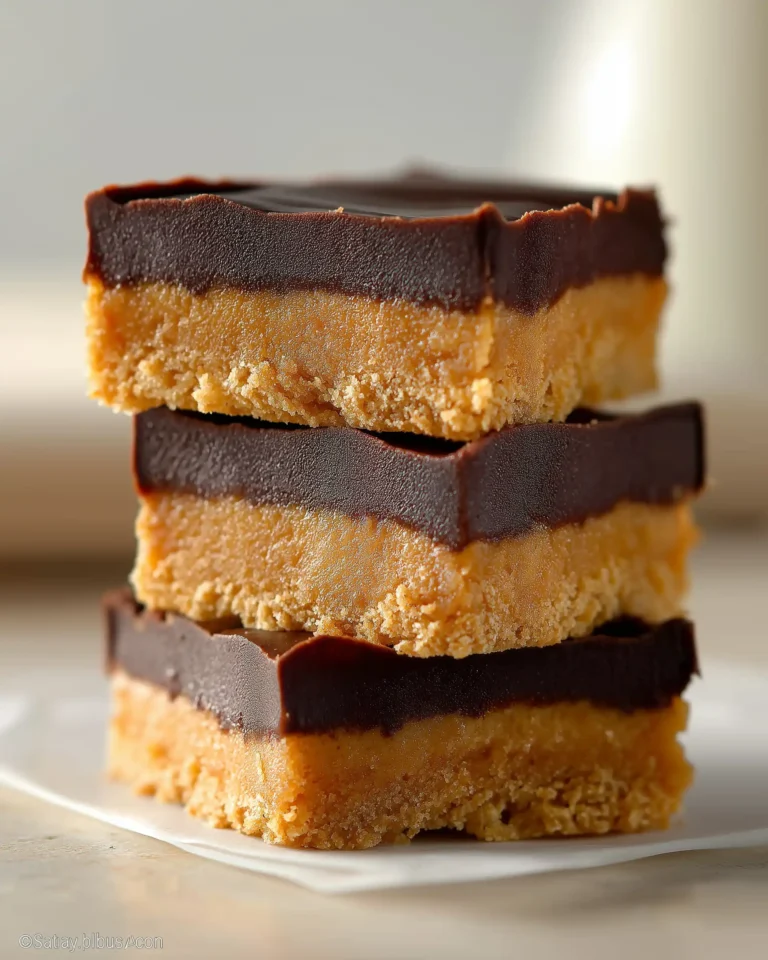
There are few desserts as effortlessly delicious as a No-Bake Chocolate Peanut Butter Bars Recipe. With a perfect balance of creamy peanut butter, sweet chocolate, and a satisfying graham cracker base, this recipe is both quick and indulgent. The best part is that you do not need an oven, which makes it a fantastic option for beginner bakers and seasoned home cooks alike. In just a few minutes of preparation and a little patience while chilling, you can create rich bars that taste like a homemade version of your favorite peanut butter cup.
This recipe is simple enough to make on a busy weekday yet impressive enough to share at a casual get-together. The texture is smooth and melt-in-your-mouth, while the flavor combination delivers that classic chocolate and peanut butter harmony loved by so many. If you are looking for a make-ahead dessert that stores beautifully in the fridge or freezer, these no-bake bars check every box.
In the following sections, we will explore the essential ingredients that make these bars so delicious, step-by-step preparation tips, variations you can try to personalize the recipe, expert storage methods, and nutritional highlights. By the end, you will know exactly how to make this dessert a household favorite.
The Essential Ingredients That Make This Recipe Work
When it comes to no-bake desserts, choosing the right ingredients is crucial. Each component in the No-Bake Chocolate Peanut Butter Bars Recipe contributes to the flavor, texture, and stability of the finished squares. Let us take a closer look at why these ingredients are so effective together.
The Creamy Base: Peanut Butter and Butter
At the heart of this recipe lies peanut butter, which provides creaminess, richness, and unmistakable nutty flavor. A processed, creamy variety such as Jif or Skippy is strongly recommended because natural peanut butter, with its oil separation, does not set well in no-bake bars. Butter joins in to add smoothness and bind everything together, ensuring the base holds firm once chilled. Using salted butter balances the sweetness, though unsalted butter with a small pinch of added salt works equally well.
The Sweet Structure: Confectioners’ Sugar and Graham Crackers
Confectioners’ sugar not only sweetens the bars but also contributes to their stability. Its fine texture blends seamlessly into the peanut butter mixture without leaving graininess. Graham cracker crumbs add a subtle honey flavor and provide the foundation for the crust. They are finely ground, allowing the mixture to press firmly into the pan, setting up the perfect base for the layers above. If graham crackers are unavailable, digestive biscuits can be used with excellent results.
The Rich Topping: Chocolate and Peanut Butter Duo
The crowning glory of these bars is the chocolate-peanut butter topping. Semi-sweet chocolate chips melt smoothly to form a glossy top layer that hardens beautifully in the fridge. By combining the chocolate with a small amount of peanut butter, the topping gains a softer bite, which prevents it from cracking too easily when sliced. This combination creates a harmonious finish that complements the peanut butter base.
Why This Ingredient List Works So Well
Together, these ingredients strike a balance between creamy and firm, sweet and salty, rich and light. The layering method ensures that every bite delivers both peanut butter and chocolate in equal measure. Since there is no baking involved, the focus is entirely on blending and chilling, which makes the quality of each ingredient especially important. High-quality chocolate chips, smooth peanut butter, and fresh graham crackers will make a noticeable difference in the final product.
Print
No-Bake Chocolate Peanut Butter Bars Recipe
- Total Time: 2 hours 10 minutes
- Yield: 24 squares
- Diet: Vegetarian
Description
Creamy peanut butter bars with a graham cracker base and a smooth semi sweet chocolate topping. No baking required, quick prep, and perfect for make ahead treats.
Ingredients
1/2 cup salted butter, melted
1 cup graham cracker crumbs
2 cups confectioners’ sugar
1 cup creamy peanut butter, plus 2 tablespoons divided
1 cup semi sweet chocolate chips
Instructions
1. Line an 8 or 9 inch square pan with parchment or foil, leaving an overhang for easy lifting.
2. In a medium bowl mix melted butter, graham cracker crumbs, and confectioners’ sugar until evenly moistened.
3. Stir in 1 cup creamy peanut butter until a thick dough forms. Press firmly and evenly into the prepared pan.
4. In a heat safe bowl melt chocolate chips with the remaining 2 tablespoons peanut butter, using 20 second microwave bursts and stirring until smooth, or a double boiler on the stove.
5. Spread the chocolate mixture evenly over the base. Refrigerate until completely firm, at least 2 hours.
6. Let the slab sit at room temperature for about 10 minutes. Lift out using the parchment, then cut into 24 squares with a warm sharp knife. Serve chilled.
Notes
Storage: Cover tightly and refrigerate for up to 1 week.
Freezer: Place squares in an airtight container with parchment between layers. Freeze up to 3 months. Thaw in the refrigerator overnight.
Texture tip: Use processed creamy peanut butter for the cleanest set. Natural peanut butter can cause separation.
Pan size: For thicker bars use an 8 inch pan. For slightly thinner bars use a 9 inch pan.
- Prep Time: 10 minutes
- Cook Time: 0 minutes
- Category: Dessert
- Method: No Bake
- Cuisine: American
Step-by-Step Preparation Guide
Even though this No-Bake Chocolate Peanut Butter Bars Recipe is easy, following each step with care ensures the best possible texture and taste. The process requires minimal tools and no oven, making it accessible to anyone who wants a homemade dessert with professional-quality results.
Step 1: Preparing the Pan
Start by lining an 8-inch or 9-inch square baking pan with aluminum foil or parchment paper. This step is crucial because it prevents the bars from sticking and makes removal effortless once they have chilled. If you leave extra parchment hanging over the sides, you can lift the entire block of bars out in one smooth motion before cutting.
Step 2: Mixing the Base Layer
In a medium mixing bowl, combine the melted butter, graham cracker crumbs, and confectioners’ sugar. Stir until the mixture looks evenly coated and crumbly. Next, add one full cup of creamy peanut butter and mix until everything comes together into a thick, spreadable dough. Press this mixture firmly and evenly into the prepared pan. Using the back of a spoon or an offset spatula helps create a smooth surface.
Step 3: Creating the Chocolate Topping
Place the chocolate chips and the remaining two tablespoons of peanut butter in a heat-safe bowl. Melt them together using either a microwave in 20-second intervals, stirring each time, or on the stovetop using a double boiler. Once fully melted, stir until the mixture is smooth and glossy. Spread the topping evenly over the peanut butter base, ensuring it reaches all corners of the pan.
Step 4: Chilling for Perfection
Refrigerate the pan for at least two hours. This chilling step allows the base to firm up and the topping to set properly. For best results, leave the bars overnight before cutting, as the flavors meld and the texture stabilizes even more.
Step 5: Cutting and Serving
When ready to serve, let the bars sit at room temperature for about 10 minutes before slicing. This prevents the chocolate topping from cracking. Use a sharp knife, warmed briefly under hot water and dried, to achieve clean cuts. Slice into 20 to 24 squares, depending on your desired portion size.
Tips and Tricks for the Best No-Bake Bars
Small details can elevate this recipe from good to outstanding. With these expert tips, you can ensure your No-Bake Chocolate Peanut Butter Bars turn out smooth, firm, and irresistible every single time.
Use the Right Peanut Butter
Processed creamy peanut butter works best because it blends evenly with the sugar and butter. Natural or oily peanut butter tends to separate, leaving the bars unstable and greasy. If you enjoy texture, you can use chunky peanut butter, but be aware that the bars may crumble slightly when cut.
Create an Even Base Layer
Pressing the base mixture firmly into the pan is key. If the layer is uneven or too loose, the bars may fall apart when cut. Using a flat spatula or the bottom of a glass helps achieve a compact, level surface.
Prevent Chocolate Cracks
Adding a spoonful of peanut butter to the chocolate topping makes it softer and easier to slice without cracking. Also, remember to let the bars sit out briefly before cutting, which keeps the chocolate from shattering.
Chill Thoroughly Before Serving
Patience is important in this recipe. Rushing the chilling process will result in soft, messy squares. A minimum of two hours is required, though longer chilling leads to firmer, cleaner cuts. If you plan to serve them at a gathering, make them the night before to reduce stress.
Freezer-Friendly Convenience
These bars freeze beautifully, making them an excellent make-ahead dessert. Place cut squares in a freezer-safe container with parchment paper between the layers. When ready to enjoy, thaw them overnight in the refrigerator. They retain their flavor and texture for up to three months.
Creative Variations to Try
One of the best things about this No-Bake Chocolate Peanut Butter Bars Recipe is its flexibility. With a few adjustments, you can create different versions that suit your taste preferences or dietary needs. These variations keep the recipe exciting and allow you to experiment while still enjoying that classic chocolate-peanut butter flavor combination.
Add a Crunchy Twist
If you like a little texture in your desserts, mix in crushed pretzels, chopped peanuts, or crispy rice cereal into the base layer. These additions bring a satisfying crunch to contrast the smoothness of the chocolate topping. The salty notes from pretzels or peanuts also enhance the overall flavor profile.
Try White Chocolate or Dark Chocolate
While semi-sweet chocolate chips are traditional, you can easily swap them out for white chocolate or dark chocolate. White chocolate creates a sweeter and creamier bar, while dark chocolate provides a bolder, less sweet taste that pairs wonderfully with the richness of peanut butter.
Make It Healthier
For a lighter take, substitute some of the butter with coconut oil and reduce the confectioners’ sugar slightly. You can also choose whole grain graham crackers for added fiber. While this will change the texture a bit, it still creates a delicious dessert with a healthier twist.
Add a Flavor Boost
Enhance the chocolate topping with a sprinkle of sea salt flakes or a dusting of cocoa powder before chilling. These finishing touches add a gourmet flair and elevate the flavor complexity. A drizzle of melted white chocolate on top of the set bars can also create a beautiful contrast and make them visually striking.
Experiment with Nut Butters
Although peanut butter is the star of this recipe, almond butter, cashew butter, or even sunflower seed butter work as substitutes. Each brings its own unique taste, allowing you to reinvent the recipe without sacrificing the no-bake simplicity.
Storage and Serving Ideas
These bars are not only delicious but also practical. They store well, travel easily, and can be served in a variety of creative ways that fit any casual gathering or family dessert moment.
Refrigeration Tips
Once chilled, the bars should be stored tightly covered in the refrigerator. They stay fresh for up to one week, maintaining their firm texture and bold flavor. A sealed container prevents them from picking up other odors from the fridge.
Freezer Storage for Long-Term Enjoyment
If you want to save a batch for later, freezing is an excellent option. Store either the entire slab or cut squares in a freezer-safe container. Be sure to place parchment paper between layers to avoid sticking. When ready to eat, transfer them to the refrigerator the night before, allowing them to thaw gradually. This method preserves their creamy texture and prevents condensation from affecting the chocolate topping.
Serving Suggestions
These bars are rich, so serving them in smaller squares makes them easier to enjoy without overwhelming sweetness. Pair them with a glass of cold milk, a warm cup of coffee, or even a simple tea. For a party platter, you can cut them into bite-sized pieces and place them alongside fresh fruit for balance.
Pack Them for On-the-Go Treats
Thanks to their firm structure, these bars travel well. They can be packed in lunchboxes, picnic baskets, or snack containers. Just remember to keep them cool during warmer weather to prevent the chocolate topping from softening.
Presentation Ideas
For special gatherings, place the bars in decorative cupcake liners or stack them neatly on a dessert tray. Garnishing with a light drizzle of melted chocolate or a sprinkle of crushed peanuts before serving can make them look bakery-worthy without extra effort.
Conclusion: Why This Recipe Deserves a Spot in Your Kitchen
The No-Bake Chocolate Peanut Butter Bars Recipe is a shining example of how simple ingredients can come together to create something extraordinary. With a buttery graham cracker base, a creamy peanut butter center, and a smooth chocolate topping, each bite delivers a perfect balance of flavor and texture. The fact that this dessert requires no baking makes it accessible to everyone, whether you are new to the kitchen or an experienced cook looking for a reliable treat.
These bars are versatile, allowing for creative variations and adjustments based on personal preference. They also store well, making them an excellent make-ahead dessert for busy schedules. From family snacks to shareable party trays, they fit seamlessly into any occasion. Once you make them, chances are they will become a repeat favorite in your household.
If you are searching for a dessert that combines convenience with indulgence, this recipe is the answer. Keep a batch ready in your refrigerator or freezer, and you will always have a satisfying, crowd-pleasing treat within reach.


