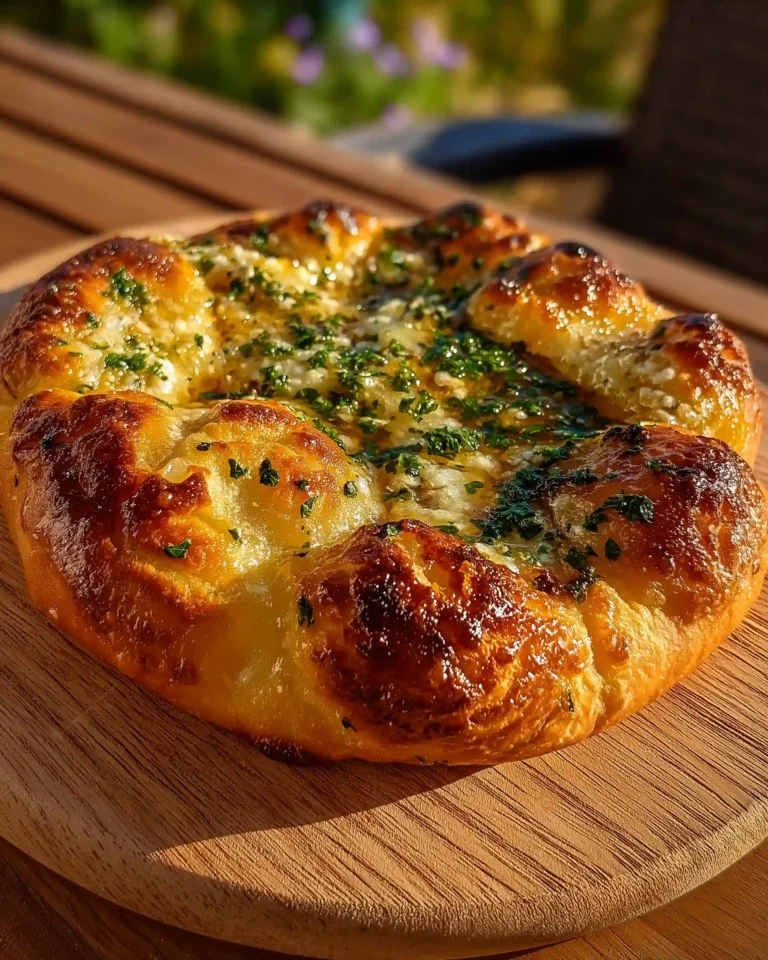
If you’re searching for a perfect homemade treat that’s both indulgent and gluten free, then Gluten Free Pizza Garlic Bread is your go-to recipe. Combining the chewy texture of pizza crust with the bold, savory flavor of garlic butter, this gluten free dish brings comfort food to a whole new level. Whether you’re hosting a cozy dinner or looking to make your weeknight meal special, this recipe offers all the satisfaction of traditional pizza bread without the gluten.
This article will walk you through the entire process—from understanding the ingredients to mastering the bake. We’ll cover dough preparation, fermentation, flavor additions, baking tips, and garlic butter techniques. We’ll even talk about alternatives for different ovens and how to make the most of your ingredients without compromising on texture or flavor. You’ll also find a handy FAQ section and a delicious conclusion to wrap things up.
The Essential Ingredients for Gluten Free Pizza Garlic Bread
Choosing the Right Gluten Free Flour Blend
The core of any gluten free bread is, naturally, the flour. For this recipe, the superstar is Mulino Caputo Fioreglut gluten free flour. Known for its exceptional texture and pizza-like elasticity, this flour includes a thoughtful blend of deglutenized wheat starch, rice flour, and plant-based fibers. It mimics traditional pizza dough beautifully without crumbling or becoming overly dense.
If Mulino Caputo isn’t available, look for a gluten free blend specifically labeled for pizza or bread making. Avoid general-purpose gluten free flours for this one, as they often lack the strength to hold a well-shaped dough.
Other flours to consider as dusting agents include:
- Rice flour (great for stretch and non-stick quality)
- Corn flour (adds slight crispiness)
- Potato starch (if you want a softer crust edge)
Importance of Yeast Activation and Sugar
Yeast is responsible for the rise, air pockets, and soft texture of your pizza garlic bread. You’ll be using dried active yeast, which needs a few minutes in warm water to wake up. The addition of caster sugar feeds the yeast, helping it activate quickly and create the beautiful foam necessary for a good proof.
When activating the yeast:
- Make sure your water is warm but not hot. Around 100°F (38°C) is perfect.
- Stir the yeast and sugar together in the water and let it sit for 10 minutes.
- If there’s no foam forming, your yeast is inactive—time to replace it.
Hydration and Fats
Hydration is key in gluten free baking. Without gluten, it’s harder for flours to hold onto moisture, so your liquid-to-dry ratio must be just right. In this case, 300ml of warm water ensures the dough remains pliable and doesn’t dry out.
Olive oil not only boosts flavor but also helps bind the dough. It keeps the bread soft on the inside while helping the outside develop a golden, slightly crisp crust during baking. Use a high-quality extra virgin olive oil for the best flavor impact.
Flavor Enhancers: Baking Powder, Salt, and Garlic Butter
To ensure your bread rises evenly and has a balanced flavor, you’ll be adding baking powder along with yeast. The baking powder gives your dough an extra push, especially helpful when baking in a conventional oven.
Fine sea salt sharpens the flavor of the flour blend, preventing the dough from tasting flat. Make sure to mix it into the flour before adding wet ingredients to avoid killing the yeast.
And now for the game changer: garlic butter. This spread is the flavor bomb that turns basic pizza crust into something memorable. Made from salted butter, olive oil, minced garlic, black pepper, and optional fresh herbs like basil and parsley, this component adds richness, aroma, and color to your final product. It’s easy to make and completely transforms the taste experience.
Print
Gluten Free Pizza Garlic Bread Recipe
- Total Time: 1 hour 25 minutes
- Yield: 2 garlic breads
- Diet: Gluten Free
Description
A soft, golden, and savory gluten free pizza garlic bread recipe with an irresistible herb and garlic butter topping. Perfect for pairing with meals or enjoying on its own.
Ingredients
For the dough:
12g dried active yeast
2 tsp caster sugar
300ml warm water
3 tbsp olive oil
1 tbsp fine salt
420g Mulino Caputo Fioreglut gluten free flour
2 tsp baking powder
Extra gluten free flour for dusting (rice flour preferred)
For the garlic butter:
40g salted butter
10ml olive oil
2 cloves garlic, minced
1 tsp fresh chopped parsley (optional)
1 tsp fresh chopped basil (optional)
Black pepper, to taste
Instructions
1. Add yeast and sugar to a jug with warm water. Stir and let sit for 10 minutes until foamy.
2. In a bowl, mix flour, baking powder, and salt.
3. Add the olive oil and yeast mixture to the bowl.
4. Mix and knead into a smooth, slightly sticky dough.
5. Cover the bowl with a tea towel and let the dough rise in a warm place until doubled in size, about 1 hour.
6. Meanwhile, prepare the garlic butter by softening the butter and mixing it with oil, garlic, black pepper, and herbs.
7. Preheat your pizza oven to 400°C or your kitchen oven to 230°C fan.
8. Dust your pizza peel with gluten free flour.
9. Divide dough in half, shape into balls, and flatten each into a pizza shape.
10. Spread garlic butter over the top.
11. Transfer to the oven.
12. Bake in pizza oven for 2–3 minutes, rotating every 30 seconds, or bake in kitchen oven for 12–15 minutes.
13. Remove, let cool for a minute, then slice and serve.
Notes
Use fresh, active yeast to ensure a proper rise.
If baking in a kitchen oven, use the top shelf and preheat your baking tray.
Add toppings like cherry tomatoes, vegan cheese, or fresh herbs if desired.
Can be made dairy free with vegan butter.
- Prep Time: 1 hour 20 minutes
- Cook Time: 5 minutes
- Method: Baking
- Cuisine: Italian, American
Mixing and Kneading Techniques for Perfect Gluten Free Dough
How to Combine Dry and Wet Ingredients Correctly
Making gluten free dough is a delicate balance. Unlike traditional wheat doughs, gluten free varieties don’t develop elasticity through kneading gluten strands. Instead, the texture comes from proper hydration and gentle mixing. Here’s how to do it right.
Start by whisking together the gluten free flour, fine salt, and baking powder in a large bowl. This ensures even distribution of dry ingredients and prevents clumps. Once your yeast mixture has formed a foamy layer, pour it into the dry mix along with the olive oil.
If you’re using a stand mixer, attach the dough hook and let it run on medium speed for 2–3 minutes. The goal isn’t to overmix but to ensure the water is fully incorporated and a slightly sticky, smooth dough forms.
If you’re mixing by hand:
- Use a wooden spoon to stir until the dough starts to come together.
- Then switch to hand-kneading inside the bowl for 2–3 minutes until smooth.
- Avoid adding too much extra flour—it’s okay if the dough is a little sticky.
A gluten free dough won’t feel the same as traditional pizza dough. It’ll be softer, more pliable, and stickier, but that’s what we want for this recipe.
Proofing the Dough for Optimal Rise
Proofing is the process of letting the dough rise in a warm environment. For gluten free pizza garlic bread, this is even more crucial since gluten free flours need that extra boost to trap gas from the yeast and become airy.
Here’s how to do it:
- Cover your bowl with a clean tea towel.
- Place it in a warm, draft-free spot. An oven with the light on works well, or near a sunny window.
- Let it sit for about an hour or until the dough doubles in size.
Keep in mind, the time needed can vary:
- On warmer days, it might take 45 minutes.
- On cooler days, up to 90 minutes.
You’ll know the dough is ready when it’s visibly puffier and has expanded in the bowl. Don’t rush this part—under-proofed dough will bake up dense and chewy, not fluffy and light.
Shaping the Dough Without Tearing
Once the dough is ready, it’s time to shape it into pizza rounds for garlic bread. Since it’s gluten free, the dough won’t stretch like regular dough. But with the right technique, you can shape it without cracks or tears.
Follow these steps:
- Dust your pizza peel or a flat surface generously with rice flour or your choice of gluten free flour.
- Divide the dough into two equal portions and roll each into a loose ball.
- Gently press one ball into a flat round using your fingertips. Start from the center and work your way out.
- Use a lifting and folding motion if needed. It helps spread the dough while maintaining thickness.
Occasionally lift the dough and sprinkle more flour underneath. This prevents sticking and keeps the base smooth. Give the pizza peel a gentle shake—your dough should move freely. If not, use a spatula to loosen any sticky spots.
Shaping this way helps the pizza bake evenly and makes it easier to transfer to your oven.
When and How to Add the Garlic Butter
Before your dough goes into the oven, it needs its garlic butter topping. This mixture doesn’t just sit on top—it infuses the bread with flavor as it bakes.
To prepare the garlic butter:
- Microwave the salted butter for 15 seconds until soft, not melted.
- Mix in olive oil, minced garlic, and a few cracks of black pepper.
- Add the fresh chopped parsley and basil if using, and stir until smooth.
Spread half the garlic butter generously over the first pizza base before baking. The high heat will caramelize the garlic and herbs, releasing irresistible aroma and golden color.
Save the remaining half for the second round of dough.
Baking Gluten Free Pizza Garlic Bread Like a Pro
Preparing Your Pizza Oven for Maximum Heat
The magic of gluten free pizza garlic bread comes alive in the bake. A key factor in getting that golden, airy crust is achieving and maintaining the right oven temperature. If you’re using a pizza oven, your target is a blazing 400°C (752°F). This high heat mimics a traditional pizzeria environment, helping the dough puff up fast and develop crisp edges with a soft interior.
Here’s how to prep:
- Fire up your pizza oven at least 30 minutes before baking to ensure even heat distribution.
- Keep the temperature consistent at around 400°C throughout the process.
- Use a pizza stone or baking surface that’s preheated—this helps cook the bottom quickly, preventing soggy dough.
The high temp not only speeds up cooking time but also helps the garlic butter caramelize, giving you a savory, lightly crispy top that’s irresistible.
Using a Home Oven for Great Results
Don’t worry if you don’t have a pizza oven—you can still make fantastic gluten free garlic pizza bread in your kitchen oven. While it won’t reach the same intensity, you can still achieve good texture and flavor with the right technique.
Follow these steps:
- Preheat your oven and baking tray to 230°C (fan). Place the tray on the top shelf to increase heat exposure.
- Roll out your dough on parchment paper for easy transfer.
- Place the parchment and dough directly onto the hot tray to bake.
- Bake for 12–15 minutes, watching for a lightly browned crust and bubbling garlic butter.
Though the crust won’t puff up as dramatically as it would in a pizza oven, it will still be soft and flavorful inside, with a deliciously golden top.
Timing and Rotation for Even Baking
Whether you’re baking in a pizza oven or a standard kitchen oven, timing and rotation are essential. In a pizza oven, cook each garlic bread for 2–3 minutes, but don’t just let it sit. Every 30 seconds, open the oven and rotate the dough using your peel. This ensures every part of the bread cooks evenly and avoids burning.
In a home oven, there’s less need for rotation, but do check at the halfway point to see if one side is browning more than the other. If so, turn the tray 180 degrees.
Here’s a quick comparison:
| Oven Type | Temperature | Cook Time | Rotation Needed? |
|---|---|---|---|
| Pizza Oven | 400°C (752°F) | 2–3 minutes | Every 30 seconds |
| Home Oven | 230°C (446°F) | 12–15 minutes | Once halfway |
Tips for Removing and Serving the Bread
Once the garlic pizza bread is puffed and golden, it’s time to remove it. Use your peel or spatula to slide it out carefully. The garlic butter will be hot and bubbling, so give it a minute or two to cool before slicing. This helps set the structure, especially with gluten free dough, which can be delicate when hot.
Then slice it into wedges or strips and serve while still warm. The crust will be slightly crisp on the outside, soft and chewy inside, and rich with buttery garlic flavor.
Flavor Variations and Custom Toppings for Gluten Free Garlic Pizza Bread
Enhancing the Garlic Butter with Herb Blends
The original garlic butter is already delicious, but small tweaks can elevate it even further without complicating the process. Consider adding a mix of fresh and dried herbs to build deeper flavor.
Try these additions for variety:
- Oregano: Adds a bold, Mediterranean kick.
- Rosemary: Offers a woodsy, aromatic quality perfect for cooler seasons.
- Thyme: Gives a subtle earthiness that complements garlic well.
Always start with small amounts, about ½ tsp, and mix into the softened butter before spreading on your dough. Avoid overpowering the garlic—you want balance, not conflict.
Optional tip: Add a pinch of chili flakes to the butter if you enjoy a little heat. It gives a subtle spicy edge without taking over the dish.
Dairy-Free Garlic Butter Alternatives
For those who are lactose intolerant or avoiding dairy, this recipe can still be enjoyed without losing its essence. You can easily make dairy-free garlic butter that mimics the flavor and richness of traditional butter.
Recommended swaps:
- Use vegan margarine or plant-based butter (look for coconut oil–based blends or soy-free options).
- Replace the salted butter with unsalted plant butter and add sea salt to taste.
- Keep the olive oil, garlic, and herbs exactly the same.
The result is a smooth, spreadable garlic topping that browns beautifully in the oven, without any dairy involved.
Adding Toppings While Staying True to the Base Flavor
You can enjoy gluten free garlic pizza bread as-is, but for variety, toppings can bring extra flair. Just remember to keep things light—this is still a garlic bread, not a loaded pizza.
Topping ideas that keep the garlic flavor front and center:
- Sliced cherry tomatoes: Adds a juicy, sweet bite.
- Shredded dairy-free mozzarella: Melts beautifully and adds stretch.
- Spinach or arugula: Toss on fresh greens right after baking for contrast.
- Sautéed mushrooms: Add a savory, umami-rich flavor with minimal ingredients.
Avoid heavy sauces or anything overly wet. You want the crust to stay crisp and the garlic butter to remain the star.
Flavor Pairings Without Overpowering the Garlic
Balance is everything. If you decide to serve your garlic pizza bread alongside other dishes, pair it with foods that enhance rather than compete.
Consider these combinations:
- Roasted vegetables: Their mild sweetness complements the garlic crust.
- Grilled chicken (seasoned simply with herbs): Adds protein without dominating.
- Salads with vinaigrette: The acidity cuts through the richness of the butter.
Remember, gluten free dough can be more delicate, so don’t overload the base with moisture-heavy ingredients. Instead, use flavor-forward but lightweight toppings and sides.
Common Mistakes to Avoid When Making Gluten Free Pizza Garlic Bread
Using the Wrong Type of Gluten Free Flour
One of the biggest missteps when making gluten free pizza garlic bread is choosing the wrong flour blend. Not all gluten free flours are created equal. Using a basic all-purpose gluten free flour often results in a crumbly or dry texture, which is exactly what we don’t want.
Here’s what to avoid:
- Flour blends that don’t contain binders like xanthan gum or guar gum
- Rice flour used on its own (great for dusting but not as a dough base)
- Inconsistent flour blends with bean or coconut flour that can overpower flavor
Stick with a reliable option like Mulino Caputo Fioreglut, designed specifically for pizza. This flour gives a doughy, elastic feel close to traditional wheat dough, which is rare in gluten free baking.
Skipping Yeast Activation or Rushing the Rise
Gluten free dough depends heavily on yeast activity to create structure and softness. If your yeast isn’t properly activated, or if you cut short the proofing time, you’ll end up with dense, flat bread.
Be sure to:
- Use warm water, not hot—around 100°F (38°C) is ideal
- Let the yeast sit for at least 10 minutes until foamy
- Allow the dough to rise until visibly doubled, not just for a set amount of time
Skipping this step or baking too soon prevents the dough from developing those small air pockets that make the crust soft and chewy.
Overmixing or Over-Flouring the Dough
When mixing gluten free dough, it’s tempting to keep adding flour until it’s no longer sticky. But that often leads to a dry, stiff crust that doesn’t bake well.
Tips to avoid this:
- Don’t panic if the dough is slightly sticky
- Mix only until ingredients are combined and smooth
- Use extra flour only for dusting, not blending into the dough
A bit of tackiness is normal—it actually helps retain moisture through the bake and contributes to that chewy interior we’re aiming for.
Not Preheating the Oven or Cooking Surface
Whether you’re using a pizza oven or a home oven, a fully preheated surface is crucial. Putting the dough on a cold tray or under-heated stone prevents the bottom from crisping and can result in soggy, undercooked centers.
Always:
- Preheat the oven for at least 30 minutes
- If using a home oven, preheat both the oven and the tray
- For pizza ovens, check that the stone has reached 400°C before placing the dough
This one small step can drastically improve the texture of your final bake.
Forgetting to Rotate or Monitor the Bake
Pizza ovens, especially wood-fired ones, tend to have hot spots. Without rotation, one side might burn while the other stays underdone. Similarly, in a home oven, failing to monitor your bread can lead to over-baking or drying.
Avoid this by:
- Rotating your bread every 30 seconds in a pizza oven
- Checking doneness by looking for browned edges and bubbling garlic butter
- Letting it cool for 1–2 minutes before slicing to avoid tearing
These little adjustments ensure each batch comes out perfectly cooked with a beautiful golden finish.
Conclusion: Your Go-To Recipe for Irresistible Gluten Free Pizza Garlic Bread
Gluten free pizza garlic bread doesn’t have to be a compromise—it can be bold, satisfying, and just as comforting as its traditional counterpart. By using quality ingredients like Mulino Caputo Fioreglut flour, activating your yeast properly, balancing hydration, and baking at the right temperature, you’ll create a chewy, golden crust infused with rich, garlicky flavor in every bite.
Whether you’re using a high-heat pizza oven or a standard kitchen setup, this recipe adapts beautifully to your environment and dietary needs. With its flexible dough, customizable butter, and naturally gluten free base, it’s perfect for weeknight dinners, appetizers, or anytime you crave something warm, savory, and incredibly delicious.


