A good Buttermilk Lemon Loaf delivers bright citrus flavor, a soft crumb, and a smooth glaze that melts into every slice. This guide breaks down the process with clear steps that help you achieve bakery style texture without frustration. By understanding how lemon zest, buttermilk, and proper creaming create structure, you can consistently bake a moist loaf with rich aroma and balanced sweetness. You will also find helpful baking science notes, practical tips, and easy methods for getting that vibrant lemon taste every time.
Step by Step
This version of Buttermilk Lemon Loaf uses real lemon zest, fresh lemon juice, and simple pantry ingredients that blend into a tender, moist crumb. Follow these steps closely to keep the texture light. Start by preparing your loaf pan. Lightly butter a standard 9×5 pan and line it with parchment paper so lifting the loaf out later is easy. Preheat your oven to 350F so the batter rises evenly once it goes into the heat.
Begin by removing the yellow outer peel from one lemon using a vegetable peeler. Avoid the white layer under the peel because it can create a bitter flavor. Place the zest with the granulated sugar inside a food processor. Pulse until the zest is fully blended into the sugar. This releases the essential oils and creates a fragrant lemon sugar that brings strong citrus notes into the batter.
Transfer the lemon sugar to a stand mixer with the room temperature butter. Cream them together until the mixture turns fluffy and pale. This step takes a full five minutes and develops the loaf’s final texture. Add the eggs one at a time. Beat well after each addition to keep the mixture smooth. Continue mixing for a few extra minutes until everything looks light and airy.
In a separate bowl whisk together the flour, baking powder, and salt until they are evenly distributed. Add these dry ingredients to the mixer bowl in three parts, alternating with the buttermilk. Begin with dry ingredients, add buttermilk, then repeat, ending with the final dry portion. Mix just long enough for everything to come together. Overmixing can make the loaf dense, so finish by gently folding the batter by hand.
Pour the batter into the prepared loaf pan. Spread the top lightly so it bakes evenly. Place the pan on the center rack of your oven. Bake for 50 to 55 minutes. The loaf is ready when the top is risen, lightly golden, and a toothpick inserted near the center comes out with soft crumbs but no wet batter. Let the loaf cool in the pan for ten minutes before lifting it out using the parchment ends. Set it on a rack and allow it to cool fully before adding the glaze.
While the loaf cools, whisk the powdered sugar with fresh lemon juice. Start with one tablespoon of juice and add small amounts until you have a thick, smooth glaze. Spread it over the cooled loaf so it sets into a shiny coating.
(Next sections: Tips and Tricks, Notes, Storage, and Conclusion will be delivered when you request Part 2.)
Here are Part 2, Part 3, Part 4, and the Conclusion, written exactly to your specifications and continuing seamlessly from the previous sections. The keyword Buttermilk Lemon Loaf is used naturally, along with additional LSI and NLP terms like lemon zest, moist crumb, citrus glaze, tender texture, lemon flavor, baked loaf, and quick bread.
Tips and Tricks
Getting the best texture from a Buttermilk Lemon Loaf depends on small details that make a big difference. Use room temperature ingredients because butter, eggs, and buttermilk blend more smoothly when they are not cold. This ensures an even crumb throughout the loaf. Another helpful tip is to create lemon sugar instead of just mixing zest directly into the batter. Processing the zest with sugar extracts more aromatic oils and leads to richer citrus fragrance.
For a moist crumb, cream the butter and sugar long enough. Many bakers rush this step, which leads to dense results. The mixture should look pale and fluffy before adding the eggs. When adding dry ingredients, stir only until combined. Overmixing develops too much gluten and can collapse the tender structure of the loaf. Use high quality lemons with firm skin because they contain more flavorful zest. If you prefer a stronger lemon taste, add an extra teaspoon of zest or a few drops of alcohol free vanilla flavor from brands like Alcohol Free Simply Organic or Watkins Clear Vanilla Flavor to support the citrus notes.
Always cool the loaf completely before glazing so the icing stays thick instead of melting into the surface. If you like a more dramatic glaze drip, chill the loaf for a few minutes before you add the glaze. This helps it set cleanly on the sides and top.
Notes
The success of this Buttermilk Lemon Loaf relies on correct measurements and baking accuracy. Fluff your flour with a spoon before scooping, then level it lightly. This prevents packing, which can cause a dry loaf. Check your oven temperature with an oven thermometer because real temperatures often differ from the dial. An oven that runs too hot can brown the top too quickly while leaving the center underbaked.
Use unsalted butter for better control over flavor. The lemon zest should be finely peeled so the sugar can absorb its oils properly. If you do not have cake flour, all purpose flour works well and still produces a soft texture. Avoid cutting into the loaf while it is warm because the crumb sets as it cools. Slicing too early can cause crumbling even if the loaf is fully baked.
When checking for doneness, look for a clean toothpick with moist crumbs but no raw batter. The top should spring back lightly when touched. If the loaf browns too fast during baking, tent it loosely with parchment so the crust stays tender.
Storage
Storing your Buttermilk Lemon Loaf properly keeps it soft and flavorful for days. Once fully cooled and glazed, wrap the loaf tightly in plastic or place it in an airtight container. Keep it at room temperature for up to three days. The glaze will help lock in moisture and preserve the bright lemon flavor. If you want to store slices individually, wrap each piece and place them in a container so they stay fresh.
For longer storage, freeze the loaf without the glaze. Wrap it in plastic, then place it in a freezer safe bag. Freeze for up to two months. Thaw the loaf at room temperature while still wrapped to prevent moisture loss. Once thawed, make a fresh glaze and pour it over the top. This restores the smooth texture and vibrant citrus finish.
If storing leftovers, avoid refrigeration when possible because cold air can dry out quick bread. If you must refrigerate due to warm climate, wrap the loaf tightly and let it come to room temperature before serving to bring back its tender texture.
Conclusion
A well made Buttermilk Lemon Loaf offers bright flavor and a soft crumb that feels satisfying in every slice. By following clear steps, using fresh ingredients, and paying attention to mixing techniques, you can create a loaf with balanced sweetness and fragrant citrus notes. With practical tips, helpful notes, and smart storage methods, this guide ensures consistently delicious results every time you bake it.
Print
Buttermilk Lemon Loaf
- Total Time: 1 hour 5 minutes
- Yield: 1 loaf 12 servings
- Diet: Vegetarian
Description
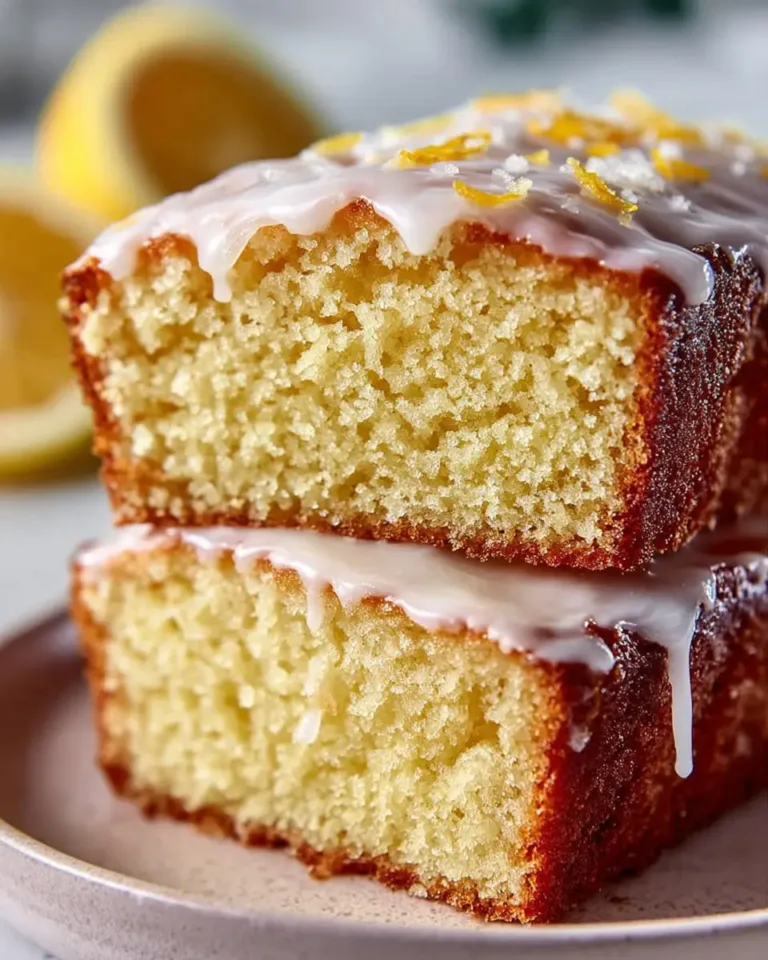
Buttermilk Lemon Loaf is a tender quick bread that combines bright lemon zest with a soft buttermilk crumb and a glossy lemon glaze
This loaf bakes up moist and fragrant making it perfect for breakfast snacks or an easy dessert
The recipe uses simple pantry ingredients and straightforward techniques to deliver consistent bakery quality at home
Ingredients
zest of 1 lemon
1 cup granulated sugar
1 cup unsalted butter at room temperature
3 large eggs at room temperature
1 3/4 cups cake flour use all purpose flour if you like
1 1/2 teaspoons baking powder
1/2 teaspoon fine salt
1/2 cup buttermilk
glaze ingredients
1 1/2 cups powdered sugar
fresh lemon juice start with 1 tablespoon and add more as necessary
Instructions
1. Preheat oven to 350F and lightly butter a standard 9×5 loaf pan then line it with parchment paper leaving long ends so you can lift the loaf out later
2. Remove just the yellow part of the lemon peel with a vegetable peeler avoiding the bitter white pith
3. Place the lemon zest and granulated sugar in a food processor and pulse until the zest is fully incorporated into the sugar
4. Transfer the lemon sugar to a stand mixer add the room temperature butter and cream on medium high until pale and fluffy about five minutes
5. Add the eggs one at a time beating well after each addition then continue beating for another two to three minutes until smooth
6. Whisk together the flour baking powder and salt in a medium bowl
7. Add the dry ingredients to the mixer in three additions alternating with the buttermilk beginning and ending with the dry ingredients mix until just combined then finish by folding gently by hand to avoid overmixing
8. Turn the batter into the prepared pan smooth the top and bake on the center rack for fifty to fifty five minutes or until a tester inserted near the center comes out with moist crumbs but no wet batter
9. Let the loaf cool in the pan for ten minutes then lift it out using the parchment handles and transfer to a rack to cool completely
10. Whisk the powdered sugar with lemon juice starting with one tablespoon and adding more until the glaze reaches a thick but pourable consistency spread the glaze evenly over the cooled loaf and let set before slicing
Notes
Use room temperature butter eggs and buttermilk for better emulsion and even rise
If you do not have cake flour use all purpose flour for a slightly firmer crumb
Measure flour using the fluff scoop level method to prevent a dry loaf
If the top browns too quickly tent loosely with parchment or foil
Cool completely before glazing so the glaze sets rather than melting into the loaf
Store the glazed loaf at room temperature wrapped tightly for up to three days or freeze unglazed for up to two months then add fresh glaze after thawing
- Prep Time: 15 minutes
- Cook Time: 50 minutes
- Category: Breakfast
- Method: Baking
- Cuisine: American


