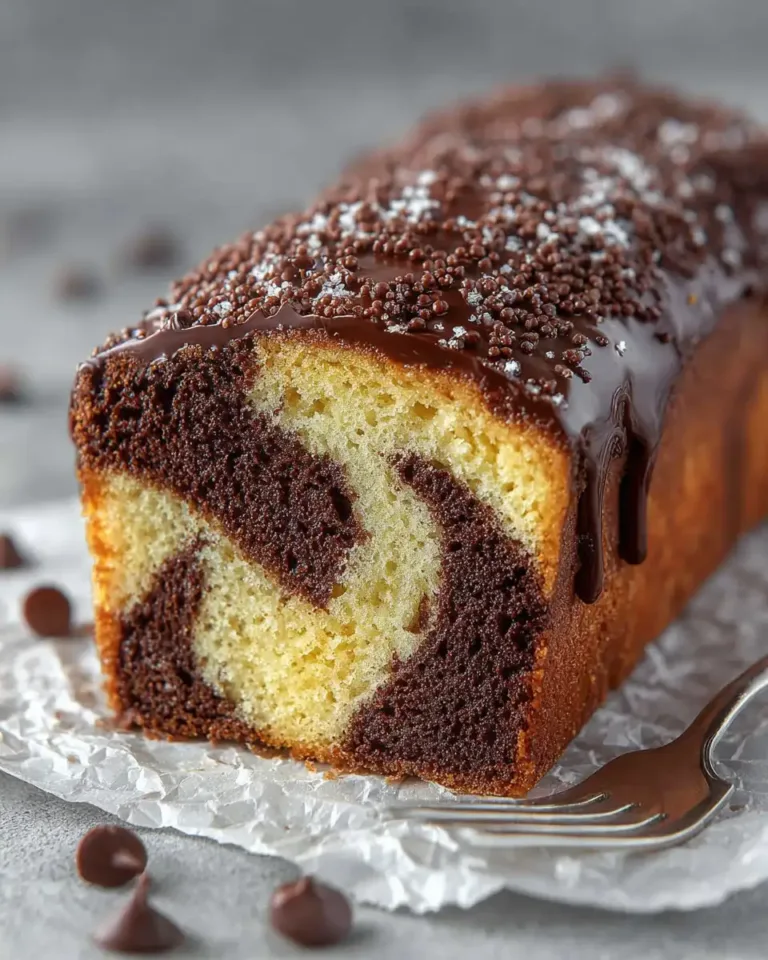
A perfectly baked Chocolate Marble Loaf is one of the most comforting treats you can make at home. Its soft vanilla base, swirled with rich cocoa ribbons, creates that classic marbled look while keeping every bite tender and balanced. This delightful loaf is simple enough for beginners yet satisfying for seasoned bakers who enjoy precision and technique. In this guide you will learn how to prepare the batter, mix the marble pattern correctly, and achieve a bakery level texture without dryness. With easy ingredients and clear steps you can enjoy a smooth baking experience while creating a loaf that slices beautifully and tastes even better the next day.
Step by Step
To make the ideal Chocolate Marble Loaf you first want to gather equipment that keeps the process efficient. A digital scale provides accurate measurements and an electric hand mixer helps you whip the butter and sugar into a pale creamy mixture. A rubber spatula will be used to combine the dry ingredients gently. A loaf pan lined with parchment paper gives the cake a clean release later and cooling it on a rack prevents steam from softening the crust.
Start by preparing your ingredients at room temperature since this helps them emulsify smoothly. Use unsalted butter that is soft but not oily. Granulated sugar adds structure while a teaspoon of alcohol free vanilla flavor such as Alcohol Free Simply Organic or Watkins Clear Vanilla Flavor enhances aroma. For the dairy component use plain whole milk yogurt from common American brands like Chobani or Fage which provide natural moisture without affecting the taste.
Crack three room temperature eggs into a bowl and whisk them lightly so they blend evenly when added to the creamed butter. In another bowl sift the dry ingredients for the vanilla batter. This includes flour, baking powder, and salt. In a separate bowl sift the flour, cocoa powder, baking powder, and salt for the chocolate batter. Keeping the dry mixes separate prevents the flavors from merging too early.
Place the softened butter and sugar into your mixing bowl. Beat them with your electric hand mixer for a few minutes until the mixture turns pale and fluffy. This aeration helps the loaf rise evenly. Add the eggs slowly while the mixer runs on low to medium speed. Adding them gradually prevents curdling. When the mixture looks smooth mix in the yogurt and vanilla until just combined.
Now divide the wet batter into two equal portions. Into the first portion fold the vanilla dry mixture using a rubber spatula. Keep your motions gentle to avoid deflating the batter. Into the second portion fold the chocolate dry mixture the same way. Once both batters are ready place each one into its own piping bag or use two large spoons if piping bags are not available.
Pipe or spoon alternating stripes of vanilla and chocolate batter into the prepared loaf pan. This method creates an even marbled pattern. To achieve the signature swirl take a clean knife and gently drag it through the batter in a zigzag pattern. Keep the movements light so the two batters stay distinct rather than blending into one color.
For an evenly split top apply a thin line of softened butter across the surface of the batter. Place the pan into a preheated oven set at 347 F. Bake for about 45 minutes or until a skewer inserted in the center comes out clean. Baking times can vary so always rely on the texture rather than the clock.
Near the end of baking prepare a simple syrup using equal parts water and granulated sugar. Warm the mixture over medium heat until the sugar dissolves and the liquid thickens slightly. When the loaf is done remove it from the oven and pour the warm syrup in stages over the surface. This step adds moisture and keeps the cake tender for several days. Let it rest in the pan for a short time then move it to a cooling rack to finish cooling. Once the loaf is fully cooled chill it for one hour if you plan to glaze it later.
Tips and Tricks
Mastering a Chocolate Marble Loaf is all about paying attention to small details that make a big difference in texture and flavor. Always begin with ingredients that are truly at room temperature since cold butter or eggs can cause the batter to separate. When beating butter and sugar make sure the mixture looks pale and airy as this step helps the loaf stay light. If the mixture appears dense give it a few more moments of mixing to incorporate more air.
Another helpful tip is to sift all dry ingredients. Sifting prevents clumps of cocoa or baking powder from showing up in the final loaf and it keeps the batter smooth. For the marbling technique avoid stirring too much once the chocolate and vanilla layers are placed in the pan. A single gentle swirl is usually enough to achieve a clean pattern. Too much motion blends the colors which creates a muddy appearance instead of defined lines.
If you want the loaf to rise evenly place a small amount of softened butter along the top before baking. This helps the cake split naturally through the center for a classic bakery style look. While baking keep your oven door closed during the first half of the baking time since sudden temperature drops may deflate the loaf. Use a digital oven thermometer to make sure your oven is heating accurately.
For a shinier glaze melt high quality chocolate slowly and stir often. When the chocolate reaches the correct temperature mix in the vegetable oil. Allow it to cool slightly before pouring so the glaze sets smoothly rather than running down the sides too quickly. Always glaze a completely chilled loaf to prevent the chocolate from melting on contact.
Notes
Consistent results come from understanding how each ingredient behaves. Butter with about eighty two percent fat creates a tender crumb and adds a richer flavor than lower fat versions. A good cocoa powder deepens the chocolate notes so choose one that is unsweetened and dark. For vanilla pick a clean tasting alcohol free product since it enhances the aroma without affecting the texture.
While preparing the batter switch from the mixer to a rubber spatula once you start adding the dry ingredients. This prevents overworking the gluten in the flour which can make the loaf tough. Fold gently until no dry streaks remain but avoid excessive mixing. When dividing the batter be sure each portion contains an equal amount so the cake bakes evenly from top to bottom.
When marbling keep in mind that the pattern is created by contrast. A single swirl through the batter with a knife is more than enough. Drag the knife lightly so the lines stay sharp. After baking test the loaf with a toothpick. It should come out clean with only a few moist crumbs. If it appears wet give the cake a few extra minutes in the oven.
For the glaze temperature control is essential. If the chocolate is too hot it becomes thin and coats unevenly. If it becomes too cool it thickens and leaves a wrinkled finish. A small infrared thermometer gun helps ensure accuracy. Always chill the loaf before glazing so the chocolate sets upon contact and forms a smooth surface.
Storage
Proper storage keeps your Chocolate Marble Loaf moist and flavorful for several days. Once the loaf is completely cool place it in an airtight container at room temperature. The syrup added after baking helps maintain moisture so the cake stays soft without drying out. If your kitchen is warm store the loaf in the refrigerator to preserve freshness.
If you have added a chocolate glaze refrigeration is especially helpful. The glaze stays firm and glossy when chilled. Before serving allow the loaf to sit at room temperature for a short time so the crumb softens slightly. When storing multiple slices layer parchment paper between them to prevent sticking.
For longer storage freeze the loaf without the glaze. Wrap it tightly in plastic wrap then place it inside a freezer safe bag. When ready to enjoy let the loaf thaw in the refrigerator. Add the glaze only after thawing for the best results. This method maintains both texture and flavor with minimal changes.
Conclusion
A well made Chocolate Marble Loaf combines the softness of vanilla cake with rich cocoa swirls in a way that feels both nostalgic and comforting. With careful mixing, gentle marbling, and proper temperature control you can achieve a loaf that rises evenly and stays moist for days. Simple techniques like sifting the dry ingredients, using room temperature components, and applying a warm syrup make all the difference. Whether enjoyed plain or topped with a smooth chocolate glaze this loaf delivers a tender crumb and a balanced flavor that suits any occasion.
Print
Chocolate Marble Loaf
- Total Time: 2 hours 15 minutes
- Yield: 6 servings
Description
A moist Chocolate Marble Loaf with tender vanilla crumb and rich cocoa ribbons that slice beautifully and stay soft for days This loaf uses simple pantry ingredients and a light syrup finish for extra moisture Perfect for slicing and sharing or serving with coffee
Ingredients
160 g unsalted butter room temperature soft
160 g granulated sugar
1 teaspoon alcohol free vanilla flavor Alcohol Free Simply Organic or Watkins Clear Vanilla Flavor
3 eggs room temperature
60 g plain whole milk yogurt Chobani or Fage room temperature
105 g all purpose flour for the vanilla part
3/4 teaspoon baking powder for the vanilla part
1/4 teaspoon fine salt for the vanilla part
80 g all purpose flour for the chocolate part
25 g unsweetened cocoa powder for the chocolate part
3/4 teaspoon baking powder for the chocolate part
1/4 teaspoon fine salt for the chocolate part
70 g water for the syrup
70 g granulated sugar for the syrup
250 g high quality dark chocolate or semi sweet chocolate for the glaze optional
38 g vegetable oil for the glaze
30 g roasted hazelnuts chopped for the glaze optional
Instructions
1. Gather equipment digital scale electric hand mixer rubber spatula loaf pan digital oven thermometer infrared thermometer gun cooling rack Preheat oven to 347 F and line a loaf pan with parchment paper or butter and flour it
2. Bring butter eggs and yogurt to room temperature Use unsalted butter that is soft but not oily and use plain whole milk yogurt such as Chobani or Fage
3. Sift flours baking powders salt and cocoa separately to remove lumps and aerate the dry ingredients
4. Beat butter and sugar with an electric hand mixer until pale and fluffy This takes a few minutes and adds air for a light crumb
5. Add eggs one at a time while the mixer runs on low to medium speed Mix until each egg is incorporated before adding the next
6. Mix in yogurt and alcohol free vanilla flavor then stop the mixer and switch to a rubber spatula to fold in dry ingredients
7. Divide the wet batter into two equal portions Into the first portion gently fold the vanilla dry mixture until no streaks remain
8. Into the second portion gently fold the chocolate dry mixture until evenly combined Keep folding motions light to avoid overworking the batter
9. Transfer each batter to a piping bag or use spoons Alternate piping or spooning vanilla and chocolate batters into the prepared loaf pan to create layers
10. Drag a knife through the batter in a single zigzag pattern to form the marble effect Avoid over mixing or the colors will blend into one tone
11. Smooth a very thin line of softened butter across the top of the batter to encourage an even rise and a bakery style split
12. Bake for about 45 minutes or until a skewer inserted in the center comes out clean Use a digital oven thermometer to confirm oven accuracy
13. While the loaf bakes make the syrup by heating water and sugar until the sugar dissolves and the mixture slightly thickens
14. When the loaf is done pour the warm syrup over it in stages allowing it to sink in Let the loaf cool in the pan briefly then transfer to a cooling rack
15. Chill the loaf for one hour in the refrigerator or fifteen minutes in the freezer before glazing if using a glaze
16. To make the glaze place high quality chocolate in a bowl and melt slowly Stir every 30 seconds in the microwave or use a bain marie Mix in vegetable oil when smooth then cool to about 77F before using
17. Stir chopped roasted hazelnuts into the glaze if desired Pour the glaze over the chilled loaf and return to the refrigerator briefly to set
18. Store the loaf in an airtight container at room temperature for 2 to 3 days or refrigerate if your kitchen is warm
Notes
All ingredients should be at room temperature for smooth emulsification Use unsalted butter at about 82 percent fat for best texture and flavor
Sift the dry ingredients to prevent lumps and to keep the batter smooth
Switch from mixer to rubber spatula when folding in dry ingredients to avoid developing gluten which makes the loaf tough
Do not over mix the marble pattern One gentle swirl is enough to preserve clear contrast between vanilla and chocolate
Use a digital oven thermometer and focus on texture not time The skewer test is the most reliable indicator of doneness
Always chill the loaf before glazing Warm loaf will melt the glaze and prevent a smooth finish
The syrup keeps the loaf moist Do not skip it If storing in the freezer do not freeze with the glaze wrap tightly then thaw in the refrigerator before glazing
- Prep Time: 30 minutes
- Cook Time: 45 minutes
- Category: Dessert
- Method: Baking
- Cuisine: American


