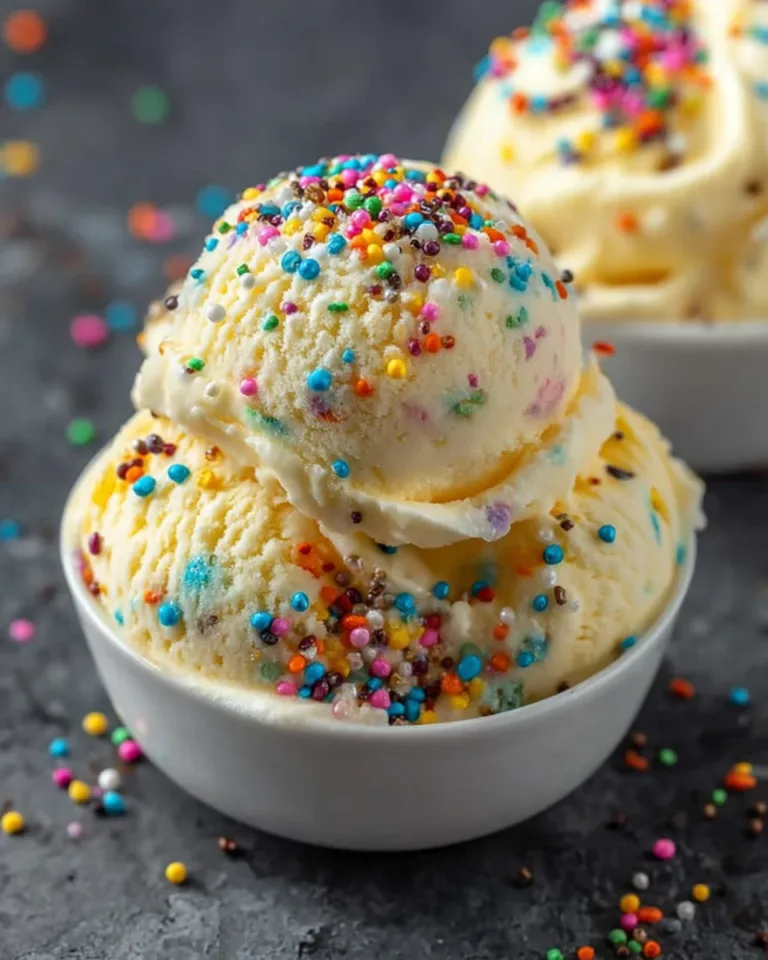
Protein ice cream has quickly become a favorite treat for anyone who wants a creamy frozen dessert with a nutritious twist. This updated version keeps the classic texture you love while adding more protein and reducing sugar. It is easy to make at home and flexible enough to customize to your taste. Whether you want a post workout dessert or a guilt free nighttime snack this protein ice cream delivers rich flavor and a smooth consistency without unnecessary additives.
Step by step
Making protein ice cream at home is much easier than many people think. The key is mastering the blend and the freezing process so the texture stays creamy instead of icy. Begin by placing a deep loaf pan in the freezer. This helps the mixture chill faster and ensures the ice cream sets evenly. Coconut milk is your base because it adds richness and gives the ice cream a naturally silky texture. Make sure your cans are chilled ahead of time so the milk thickens properly. Once ready open the cans and add the coconut milk to a blender or food processor. Blend for a few seconds until smooth and uniform.
Next add your protein powder. You can use whey protein isolate plant based protein or casein depending on the flavor and thickness you prefer. A neutral or vanilla flavored protein works best because it gives the ice cream a classic taste that pairs well with toppings. Add allulose or dates to sweeten the mixture gently without overpowering the creamy flavor. Blend again. The goal is to achieve a thick luxurious texture that resembles soft serve before freezing. If you add extra scoops of protein powder blend a bit longer since additional powder can make the mixture denser.
Once everything is creamy pour the mixture into your pre chilled loaf pan. Spread it out evenly using a spatula. The next step is crucial for preventing ice crystals. For the first hour freeze the ice cream and stir it lightly every 20 minutes. These small mixes help break up forming ice shards and keep the texture smooth and scoopable. After the first hour let the ice cream freeze without interruption until firm. When you are ready to serve remove the pan from the freezer and let it sit for 10 to 15 minutes. This short thawing time makes scooping easier. Wet the scoop lightly with water to achieve smooth even servings.
To enjoy it soft serve style let it thaw longer until it reaches your preferred consistency. This version melts beautifully because of the balanced combination of protein and coconut milk. Not only is it delicious but it is also filling thanks to the protein content that keeps you satisfied. This recipe is perfect for anyone who wants a nutritious dessert that still feels indulgent.
Tips and tricks
For extra creaminess use full fat canned coconut milk that has been chilled properly. Avoid cartons because they are too watery. A high quality blender ensures the texture stays silky and avoids clumps of protein powder. If you want a chocolate version simply add unsweetened cocoa powder to the mixture. For a fruit swirl blend raspberries or strawberries separately then fold them into the mixture just before freezing. Add alcohol free vanilla flavor for a warm sweet aroma that boosts the overall taste. You can also experiment with flavor boosts like cinnamon peanut butter powder or espresso. If your ice cream turns icy it usually means it froze too long without stirring so stick to the early mixing intervals.
Notes
If you prefer extra protein you can increase the amount to four scoops as long as you blend well. Using dates creates a natural caramel like sweetness that pairs perfectly with coconut milk. Store leftovers in a tightly covered container to preserve texture. If the ice cream becomes icy let it thaw slightly and give it a quick re blend to restore a soft serve consistency. For mix ins add chopped nuts chocolate chips or fruit pieces near the end of the blending process so they stay evenly distributed. This recipe is versatile and works with most protein powders whether dairy based or plant based.
Storage
Store protein ice cream in the freezer in an airtight container for up to five days. For best results place plastic wrap gently on the surface of the ice cream before covering the container to reduce air exposure. If it hardens too much let it sit at room temperature for several minutes before scooping. Avoid refreezing once it has thawed fully because it may become grainy. When stored properly the ice cream keeps its rich flavor and smooth texture. To enjoy it later in a soft serve style simply re blend a portion with a splash of coconut milk until it reaches the perfect consistency.
Conclusion
Protein ice cream is an easy and refreshing way to enjoy a creamy dessert with added nutritional benefits. With a simple base and customizable flavors this recipe fits into any routine whether you want a post workout treat or a daily frozen snack. Enjoy its rich texture natural sweetness and satisfying protein content as part of your weekly meal rotation.

Protein ice cream
- Total Time: 1 hour 5 minutes
- Yield: 16 servings
Description
Creamy protein ice cream made with coconut milk, protein powder, and a light sweetener for a smooth, frozen treat that is easy to customize.
Ingredients
28 ounces canned coconut milk chilled
1 cup protein powder
1 to 2 tablespoons allulose
1 teaspoon alcohol free vanilla flavor such as Alcohol Free Simply Organic or Watkins Clear Vanilla Flavor
Instructions
1. Place a large deep loaf pan or deep pan in the freezer.
2. Add the coconut milk to a blender and blend until smooth and creamy.
3. Add the protein powder and allulose or dates then blend until a thick and creamy texture forms.
4. Transfer the mixture to the loaf pan and spread evenly.
5. Mix lightly every 20 minutes for the first hour to reduce iciness.
6. Freeze until firm.
7. Thaw for 10 to 15 minutes before scooping.
8. Wet the scoop lightly for smooth servings.
9. For soft serve texture let it thaw longer until it reaches your preferred consistency.
Notes
You can increase the protein powder to four scoops but blend longer for smoothness.
One half cup Medjool dates can be used instead of allulose.
Store covered in the freezer for up to five days.
Avoid refreezing once it has thawed.
If it becomes icy re blend for a soft serve consistency.
- Prep Time: 5 minutes
- Cook Time: 0 minutes
- Category: Dessert
- Method: No cook
- Cuisine: American


