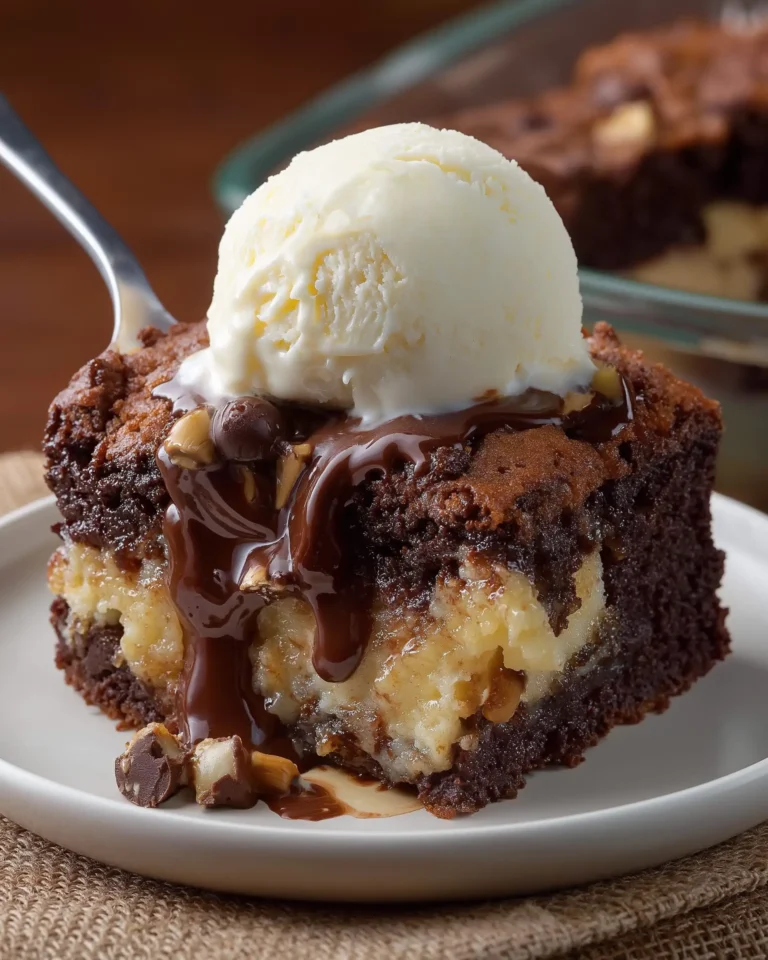
Reese’s Peanut Butter Earthquake Cake is a rich, gooey dessert that layers fudgy chocolate cake, creamy peanut butter filling, and chopped peanut butter cups to deliver an indulgent treat. The contrast between the chocolate cake base and the peanut butter swirl creates an “earthquake” effect when you bake it — the peanut butter mixture bubbles, seeps, and melds into the cake to give pockets of sweet, creamy flavor in every bite. Whether you enjoy it warm with a scoop of vanilla ice cream or at room temperature for dessert, this cake satisfies any sweet tooth. Its easy preparation using a boxed cake mix makes it accessible, yet it feels like something special because of the peanut butter filling and candy mix‑ins. Below I will show you how to make it, with all ingredients safe for general consumption in the United States, avoiding anything that might be doubtful.
Ingredients & Safety Check
Here are all the ingredients you will need to make Reese’s Peanut Butter Earthquake Cake. After that I include a check for any doubtful or unsafe items and the replacements, so you can bake confidently.
Ingredients
- 1 box chocolate cake mix (plus the eggs, oil, and water required on the box)
- ½ cup butter, softened
- 8 oz cream cheese, softened
- ½ cup creamy peanut butter
- ½ teaspoon alcohol‑free vanilla flavor (brand examples: Simply Organic Clear Vanilla Flavor or Watkins Clear Vanilla Flavor)
- 3½ to 4 cups powdered sugar
- ½ cup semi‑sweet chocolate chips
- 1 cup chocolate peanut butter cups, halved (use ones certified safe, see note)
Safety / Doubtful Ingredient Check & Replacements
I reviewed this recipe for any ingredient that could be questionable. None of the basic ingredients are inherently non‑permissible, but some commercial products sometimes use additives or processing agents that might introduce doubt. To avoid that, here is what to use:
- Vanilla flavor: Use an alcohol‑free vanilla flavor instead of standard vanilla extract (which often contains alcohol). Brands like Simply Organic Clear Vanilla Flavor or Watkins Clear Vanilla Flavor work well.
- Peanut butter cups / chocolate candy mix‑ins: Choose peanut butter cups (or chocolate candies) that are produced without alcohol or gelatin from non‑permissible sources. Many mainstream brands are fine, but check the label for halal‑friendly certification or look for one that explicitly states alcohol or gelatin free.
- Chocolate chips and cake mix: Check labels to ensure no alcohol or gelatin or animal rennet in any additives; most semi‑sweet chocolate chips are safe but always read.
- All other ingredients (butter, cream cheese, peanut butter, powdered sugar) are standard dairy, sugar, and fat items; these are generally acceptable.
Step-by-Step Preparation Guide
Creating this gooey, chocolatey peanut butter cake is easier than it looks. The process involves preparing the chocolate cake base, mixing the peanut butter swirl, and combining it all for the perfect “earthquake” effect in the oven.
Preparing the Cake Base
Start by preheating your oven to 350°F. Lightly grease a 9×13-inch cake pan with butter or baking spray to ensure easy release after baking. Prepare the chocolate cake mix according to the package instructions. Most boxed mixes require a combination of eggs, water, and oil — just follow the quantities listed. Once the batter is ready, pour it into the greased cake pan. At this stage, do not bake it. Set the pan aside while you make the peanut butter cream mixture.
Using a boxed cake mix simplifies the process and ensures consistent results. Choose a high-quality brand with no artificial flavorings or alcohol-based additives. If you’re aiming for a denser, fudgier texture, consider using less water or adding a tablespoon of instant espresso powder for depth without overwhelming the peanut butter notes.
Making the Peanut Butter Cream Layer
In a mixing bowl, melt the butter on the stovetop until bubbly, then pour it into a larger bowl. Add the softened cream cheese and beat until smooth and creamy. Mix in the peanut butter and the alcohol-free vanilla flavor. Beat the mixture again until fully combined.
Now slowly add the powdered sugar, one cup at a time. Beat thoroughly after each addition to make sure the sugar is fully absorbed and the mixture becomes fluffy and smooth. This peanut butter layer will act as the rich, creamy counterpart to the chocolate base. It’s thick enough to hold its shape in the oven but soft enough to melt and swirl into the cake during baking, creating those signature “cracks” and pockets.
Assembling and Baking
Once your two main mixtures are ready, it’s time to put everything together in the pan. This step is where the cake begins to take on its unique texture and visual appeal.
Swirling the Layers Together
Using a spoon or scoop, drop large dollops of the peanut butter mixture onto the unbaked chocolate cake batter in the pan. There’s no need to be precise — the more random the placement, the better. The goal is to create an uneven distribution that will bake into jagged, flavorful fault lines.
After all the peanut butter cream has been added, take a butter knife and gently swirl it into the chocolate batter. Don’t overmix. A few light swirls will allow the layers to stay distinct while giving that cracked, marbled look once baked. The batter should look like chocolate with thick veins of peanut butter cream cutting through it.
Topping and Baking
Sprinkle the top of the cake with semi-sweet chocolate chips and chopped chocolate peanut butter cups. These will melt into the surface during baking, creating gooey pools of candy goodness. If you like added texture, toss in a handful of chopped nuts like roasted peanuts or walnuts.
Place the pan in the preheated oven and bake for 45 to 55 minutes. The top should look set, but the center may still jiggle slightly — this is normal and part of the gooey texture. Avoid overbaking, as it can dry out the cream cheese layer and harden the peanut butter pockets.
Once baked, remove from the oven and let the cake cool for 15 to 20 minutes. This helps it set up enough for clean slicing without losing its molten texture.
Print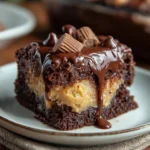
Reese’s Peanut Butter Earthquake Cake
- Total Time: 1 hour 5 minutes
- Yield: 20 servings
- Diet: Vegetarian
Description
This rich, gooey Reese’s Peanut Butter Earthquake Cake combines layers of chocolate fudge cake, creamy peanut butter filling, and chopped peanut butter cups into a molten, indulgent dessert.
Ingredients
1 box chocolate fudge cake mix (plus eggs, oil, water per instructions)
½ cup butter, softened
8 oz cream cheese, softened
½ cup creamy peanut butter
½ tsp alcohol-free vanilla flavor (e.g., Simply Organic or Watkins)
3½ to 4 cups powdered sugar
½ cup semi-sweet chocolate chips
1 cup chocolate peanut butter cups, halved
Instructions
1. Preheat oven to 350°F. Lightly grease a 9×13-inch cake pan.
2. Prepare the cake mix according to the package directions, pour into pan. Do not bake.
3. Melt the butter, then mix with softened cream cheese until smooth.
4. Add peanut butter and alcohol-free vanilla flavor. Mix until smooth.
5. Gradually beat in powdered sugar until mixture is fluffy and thick.
6. Spoon dollops of peanut butter mixture over the cake batter in the pan.
7. Swirl lightly with a knife. Top with chocolate chips and peanut butter cups.
8. Bake for 45–55 minutes or until center is slightly jiggly.
9. Cool for 15–20 minutes before slicing. Serve warm or chilled.
Notes
For best results, use alcohol-free vanilla flavor.
Serve warm with vanilla ice cream for a decadent treat.
Cake stores well refrigerated for up to 5 days or frozen up to 2 months.
- Prep Time: 15 minutes
- Cook Time: 50 minutes
- Category: Dessert
- Method: Baking
- Cuisine: American
Serving Suggestions and Customizations
While this cake is delicious on its own, how you serve it can elevate the entire dessert experience. The flexibility of the base recipe also allows for creative adjustments to suit different tastes or dietary preferences.
How to Serve It Best
This cake is at its best when served slightly warm. After it cools for 15 to 20 minutes, the peanut butter and cream cheese filling remains soft, and the melted chocolate bits are still gooey. It slices more cleanly than when piping hot but retains that rich, molten effect.
For an extra indulgent treat, add a scoop of vanilla ice cream on top of each slice. The contrast between warm cake and cold ice cream makes every bite rich and comforting. You can also drizzle a touch of chocolate syrup or peanut butter sauce over the top for added flair.
If you prefer a firmer texture, refrigerate the cake and serve it chilled. The flavor intensifies and the filling becomes denser, almost like a fudge brownie.
Customization Ideas
This recipe works well as a base for other chocolate-peanut butter combinations. Here are a few ways to change things up:
- Add Crunch: Mix in chopped roasted peanuts, crushed pretzels, or crispy cereal for texture.
- Swap the Chips: Use white chocolate chips, dark chocolate chunks, or even butterscotch morsels.
- Try Nut Alternatives: If peanut butter isn’t your thing, almond butter or sunflower seed butter can offer a different but equally creamy twist.
- Healthier Options: Substitute part of the butter with coconut oil, or use reduced-fat cream cheese. You can also experiment with natural peanut butter, though it may result in a slightly oilier filling.
With these adjustments, you can make a new version of the cake every time — still keeping that signature “earthquake” swirl and gooey center.
Storage, Shelf Life, and Make-Ahead Tips
One of the best things about this dessert is how well it stores. Whether you’re baking it for a weekend treat or prepping ahead for a gathering, this cake holds up beautifully over time.
Storing the Cake
Once cooled, cover the cake tightly with plastic wrap or store it in an airtight container. You can leave it at room temperature for up to 2 days. For longer storage, refrigerate it. In the fridge, the cake will keep for up to 5 days and still taste fresh.
If you want to preserve it for even longer, this cake freezes well. Wrap individual slices in foil or plastic wrap, then place them in a freezer-safe container. When you’re ready to enjoy, simply thaw a slice overnight in the fridge and microwave it for 10 to 15 seconds to bring back that gooey texture.
Make-Ahead Tips
To save time, you can prepare the peanut butter cream mixture up to 2 days in advance and refrigerate it. Let it soften for 15 to 20 minutes before using so it’s easier to scoop and swirl.
You can also assemble the entire cake, unbaked, and refrigerate it for a few hours before baking. Just make sure to bring the pan to room temperature before placing it in the oven. Baking from cold may require a slightly longer bake time, so check for doneness around the 55-minute mark.
Conclusion
Reese’s Peanut Butter Earthquake Cake combines the best of both dessert worlds — a rich, chocolatey base and a sweet, creamy peanut butter swirl that creates irresistible pockets of flavor with every bite. With easy-to-find ingredients, a forgiving recipe structure, and endless possibilities for customization, it’s no wonder this cake is becoming a favorite for home bakers across the U.S.
Its dramatic presentation, gooey texture, and bold chocolate-peanut flavor profile make it a showstopper at any gathering or a rewarding treat after dinner. Whether served warm with ice cream or cold from the fridge, this dessert never fails to impress.
Give this recipe a try, and you’ll see why people can’t stop talking about this cake. No fancy skills or special tools are required — just mix, swirl, and bake for a sweet treat that looks as good as it tastes.


