Creamy layers of peanut butter, chocolate, and a crunchy cookie crust come together in this irresistible no-bake peanut butter lasagna. This chilled dessert is perfect for anyone who loves rich flavors without spending hours in the kitchen. The best part is that you do not need to turn on the oven, making it easy to prepare on warm days or when you want a sweet treat without extra fuss. With its decadent combination of textures and flavors, this recipe is sure to impress family and friends at any gathering.
No-bake desserts have become increasingly popular because they save time and keep things simple. Unlike traditional baked cakes or pies, a dessert lasagna like this one uses layers of cookies, whipped topping, pudding, and a rich peanut butter cream to create a dish that feels indulgent yet approachable. Each spoonful delivers a blend of crunch, smoothness, and sweetness that makes it unforgettable.
This no-bake peanut butter lasagna is also versatile. You can prepare it in advance, store it in the refrigerator, and let the flavors meld together. It is ideal for parties, casual dinners, or anytime you crave a dessert that feels like comfort food but still looks polished on the table. In the sections below, we will break down the components of this dessert, explain how they work together, and provide detailed guidance so you can make it at home with confidence.
Why No-Bake Peanut Butter Lasagna Works So Well
A dessert lasagna might sound unusual at first, but the concept is simple. Just like savory lasagna uses layers of pasta, sauce, and cheese, this sweet version uses cookies, creamy fillings, and pudding. The result is a layered treat that slices beautifully and offers different textures in each bite. Understanding why this dessert works so well makes it even more enjoyable to prepare and serve.
The Magic of Layers
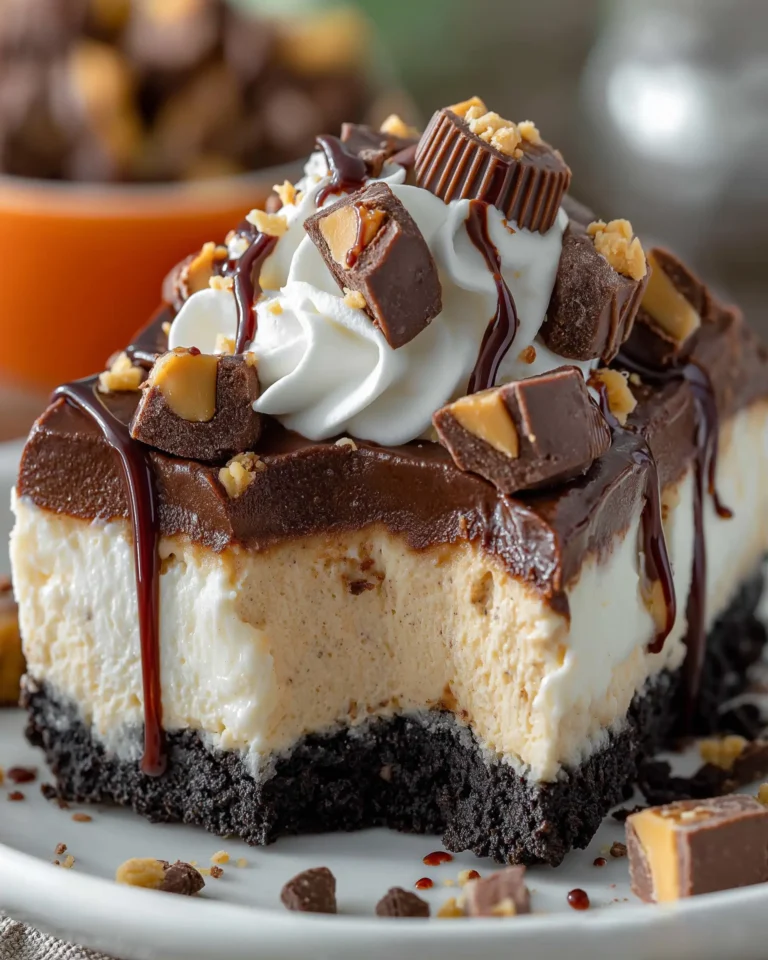
One of the reasons this recipe is so appealing is the layering technique. Each layer serves a specific purpose and contributes to the overall balance. The Oreo crust creates a sturdy base with a delightful crunch. The peanut butter cream adds richness and depth, offering a salty-sweet contrast that complements the chocolate pudding. The pudding itself provides smoothness and ties the flavors together, while the whipped topping lightens the dessert, preventing it from feeling too heavy.
The layering also makes every slice visually striking. You see defined sections of dark crust, tan peanut butter filling, chocolate, and fluffy white topping. It looks elegant without requiring advanced decorating skills, making it achievable for home cooks of all levels.
A No-Bake Advantage
The no-bake element cannot be overstated. Many traditional desserts require baking, cooling, and sometimes complex techniques. With this recipe, the hardest part is waiting for the dessert to chill in the refrigerator. The crust sets quickly in the freezer, the pudding thickens without cooking, and the whipped layers come together in minutes. This means you can assemble the dessert in about 20 minutes, then let time in the fridge do the rest of the work.
Another benefit is flexibility. Since there is no baking involved, you do not have to worry about overcooking or undercooking. The dessert is forgiving and allows for minor adjustments in ingredients or proportions without ruining the outcome. For example, if you want a thicker peanut butter layer, you can slightly increase the amount of peanut butter or cream cheese without affecting the structure.
Print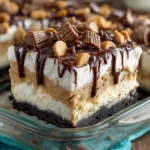
No-Bake Peanut Butter Lasagna Recipe
- Total Time: 3 hours 20 minutes
- Yield: 12 servings
- Diet: Vegetarian
Description
This no-bake peanut butter lasagna is a creamy layered dessert with an Oreo crust, peanut butter filling, chocolate pudding, whipped topping, and candy garnishes. Perfect for an easy make-ahead treat.
Ingredients
Crust:
36 Oreo cookies
1/3 cup melted butter
Peanut Butter Layer:
8 ounces cream cheese, softened
1 cup creamy peanut butter
1 cup powdered sugar
1/4 cup milk
1 1/2 cups whipped topping
Chocolate Layer:
2 boxes instant chocolate pudding mix (3.4 ounces each, 4-serving size)
2 3/4 cups milk
Topping:
Whipped topping
Mini peanut butter cups, chopped
Peanut butter chips
Chocolate syrup (optional)
Instructions
1. Finely crush Oreo cookies in a food processor and mix with melted butter. Press into a 9×13 inch dish. Freeze while preparing the filling.
2. Beat cream cheese, milk, and peanut butter until fluffy. Add powdered sugar gradually. Fold in whipped topping gently. Spread over the crust and freeze again.
3. Mix pudding mix with milk until thick. Spread evenly over the peanut butter layer. Refrigerate for 5 minutes.
4. Top with whipped topping, chopped peanut butter cups, peanut butter chips, and chocolate syrup if desired.
5. Chill in the refrigerator for at least 3 hours before serving.
Notes
Use creamy peanut butter for a smooth texture.
Refrigerate leftovers for up to 3 days.
For neat slices, dip a sharp knife in warm water before cutting.
- Prep Time: 20 minutes
- Cook Time: 0 minutes
- Category: Dessert
- Method: No-Bake
- Cuisine: American
Building the Perfect Oreo Crust
Every good dessert lasagna begins with a strong foundation, and for this recipe, that foundation is the Oreo crust. The crust provides crunch, structure, and just the right amount of chocolate flavor to balance the creamy layers on top. Without a solid crust, the dessert could feel flat or overly soft, so this step is essential.
Why Oreos Make the Best Base
Oreos are a classic choice for no-bake crusts because they bring more than just chocolate. Their slightly bitter cocoa flavor enhances the sweetness of the peanut butter and pudding layers, creating a more balanced dessert. Unlike plain cookies, Oreos contain a creamy filling that melts into the crust mixture when blended with butter. This gives the base a richer taste and ensures that it binds together firmly.
The crust in this recipe calls for finely crushed cookies mixed with melted butter. The butter works like glue, holding the crumbs together once chilled in the freezer. This simple combination creates a crust that can stand up to the creamy fillings without crumbling apart when sliced.
Tips for a Strong and Flavorful Crust
The process is straightforward, but a few small adjustments can make a big difference in the final result. Here are some tips to get the perfect Oreo crust every time:
- Crush the cookies finely – Use a food processor to grind the Oreos until they resemble sand. Larger chunks can make the crust uneven and cause gaps when pressed into the dish.
- Distribute the butter evenly – Make sure the melted butter is stirred thoroughly into the cookie crumbs so every part of the crust holds together. If some areas are too dry, they may crumble when you slice the dessert.
- Press firmly into the pan – Use the bottom of a flat measuring cup or glass to press the mixture into the baking dish. A firm press ensures the crust will set evenly without weak spots.
- Chill before layering – Freezing the crust for at least 10 minutes gives it a solid base. This step is crucial, since adding the soft peanut butter mixture on top of a warm or loose crust can cause it to break apart.
The Oreo crust is more than just a base. It sets the stage for the peanut butter and chocolate layers, giving each bite a satisfying texture that contrasts beautifully with the smooth fillings. When done correctly, it adds both flavor and structure, making the dessert easy to slice and serve without falling apart.
The Creamy Peanut Butter Layer
If the crust is the backbone of no-bake peanut butter lasagna, then the peanut butter layer is its heart. This creamy, dreamy filling provides the unmistakable nutty flavor that makes this dessert unforgettable. It is rich yet airy, sweet but slightly savory, and it bridges the crunchy base with the smooth chocolate pudding layer.
The Role of Cream Cheese and Peanut Butter
This layer begins with softened cream cheese, which adds tang and structure. Cream cheese prevents the filling from being overly sweet and helps it firm up just enough to hold its shape when sliced. When combined with peanut butter, it creates a balance of flavors: the cream cheese brings lightness, while the peanut butter delivers richness and depth.
Creamy peanut butter is the best choice for this recipe. Chunky peanut butter, while delicious on toast, can disrupt the smooth texture of the dessert and make slicing uneven. A smooth, spreadable peanut butter blends seamlessly with the cream cheese and powdered sugar, ensuring every bite feels velvety and indulgent.
Whipped Topping for Lightness
The real secret to this layer’s irresistible texture is the whipped topping. By folding it gently into the peanut butter and cream cheese mixture, you introduce airiness that prevents the filling from becoming too heavy. This light touch balances the dense Oreo crust and makes the dessert feel more like a mousse than a solid block of peanut butter.
A little milk is also included in the mix, loosening the consistency and making it easier to spread over the crust. The result is a silky filling that sets beautifully in the freezer while remaining easy to slice.
Tips for the Best Peanut Butter Layer
- Use room-temperature cream cheese – Cold cream cheese can create lumps that are hard to smooth out. Let it sit out for a bit before mixing.
- Blend gradually – Start by mixing the cream cheese and peanut butter until fluffy, then add powdered sugar slowly to avoid clumps.
- Fold, don’t whip – When incorporating whipped topping, fold it in gently with a spatula rather than whisking or beating. This keeps the mixture light and airy.
This peanut butter layer is what transforms a simple cookie and pudding dessert into something truly special. It not only carries the star flavor of the dish but also creates a creamy buffer between the crust and the pudding, ensuring each bite is balanced and satisfying.
The Silky Chocolate Pudding Layer
Once the peanut butter filling is in place, it is time to add another showstopper, the chocolate pudding layer. This part of the no-bake peanut butter lasagna provides contrast in both color and taste. It is silky, sweet, and slightly bitter, which balances the richness of the peanut butter cream. Without it, the dessert would feel incomplete, but with it, every bite feels harmonious.
Why Chocolate Pudding Works So Well
Chocolate pudding has a natural ability to bring comfort and satisfaction. In this recipe, it adds moisture and creaminess, preventing the peanut butter layer from being too dense. Because pudding is softer than the peanut butter cream, it seeps slightly into the layer below, creating a luscious transition rather than a sharp divide. This makes each spoonful feel like a perfectly blended combination of flavors rather than separate elements stacked on top of one another.
Instant pudding mix makes this process quick and reliable. Instead of spending extra time cooking and cooling pudding from scratch, you can simply whisk together the mix with milk. The trick here is using less milk than the package suggests, which ensures the pudding turns out thicker than usual. This slight adjustment gives the layer structure, helping the lasagna hold together when sliced.
Tips for Making the Chocolate Layer
- Use cold milk – Cold milk helps the pudding set faster and creates a smoother texture.
- Whisk thoroughly – Stir the pudding until no lumps remain. A smooth mixture will spread more evenly over the peanut butter layer.
- Let it rest briefly – Allowing the pudding to thicken for a few minutes before spreading makes it easier to control and prevents it from running into the edges of the dish.
When spread over the peanut butter layer, the chocolate pudding forms a glossy, dark section that looks as good as it tastes. It also introduces a comforting chocolate flavor that enhances the overall profile of the dessert without overshadowing the nutty filling. The combination of peanut butter and chocolate has always been a winning pair, and here, it shines in every bite.
This layer also sets the stage for the finishing touches. Once it firms up in the refrigerator, it provides a smooth surface for whipped topping and garnishes, making the dessert look polished and ready for serving.
Finishing Touches with Toppings and Presentation
The final layer of no-bake peanut butter lasagna is where you can have fun with creativity. Once the crust, peanut butter filling, and chocolate pudding are set, the whipped topping and garnishes transform the dessert into something eye-catching and irresistible. This step is not just about flavor, but also about presentation and texture.
The Role of Whipped Topping
The last layer of whipped topping acts like a soft blanket, giving the lasagna a smooth, snowy finish. It lightens the overall appearance and creates a creamy contrast to the darker layers underneath. Whipped topping also adds a mild sweetness that complements the stronger flavors of peanut butter and chocolate without overwhelming them.
When spreading the topping, use a spatula to create a clean, even layer. For a more decorative touch, you can pipe it on with a pastry bag, making swirls or patterns that elevate the look of the dessert.
Garnishes that Make It Special
This dessert becomes truly memorable with its finishing touches. Small chocolate candies, peanut butter chips, and a drizzle of chocolate syrup add both beauty and texture. They also hint at the flavors waiting inside. Chopped mini peanut butter cups scattered over the top create pops of color and an extra dose of indulgence.
If you prefer a slightly less sweet version, you can reduce the amount of candy topping and rely on a light drizzle of chocolate sauce instead. For added crunch, consider sprinkling crushed cookies or chopped nuts on top. The key is balance: a little goes a long way in making the dessert look polished while enhancing its taste.
Serving and Storage
Once topped, the lasagna needs at least three hours in the refrigerator to firm up properly. This waiting time allows all the layers to set, making it easy to slice and serve without collapsing. For neat slices, use a sharp knife dipped in warm water and wipe clean between cuts.
Leftovers store well in the refrigerator for up to three days, maintaining their creamy texture and flavor. The dessert can also be frozen if you want to prepare it well in advance. Simply thaw in the fridge before serving.
The toppings may seem like the smallest part of the recipe, but they are the finishing detail that turns a simple layered dessert into a showpiece. With a little creativity, you can customize the appearance and flavor to suit any occasion, making it as playful or elegant as you like.
Conclusion: A Dessert Worth Savoring
No-bake peanut butter lasagna is more than just a dessert, it is an experience. Each layer contributes something unique, from the crunchy Oreo crust to the creamy peanut butter filling, silky chocolate pudding, fluffy whipped topping, and irresistible garnishes. Together, they create a dish that is both indulgent and approachable, perfect for sharing with family and friends.
What makes this recipe truly special is how easy it is to prepare. With no oven required, simple steps, and readily available ingredients, anyone can master it. The chilling process does most of the work, leaving you free to enjoy the anticipation of slicing into the layered masterpiece.
This dessert also offers versatility. You can adjust toppings to your taste, prepare it ahead of time for convenience, and store leftovers without losing quality. It is a recipe that invites creativity while guaranteeing delicious results.
If you are searching for a dessert that delivers comfort, elegance, and unforgettable flavor in every bite, no-bake peanut butter lasagna is the answer. Its creamy layers and balanced flavors make it a treat worth savoring again and again.


