If you’re searching for a healthy, gluten-free, and low-carb alternative to traditional pizza dough, then this cauliflower pizza crust recipe will become your new kitchen favorite. It’s crispy on the edges, soft in the center, and sturdy enough to hold your favorite toppings. Made with just a handful of simple ingredients like cauliflower, egg, and cheese, this crust is perfect for anyone wanting a lighter take on pizza night. Whether you’re watching your carbs, going grain-free, or simply want to sneak more veggies into your meals, this recipe checks all the boxes.
In this guide, we’ll break down the process into five key parts. From preparing the cauliflower to baking a perfectly crisp crust and adding your own toppings, each section will guide you step by step with helpful tips and variations. Let’s begin with the foundation—prepping the cauliflower the right way.
Preparing the Cauliflower for the Crust
Choosing the Right Cauliflower
The first and most important step is selecting the right kind of cauliflower. A medium to large head, around 2.5 pounds, is ideal for one large crust. You can also use frozen cauliflower or pre-packaged cauliflower rice to save time. If you’re using fresh, make sure the head is firm, tight, and free from dark spots or mold.
Fresh cauliflower gives the best texture, but frozen works just as well with proper preparation. Remember, the key is removing excess moisture.
Ricing the Cauliflower
Once you’ve selected your cauliflower, rinse it under cold water, remove the outer leaves, and cut it into medium-sized florets. Place these florets into a food processor in small batches. Pulse until the cauliflower resembles the texture of rice. Avoid over-processing, as this can turn the mixture into mush, which will make your crust soggy.
If you’re working with store-bought cauliflower rice, skip this step. For frozen cauliflower, let it cook directly from frozen as outlined below.
Cooking the Cauliflower Rice
Now it’s time to cook the riced cauliflower to reduce moisture further. Preheat your oven to 375 degrees Fahrenheit and spread the riced cauliflower onto a lined baking sheet. Bake for 15 minutes until it steams and softens. You can also use the microwave—place the rice in a microwave-safe bowl and cook for 8 minutes.
Let the cooked cauliflower cool for about 10 to 15 minutes. It should be safe to touch but still warm. This step is critical—don’t skip the cooling time, or you’ll burn your hands when squeezing.
Removing Excess Water
This is where many cauliflower crust recipes fall short. Wrap the cooled rice in a cheesecloth or a clean linen towel. Twist and squeeze as hard as you can to extract all excess liquid. Don’t rush—this step takes 3 to 4 minutes of steady pressure. You want to remove around 1½ cups of water. The drier the cauliflower, the crispier the crust.
Your hands might be sore afterward, but this effort is what gives the crust its structure and keeps it from being soggy. This single step is the secret to success.
Print
Cauliflower Pizza Crust Recipe
- Total Time: 1 hour
- Yield: 8 slices
Description
A healthy, gluten-free, and low-carb cauliflower pizza crust that’s crispy, cheesy, and perfect for any topping.
Ingredients
2.5 pounds cauliflower (medium-large head) or 2 x 12–16 oz cauliflower rice
1 large egg
1/2 cup Cabot Parmesan cheese or Tillamook cheese or mozzarella cheese, grated or shredded
1 teaspoon Italian seasoning (or mix of dried oregano and basil)
1/8 teaspoon salt
1/4 teaspoon ground black pepper
Cooking spray
Instructions
1. Preheat oven to 375°F and line a baking sheet with parchment paper.
2. Rinse cauliflower, remove outer leaves, separate into florets, and chop. Process in a food processor into rice-like texture.
3. Transfer riced cauliflower to the prepared baking sheet and bake for 15 minutes, or microwave in a bowl for 8 minutes.
4. Cool slightly, then transfer to a cheesecloth or linen towel and squeeze out excess moisture for 3–4 minutes.
5. Increase oven temperature to 450°F.
6. In a bowl, mix dried cauliflower with egg, cheese, seasoning, salt, and pepper.
7. Form into an 11-inch crust on a lined and sprayed baking sheet.
8. Bake for 20 minutes. Flip carefully and bake a few more minutes for extra crispiness.
9. Add toppings and bake again until cheese is melted and bubbly.
10. Cool slightly, slice, and serve.
Notes
Store leftovers in the fridge up to 2 days in an airtight container.
Freeze baked crusts for up to 3 months. Reheat at 400°F for 10 minutes before topping.
Always squeeze cauliflower well to remove as much moisture as possible.
Use cheesecloth or a clean towel to wring out the cooked cauliflower.
- Prep Time: 30 minutes
- Cook Time: 30 minutes
- Method: Baking
- Cuisine: American
Mixing the Dough and Forming the Crust
Bringing the Ingredients Together
Once your cauliflower is as dry as possible, it’s time to transform it into a dough. In a large mixing bowl, combine the following:
- 1 packed cup of well-drained cauliflower
- 1 large egg
- ½ cup grated Parmesan (Cabot Parmesan cheese or Tillamook brand) or shredded mozzarella cheese
- 1 teaspoon Italian seasoning (or a mix of dried basil and oregano)
- ⅛ teaspoon salt
- ¼ teaspoon ground black pepper
Using a silicone spatula or your hands, mix everything until fully combined. The mixture should be soft but not wet or sticky. It should hold together well when pressed. If it feels too wet, chances are there’s still too much moisture in the cauliflower, and you might need to squeeze it again.
Lining the Baking Surface
Preheat the oven to 450 degrees Fahrenheit. Take your baking sheet or pizza stone and line it with a fresh sheet of unbleached parchment paper. Lightly spray it with cooking spray to prevent sticking. Avoid using foil, as the crust tends to stick and tear when using it.
Shaping the Pizza Crust
Place the cauliflower dough onto the prepared baking sheet. Using your hands, press and flatten the dough into a circular pizza shape, about 11 inches in diameter. Try to keep the thickness uniform, around ¼ inch thick. Avoid creating thin edges—they can burn quickly. Instead, gently push the dough inward using your palms to reinforce the edges.
You’re not aiming for perfection here. A rustic, slightly uneven edge adds to the charm. The key is even thickness throughout, which ensures consistent baking.
First Bake – Setting the Structure
Now, bake the formed crust in the oven at 450 degrees Fahrenheit for 20 minutes. This initial baking helps the crust set and become firm enough to support toppings. After 20 minutes, check if the crust is holding well and the edges are slightly browned.
For extra crispiness, you can carefully flip the crust using a wide spatula and bake it for another 5 minutes. This step is optional but adds a great texture, especially for those who love a firm base.
Adding Toppings and Baking Your Pizza
Choosing Your Favorite Toppings
Now that your cauliflower crust is baked and sturdy, it’s time for the fun part—toppings. Because this crust is light and lower in fat, you can go all out with fresh, colorful ingredients.
Start with a sauce. A simple tomato-based sauce or a homemade marinara made with herbs, garlic, and olive oil pairs beautifully with this crust. Just be sure not to overdo it—too much sauce can make the crust soggy. About 2–3 tablespoons spread thinly should do the trick.
For cheese, mozzarella is a classic option, but feel free to mix in provolone, fontina, or a dairy-free blend if you prefer. Layer thinly sliced vegetables like mushrooms, spinach, zucchini, onions, or bell peppers. You can also add grilled chicken, shredded turkey, or tofu for added protein.
Keep in mind that too many toppings can weigh down the crust. Less is more when it comes to building the perfect cauliflower pizza.
Final Bake for Melting and Browning
Once your toppings are arranged, return the pizza to the oven. Bake at 450 degrees Fahrenheit for 5–7 minutes or until the cheese is melted and golden brown. If you like it extra bubbly and browned, you can broil it for an additional 1–2 minutes. Just keep an eye on it so it doesn’t burn.
When the cheese is gooey and slightly browned and the vegetables are softened, it’s ready to come out. Let the pizza cool for a couple of minutes before slicing. This helps the crust firm up a little more, making it easier to handle.
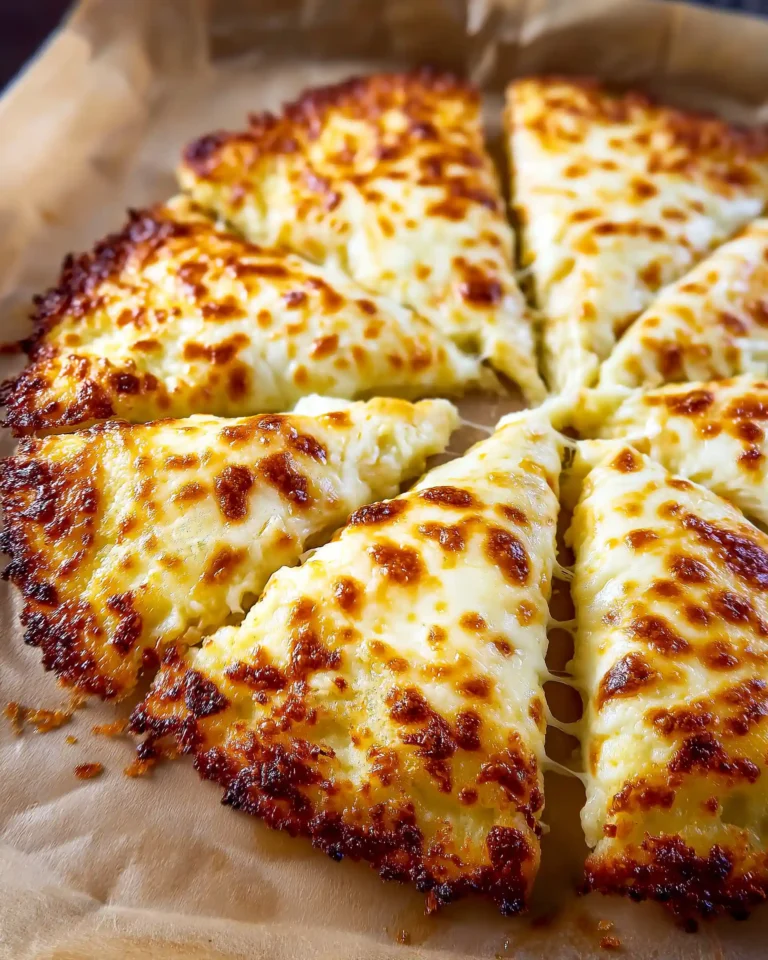
Slicing and Serving Tips
Use a sharp pizza cutter or chef’s knife to cut your cauliflower pizza into 8 slices. The texture will be firm enough to lift and hold, especially if you squeezed enough moisture out during the earlier steps.
Serve immediately while it’s hot and crispy. If you have leftovers, store them in an airtight container in the fridge for up to two days. You can reheat slices in the oven at 400 degrees Fahrenheit for 5–7 minutes to restore crispiness.
Want to make more than one? Double the recipe and make two crusts back to back. It’s perfect for family meals or small gatherings.
Storing, Freezing, and Reheating Tips
How to Store Cauliflower Pizza Crust
If you have leftovers or you’ve made extra crusts in advance, proper storage is key to maintaining taste and texture. Once the crust or fully topped pizza has cooled to room temperature, place it in an airtight container. Store in the refrigerator for up to 2 days.
To avoid sogginess, place parchment paper between slices if stacking. Keep the crust uncovered for the first 15–20 minutes in the fridge to let any residual moisture escape before sealing it completely.
Freezing the Crust for Later
Cauliflower pizza crust is freezer-friendly, which makes it perfect for meal prep. After baking the crust (without toppings), allow it to cool completely. Then wrap it tightly in plastic wrap or place it in a large resealable freezer-safe bag. You can freeze either two large crusts or four smaller individual ones for up to 3 months.
When you’re ready to use a frozen crust, take it straight from the freezer and bake it at 400 degrees Fahrenheit for about 10 minutes. After that, add your desired toppings and bake again until the cheese melts and bubbles.
Reheating Like a Pro
Avoid using the microwave to reheat cauliflower pizza—it tends to make the crust soft and limp. Instead, place the slice on a baking sheet and reheat it in a 400-degree Fahrenheit oven for 5–7 minutes. If you’re reheating a whole pizza, add a few more minutes.
Another great option is to use an air fryer. Just place a slice inside at 375 degrees Fahrenheit for 4–5 minutes. It brings back the crispiness beautifully without drying it out.
By following these reheating methods, you can enjoy leftover cauliflower pizza that tastes just as good as it did fresh from the oven.
Troubleshooting and Expert Tips
Common Issues and How to Fix Them
Even though cauliflower pizza crust is simple to make, small mistakes can affect the outcome. Let’s go over common problems and how to fix them:
1. Crust falls apart or is too soft:
This usually means there’s too much moisture left in the cauliflower. The solution is to squeeze the cooked cauliflower longer. Use a strong cheesecloth or linen towel, and apply firm pressure. You should get around 1½ cups of water out for a successful crust.
2. Crust is soggy after baking:
Besides extra moisture, using too much sauce or loading on heavy toppings can create a soggy bottom. Try using a light layer of sauce and fewer moist vegetables. Also, pre-bake the crust for a full 20 minutes, then optionally flip it and bake for 5 more.
3. Crust sticks to the baking sheet:
Always use parchment paper and spray it with a light layer of cooking oil. Never bake directly on a bare pan, and avoid using wax paper or foil, which can melt or cause sticking.
Expert Tips for the Best Cauliflower Pizza Crust
Squeeze more than you think you need to:
This can’t be repeated enough. The secret to a firm, holdable crust is removing every last drop of moisture. Even if it feels dry, squeeze again. Your hands might get tired, but the results are worth it.
Double the recipe:
Making two crusts at once can save time. If you’ve got two large heads of cauliflower, go for it. Bake one now and freeze the second for later. Just make sure you have space on your baking sheet.
No food processor? No problem:
If you don’t have a food processor, use a box grater to rice the cauliflower. It’s more manual but works just as well. Alternatively, grab a bag of store-bought cauliflower rice, either fresh or frozen.
Use the right baking tools:
A pizza stone or a sturdy sheet pan helps distribute heat evenly. This leads to a crispier crust. If your crust seems to brown too quickly, lower the rack in your oven or reduce the heat slightly for the last few minutes.
Experiment with seasoning:
While Italian seasoning is classic, feel free to experiment with garlic powder, crushed red pepper, or nutritional yeast for a savory kick. Keep the core ingredients simple, but don’t be afraid to customize the flavor.
Conclusion
Making your own cauliflower pizza crust at home is a smart, satisfying way to enjoy pizza without the extra carbs or gluten. With just a few wholesome ingredients—cauliflower, egg, cheese, and spices—you can create a crispy, golden crust that’s strong enough to hold your favorite toppings while still being light and veggie-packed.
The keys to success are in the prep: ricing the cauliflower properly, removing all excess moisture, and baking the crust until it’s firm and golden. With a little patience and practice, you’ll get the hang of it quickly. Whether you’re looking to eat healthier, reduce carbs, or simply try something new, this cauliflower pizza crust recipe delivers on both taste and texture.
Once you’ve nailed the basics, you can get creative with toppings, sauces, and even the shape of your pizza. It’s freezer-friendly, reheats well, and satisfies those pizza cravings without any of the guilt. Try it once and this crust will likely earn a permanent spot in your recipe rotation.


