Making your own Famous California Pizza Dough from scratch brings more than just fresh flavor into your kitchen. It opens the door to artisan-style, golden-brown crusts with that perfect balance of crispiness and chew. California-style pizza is known for its thin, airy crust and its ability to support a range of fresh, seasonal toppings. But what really sets it apart is the dough — and that’s where this article steps in.
In this guide, we’ll explore how to make a delicious, easy-to-handle dough at home using basic ingredients you likely already have in your pantry. From activating the yeast to baking the perfect crust, you’ll learn all the tricks to replicate that authentic California taste. We’ll also dig into dough science, shaping techniques, ideal baking temperatures, and nutrition tips to help you master this essential foundation of great pizza.
Understanding the Key Ingredients for Famous California Pizza Dough
Active Dry Yeast – The Foundation of Your Dough’s Rise
The magic of any good pizza dough begins with yeast. In this recipe, we use active dry yeast, which needs to be dissolved in warm water with a touch of honey to activate. Yeast is responsible for fermentation — it converts sugars into carbon dioxide, giving your dough that light, airy structure. Letting the yeast dissolve for about 10 minutes creates a foamy surface, indicating it’s alive and ready to work.
To ensure the yeast performs well:
- Water should be warm, not hot — around 105°F to 110°F.
- Always add a sugar source like honey to feed the yeast.
- Give it time to rest so it can activate properly.
Honey – A Natural Activator and Flavor Enhancer
The teaspoon of honey in the dough does more than sweeten the mix. It helps kickstart the fermentation process by providing sugars for the yeast to consume. This small touch also adds a faint sweetness to balance the savory nature of the finished crust.
Water – The Dough’s Backbone
Using municipal tap water is perfectly fine, as long as it’s clean and at the right temperature. Water hydrates the flour, binds the dough together, and supports gluten development. It also affects how the dough handles and bakes:
- Cooler water slows fermentation, allowing more flavor development over time.
- Warmer water speeds up the rise, ideal for quicker dough prep.
Kosher Salt – Balancing Flavor and Gluten Strength
Kosher salt not only enhances the overall flavor of your dough, but it also tightens the gluten structure. This results in a dough that’s easier to stretch without tearing. One teaspoon is just the right amount for flavor without overwhelming the natural taste of the crust.
Extra Virgin Olive Oil – Texture and Richness
Using extra virgin olive oil in two steps (1 tablespoon in the dough and the rest for brushing before baking) plays a vital role in texture and browning:
- In the dough, it adds moisture and tenderness.
- On top, it helps crisp the crust and boosts flavor.
You’ll need 5 tablespoons in total, used strategically to lock in moisture and create that golden finish California-style pizzas are famous for.
All-Purpose Flour – The Core of Structure
We’re using 2 ¾ cups of all-purpose flour, which balances strength with softness. It’s easier to work with than bread flour and more traditional than cake flour, making it ideal for thin crusts with a slight chew. Add more as needed during kneading if the dough feels too sticky.
Why it matters:
- The right flour ratio affects chewiness and crispiness.
- More flour adds strength but can also make the dough tougher if overused.
Cornmeal – That Signature Crunch
Finally, cornmeal is used for dusting the baking sheet. It prevents the dough from sticking while adding a subtle crunch to the crust’s bottom. This is a signature move in many California pizzerias.
To summarize the ingredient roles:
| Ingredient | Purpose |
|---|---|
| Active Dry Yeast | Creates rise, texture, and air pockets |
| Honey | Feeds yeast, adds light sweetness |
| Water | Binds ingredients, controls fermentation |
| Kosher Salt | Strengthens dough, enhances taste |
| Extra Virgin Olive Oil | Moisture, flavor, browning |
| All-Purpose Flour | Structure, chewiness |
| Cornmeal | Prevents sticking, adds crunch |
Famous California Pizza Dough Recipe
- Total Time: 1 hour 35 minutes
- Yield: 4 8-inch pizza crusts
- Diet: Vegetarian
Description
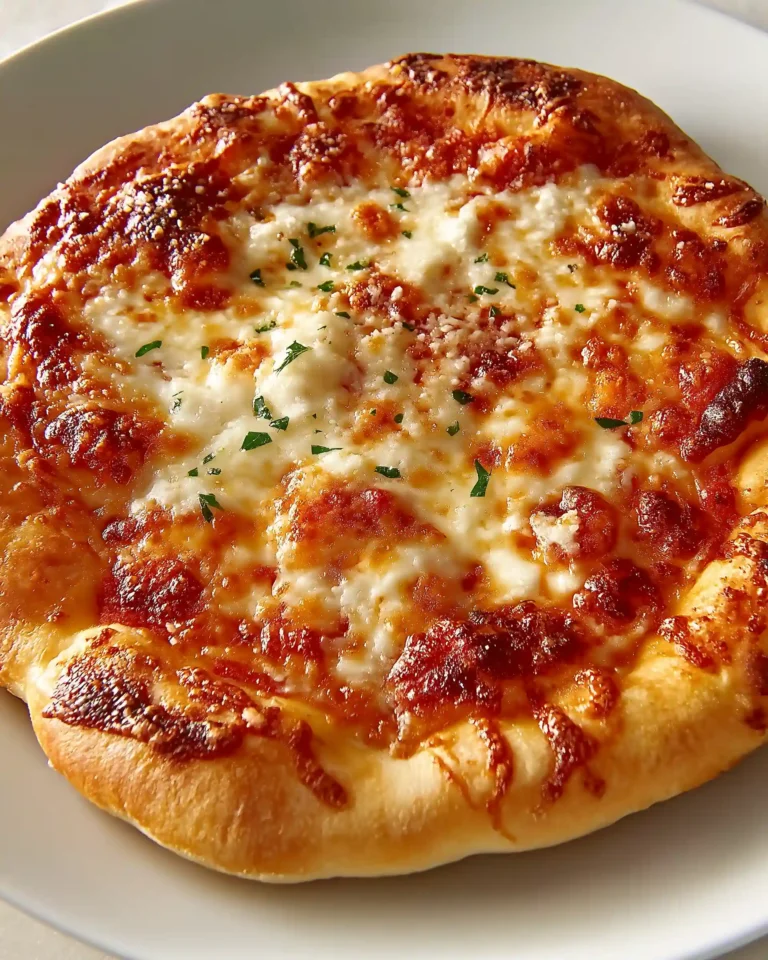
Crispy, chewy, and golden – this Famous California Pizza Dough recipe brings artisan flavor to your home oven with just a few pantry staples.
Ingredients
1 (.25 ounce) package active dry yeast
1 teaspoon honey
1 cup warm water (divided)
1 teaspoon kosher salt
5 tablespoons extra-virgin olive oil (divided)
2 ¾ cups all-purpose flour, or more as needed
¼ cup cornmeal, or as needed
Instructions
1. Combine yeast, honey, and 1/4 cup warm water in a large bowl and whisk. Let it stand for about 10 minutes until dissolved and foamy.
2. Add salt, 1 tablespoon olive oil, remaining 3/4 cup warm water, and 1 cup flour. Stir until a batter forms.
3. Add another 1 cup flour and stir. Mix in 1/2 cup more flour until combined.
4. Transfer dough onto a floured surface. Knead until smooth, adding more flour as needed to achieve a slightly sticky but firm dough.
5. Place the dough in a lightly oiled bowl, cover with a damp towel, and let it rise until doubled, about 30–40 minutes.
6. Punch down the dough, divide it into 4 equal parts, and shape each into a ball by stretching and tucking the dough under itself.
7. Cover with a towel and let rest in a warm area until doubled in size again, about 20–30 minutes.
8. Preheat oven to 450°F (230°C). Dust a baking sheet with cornmeal.
9. Press dough rounds into 8–10 inch circles, forming a crust rim with your fingertips.
10. Brush one dough round with 1 tablespoon olive oil. Add your favorite sauce and toppings.
11. Bake on the lower oven rack for 5 minutes, then move to the center rack and bake for another 10 minutes or until golden.
12. Repeat with remaining dough rounds.
Notes
This recipe yields 4 personal-sized crusts. Dough can be frozen after shaping and thawed before use. Best enjoyed fresh, topped with seasonal veggies and fresh herbs.
- Prep Time: 20 minutes
- Cook Time: 15 minutes
- Method: Baking
- Cuisine: California
Mixing, Kneading, and First Rise – Crafting the Perfect California Dough Texture
Preparing the Yeast Mixture – Getting the Rise Right from the Start
Begin by combining 1 (.25 ounce) package of active dry yeast, 1 teaspoon of honey, and 1/4 cup of warm water in a large mixing bowl. Use a whisk to dissolve everything thoroughly. This step is crucial for activating the yeast, which gives your dough its airy, stretchy quality. Let the mixture sit for about 10 minutes until it starts to bubble or foam. That frothy surface is your signal — the yeast is alive and ready to work.
If your mixture doesn’t foam, the yeast may be expired or the water temperature could be off. Always check your yeast’s expiration date and use a thermometer if needed to verify water temperature between 105°F and 110°F.
Building the Dough – Gradual Mixing for Ideal Consistency
After your yeast mixture is ready, stir in 1 teaspoon of kosher salt, 1 tablespoon of olive oil, and the remaining 3/4 cup of warm water. Add 1 cup of flour and mix until a thick batter forms. Then gradually add another 1 cup of flour, mixing until it’s absorbed. Finally, mix in 1/2 cup more flour to develop a dough that’s soft and sticky but manageable.
This methodical addition of flour ensures the dough stays hydrated and balanced. Avoid dumping in all the flour at once, which can lead to an overly dry dough that’s tough to knead and shape.
Kneading – Developing Gluten for Strength and Stretch
Once the dough forms, transfer it to a clean surface dusted with 1/4 cup of flour. Begin kneading by folding and pressing the dough with the heels of your hands, turning it as you go. Knead for 8 to 10 minutes, adding flour a tablespoon at a time only if necessary. You’re aiming for a dough that’s:
- Smooth
- Elastic
- Slightly tacky but not wet
Kneading is key to developing gluten, the protein that creates structure and elasticity. This process gives your dough the strength to hold up to baking, while remaining tender on the inside.
First Rise – Letting Flavor and Texture Develop
Transfer the kneaded dough to a lightly oiled bowl, using a touch of olive oil to coat the surface of the dough. Cover with a damp kitchen towel and set it in a warm, draft-free spot. Let the dough rise until doubled in size, about 30 to 40 minutes.
This resting period allows the yeast to work, creating air bubbles that give the crust its chewy lightness. You’ll notice the dough becomes puffier and softer during this stage.
Quick tip: To speed up rising in cooler weather, place the bowl near a warm oven or inside a microwave with a cup of hot water beside it (don’t turn the microwave on).
Shaping the Dough into Rounds – Prepping for the Oven
After the first rise, turn the dough onto a lightly floured cutting board. Gently press it down with your hand to release air. Cut the dough into 4 equal pieces. Take each piece and stretch the surface downward and underneath, tucking and rotating as you go to form a smooth ball.
This step gives your dough rounds strength and helps maintain shape when rolled out. Cover the rounds with a towel and let them rest for 20 to 30 minutes in a warm spot until doubled in size again. This second rise improves tenderness and makes stretching easier.
Key Dough Handling Tips
| Step | Key Technique | Why It Matters |
|---|---|---|
| Activate Yeast | Use warm water and sugar | Ensures full fermentation and rise |
| Gradual Mixing | Add flour slowly, stir until absorbed | Prevents dry, tough dough |
| Kneading | 8–10 minutes, add flour only if needed | Develops gluten for stretch and chew |
| First Rise | Covered in a warm area | Creates light, airy texture |
| Round Formation | Tuck and stretch surface under | Strengthens shape for even baking |
Shaping, Stretching, and Baking Your Famous California Pizza Dough to Perfection
Stretching the Dough – The Art of an Even, Thin Crust
Once your dough rounds have doubled in size from the second rise, it’s time to stretch them into classic 8 to 10-inch pizza bases. Begin by placing one dough round on a lightly floured board. Use your fingertips to press from the center outward, gently pushing the dough into a circular shape.
As you work, rotate the dough frequently. Avoid using a rolling pin, which can press out the air pockets and make the crust dense. Instead, stretch by hand to maintain the dough’s natural rise and airy texture. Let the outer edges remain a bit thicker to form a beautiful, golden crust rim.
Keep in mind:
- Work from the center out for even thinness
- Don’t overstretch or pull too fast — let the dough relax as needed
- A uniform thickness of around 1/4 inch is ideal for a California-style crust
Prepping the Surface – Cornmeal Crunch and Nonstick Finish
Before placing your shaped dough on the baking sheet, dust the pan with cornmeal. This small but essential step prevents sticking and gives the crust bottom a subtle crunch. It also helps simulate the effect of a pizza stone or wood-fired oven, both known for delivering crispy finishes.
A generous sprinkle of cornmeal under the dough also enhances airflow under the crust, reducing sogginess and supporting even baking.
Applying Olive Oil – Boosting Texture and Flavor Before Baking
Right before baking, brush the top of the shaped dough with 1 tablespoon of extra virgin olive oil. This locks in moisture and promotes golden, blistered bubbles across the crust. It also acts as a barrier between the dough and your sauce or toppings, keeping the crust crisp during baking.
This added oil enhances the famous California style by giving it a light sheen, deeper flavor, and crunchy bite.
Baking Stages – Mastering Heat for a Crisp, Golden Crust
Preheat your oven to 450°F (230°C) at least 20 minutes ahead of time. This ensures the oven and baking sheet are hot enough to give your dough the structure it needs when it first hits the heat.
Place the pizza dough (with or without toppings) on the lower rack of the oven for the first 5 minutes. This creates a crisp base.
Then, move the pizza to the middle rack and bake for another 10 minutes, or until the crust is golden and firm. You’re aiming for a light brown edge with small, crispy bubbles and a base that’s both chewy and firm.
For a classic California texture:
- Lower rack bakes the crust base firmly
- Center rack finishes with balanced top heat
- Look for an even, golden brown edge with soft inner bubbles
Baking Time Recap Table
| Step | Position in Oven | Duration | Purpose |
|---|---|---|---|
| Initial Bake | Lower rack | 5 minutes | Firm up bottom, prevent soggy crust |
| Finish Bake | Center rack | 10 minutes | Cook toppings, brown crust |
Finishing Touches – Crisp Outside, Tender Inside
When the pizza is done baking, remove it from the oven and let it rest on a wire rack or cutting board for a few minutes. This allows steam to escape, which keeps the crust from turning soggy.
You’ll notice that:
- The crust is firm yet light
- It holds toppings without drooping
- The rim is golden and slightly blistered
Repeat this process for the remaining dough rounds. This method ensures each pizza is evenly baked, beautifully textured, and bursting with the homemade California pizza spirit.
Sauce, Topping Ideas, and Flavor Pairings for California Pizza Dough
Choosing the Right Sauce – Balanced, Bright, and Not Too Heavy
Your Famous California Pizza Dough is thin and airy, which means it shines best with light, fresh sauces. Overloading it can weigh the dough down and cause sogginess. Go for sauces that enhance, not overpower, the crust’s naturally crisp base.
Here are a few great choices:
- Classic Tomato Sauce: Made with crushed tomatoes, garlic, olive oil, and herbs. Keep it simple for maximum flavor.
- Garlic Olive Oil Base: Perfect for a white pizza. Infuse extra virgin olive oil with minced garlic and brush it over the dough before baking.
- Pesto Sauce: Bright, herby, and ideal for lighter toppings like vegetables and cheeses.
- Tomato-Free Roasted Veggie Purée: Blend roasted red peppers, onions, and carrots for a sweet-savory twist.
The secret is using a thin layer — just enough to flavor the crust without creating soggy spots.
Toppings That Shine on California-Style Dough
California pizza is all about creativity and freshness. The dough’s lightness makes it a great base for seasonal vegetables and bold, clean flavors. Think beyond the usual and opt for combinations that are nutrient-rich and vibrant.
Vegetable-Based Ideas:
- Sliced heirloom tomatoes and fresh basil
- Grilled zucchini, bell peppers, and mushrooms
- Caramelized onions and spinach
- Roasted broccoli or cauliflower florets
- Fresh arugula or kale added after baking
Cheese Options (used sparingly):
- Fresh mozzarella for melty richness
- Goat cheese or ricotta for creaminess
- Cabot Parmesan cheese (or Tillamook brand) shavings added after baking for sharpness
Flavor Pairings – Keep It Light and Harmonious
California pizzas often favor ingredient harmony over heaviness. Aim for a balanced bite in each slice, with something creamy, something fresh, and something savory.
Here are a few signature combinations:
- Tomato, basil, and mozzarella with a drizzle of olive oil
- Pesto, zucchini, and ricotta
- Caramelized onions, spinach, and goat cheese
- Bell peppers, mushrooms, and arugula added post-bake
Sprinkle with dried oregano or chili flakes for extra depth without overpowering the crust.
Tips for Balanced Topping Application
- Less is more: Let the crust remain the star.
- Distribute evenly: Ensure toppings cook consistently.
- Use pre-cooked ingredients: Especially for watery vegetables like mushrooms or zucchini to avoid sogginess.
- Add fresh greens post-baking: Arugula or herbs added after baking keep their bright flavors intact.
Common Topping Mistakes to Avoid
| Mistake | Why It’s a Problem | Fix |
|---|---|---|
| Using too much sauce | Makes the crust soggy | Use a light spread — a few tablespoons max |
| Overloading with toppings | Prevents even baking, makes crust collapse | Stick to 3-5 toppings max |
| Not draining veggies | Adds moisture that weakens the crust | Pre-cook or blot ingredients before use |
| Too much cheese | Can overpower other flavors | Use thin slices or crumbles strategically |
By focusing on flavor clarity and freshness, your toppings will enhance — not hide — the unique qualities of your homemade California pizza dough.
Storing, Freezing, and Reheating Famous California Pizza Dough
Short-Term Storage – Keeping Dough Fresh for a Day or Two
Sometimes, you might want to prep your Famous California Pizza Dough in advance. For short-term storage (within 24 to 48 hours), follow these steps after the first rise, before shaping into rounds:
- Lightly oil the inside of a container or wrap each dough ball in plastic wrap.
- Place the covered dough in the refrigerator.
- When ready to use, remove from the fridge and let it sit at room temperature for 30 to 45 minutes before shaping and baking.
Refrigeration slows fermentation, which enhances flavor, but the dough must warm slightly before you try stretching it — cold dough resists shaping and may tear.
Long-Term Storage – Freezing for Convenience
Homemade pizza dough freezes beautifully and keeps well for up to 3 months. Here’s how to do it right:
Freezing Steps:
- After dividing and shaping the dough into rounds (before the second rise), wrap each one tightly in plastic wrap.
- Place the wrapped dough balls in a zip-top freezer bag, squeezing out excess air.
To thaw:
- Transfer dough to the refrigerator 12 hours ahead of time.
- After thawing, let it sit at room temperature 30 minutes before stretching and baking.
This method allows you to enjoy scratch-made crust even on busy nights.
Reheating Baked Pizza – Getting the Crust Crisp Again
If you have leftover baked pizza, reheating it properly is the key to reviving its crispness and flavor. Avoid the microwave if you want to keep the crust firm. Instead, try these methods:
Oven Reheat (Best for Whole Slices)
- Preheat oven to 375°F (190°C).
- Place slices directly on the oven rack or a preheated baking sheet.
- Heat for 8 to 10 minutes until cheese is melted and crust is crisp.
Stovetop Reheat (Quick and Effective)
- Heat a skillet over medium heat.
- Add a slice and cover with a lid.
- Heat for 4 to 5 minutes, until the cheese is gooey and bottom is crunchy.
Avoid reheating pizza in the microwave, which tends to make the crust chewy and limp.
Storage Tips Recap Table
| Method | When to Use | Key Steps | Shelf Life |
|---|---|---|---|
| Fridge (raw dough) | Next-day use | Refrigerate after first rise, use within 2 days | 24–48 hours |
| Freezer (raw dough) | Future prep | Freeze after shaping, thaw overnight before baking | Up to 3 months |
| Oven (baked pizza) | Best for reheating | 375°F, 8–10 mins, use baking sheet or rack | Eat within 3–4 days |
| Stovetop (baked pizza) | Fast single-slice reheat | Skillet with lid, medium heat, 4–5 mins | Best for same-day |
Proper storage and reheating not only save time, but they also help preserve the integrity of your homemade dough. That way, each bite remains just as flavorful and satisfying as the first time it came out of the oven.
Nutrition Breakdown and Health-Friendly Tips for Famous California Pizza Dough
Understanding the Nutritional Profile – What’s in Each Serving
While pizza dough often gets a bad reputation, this Famous California Pizza Dough strikes a smart balance between flavor and nutrition, especially when homemade with minimal ingredients and no artificial additives. Here’s what you get per serving (1/16 of the recipe, or roughly 1 slice of an 8-inch pizza):
- Calories: 127
- Total Fat: 5g
- Saturated Fat: 1g
- Sodium: 121mg
- Carbohydrates: 19g
- Dietary Fiber: 1g
- Sugars: 1g
- Protein: 3g
- Calcium: 4mg
- Iron: 1mg
- Potassium: 35mg
This makes it a moderate-calorie base that can easily fit into a balanced meal, especially when paired with fresh vegetables and lean cheeses. Plus, because it’s homemade, you’re skipping the preservatives, excess sodium, and processed oils that are often found in store-bought crusts.
Healthier Choices Without Compromising Flavor
Making smart ingredient swaps and baking adjustments can boost the nutritional value of this dough without sacrificing its famous California-style texture and taste.
Ways to Make It Even Healthier:
- Substitute half the flour with whole wheat flour for extra fiber and nutrients.
- Use less oil in the dough if you’re watching fat intake, without skipping it completely.
- Reduce salt slightly and add dried herbs like oregano or thyme for flavor.
- Load your pizza with colorful vegetables like spinach, peppers, tomatoes, or onions for added fiber and antioxidants.
You can also experiment with gluten-free flour blends if you’re sensitive to gluten, although you’ll need to adjust the water and kneading process to achieve similar elasticity.
Portion Control – Enjoying Pizza in Moderation
The beauty of this dough is its flexibility — you can make smaller individual pizzas or share a larger one. When you divide the dough into four 8-inch rounds, each round serves about 4 slices, which is perfect for portion-conscious eating.
Try pairing your pizza with:
- A leafy green salad topped with citrus or balsamic
- Roasted vegetables on the side
- A fresh fruit bowl for a light, sweet finish
This allows you to enjoy a flavorful, satisfying meal without overdoing it.
Comparison with Store-Bought Dough
| Aspect | Homemade California Dough | Store-Bought Dough |
|---|---|---|
| Ingredients | Simple, whole ingredients | Often contains preservatives |
| Fat Content | Lower, mostly olive oil | May include palm or canola oil |
| Sodium Level | Easily controlled | Often high |
| Freshness | Used same-day or frozen fresh | Pre-packaged and aged |
| Flavor | Customizable and clean | Heavier and less vibrant |
Making Dough Part of a Balanced Diet
This recipe proves that pizza doesn’t have to be indulgent to be delicious. By using minimal, quality ingredients and topping your pizza with seasonal produce, you turn it into a meal that’s both nourishing and crowd-pleasing.
Conclusion: Mastering the Famous California Pizza Dough at Home
Crafting your own Famous California Pizza Dough from scratch is more than just a fun kitchen project — it’s a way to bring artisan-level flavor, texture, and versatility right into your home oven. With just a few simple ingredients, this dough delivers the signature crispiness and chew that define California-style pizza.
You’ve now learned how to activate yeast for a proper rise, mix and knead for the perfect texture, shape and bake like a pro, and store or freeze dough for convenience. You’ve also explored healthy topping options and smart nutrition tips to keep your pizza balanced and delicious.
This recipe is approachable, customizable, and endlessly adaptable — whether you’re making dinner for the family or meal-prepping for the week. With its golden crust, light interior, and just the right amount of bite, this dough truly lives up to its reputation.


