Nothing warms the heart and home quite like the smell of fresh bread baking in the oven. For generations, Mamaw’s Homemade Bread has been a symbol of comfort, nourishment, and tradition. This simple yet beloved recipe captures everything we love about old-fashioned home baking—reliable ingredients, hearty texture, and a rustic charm that store-bought bread just can’t match.
Whether you’re new to bread baking or a seasoned baker seeking a reliable go-to, this recipe delivers every time. In this article, we’ll walk you through everything you need to know about making Mamaw’s Homemade Bread, from mastering the dough to troubleshooting rising issues, and even how to adapt it for larger families. We’ll also discuss variations, storage tips, and practical advice that ensures success with each loaf.
The Legacy and Simplicity Behind Mamaw’s Homemade Bread
The Story Behind the Recipe
Mamaw’s Homemade Bread is more than a recipe, it’s a cherished memory passed down through generations. What began as a daily necessity in rural kitchens became a tradition that connected families across time. The recipe uses pantry staples, making it accessible and budget-friendly, and reflects the philosophy of cooking with love and simplicity.
This bread is known for its soft crumb, golden crust, and subtle sweetness. Its uncomplicated method and ingredients reflect a time when food was about sustenance and soul, not speed and shortcuts.
Basic Ingredients, Big Impact
What makes this bread a standout isn’t exotic ingredients, but how they work together:
- Lukewarm water (3 cups): The right temperature activates the yeast gently, encouraging a strong rise.
- Sugar or honey (2 tbsp): Feeds the yeast and gives the bread a hint of sweetness.
- Salt (2 tsp): Essential for flavor balance and gluten control.
- Active dry yeast (2 tsp): The engine of your rise, producing air pockets that create a soft, springy texture.
- Vegetable oil or olive oil (3 tbsp): Adds tenderness and moisture.
- Bread flour (6–8 cups): The high protein content forms a sturdy structure and gives the loaf its chew.
Each of these elements plays a role in the taste, texture, and rise of the final loaf. With just a few high-quality ingredients and a little patience, anyone can create a bakery-worthy loaf at home.
Why Bread Flour Matters
While you can use all-purpose flour in a pinch, bread flour gives the best results. Bread flour has higher protein content, usually around 12–14%, which creates more gluten. Gluten traps the gas released by yeast, giving your bread a strong structure and better volume. Using all-purpose may result in a denser loaf, which some prefer, but if your goal is fluffy, sandwich-worthy slices, bread flour is the way to go.
Still, the beauty of Mamaw’s bread lies in its flexibility—use what you have, and it’ll still turn out delicious.
Print
Mamaw’s Homemade Bread Recipe
- Total Time: 4 hours
- Yield: 2 loaves
- Diet: Vegetarian
Description
Mamaw’s Homemade Bread is a soft, fluffy, golden-crusted bread made with simple pantry ingredients. Perfect for sandwiches, toast, or enjoying on its own, this family-favorite loaf brings back comforting traditions with every bite.
Ingredients
3 cups lukewarm water
2 tbsp sugar or honey
2 tsp salt
2 tsp active dry yeast
3 tbsp vegetable oil or olive oil
6–8 cups bread flour (as needed to make a smooth dough)
Instructions
1. In a large bowl, combine water, sugar, and salt.
2. Sprinkle yeast over the mixture and let sit for 5–10 minutes.
3. Add oil and stir in 6 cups of bread flour.
4. Continue adding flour and kneading until a smooth, elastic dough forms (about 6–8 minutes).
5. Place dough in an oiled bowl, cover, and let rise for about 1 hour or until doubled.
6. Oil your hands, punch down the dough, cover, and let rise again for another hour.
7. Divide dough into two loaves, punch down again to remove air bubbles, shape, and place in oiled pans.
8. Cover and let rise for 30 minutes.
9. Bake at 375°F for 30 minutes or until golden brown.
10. Brush tops with butter if desired and cool on a wire rack.
Notes
Use bread flour for best results. All-purpose can be used, but texture may vary.
To test if you’ve added enough flour, roll a small dough ball in your hand—if it’s not sticky, the dough is ready.
This recipe is scalable. For 6 loaves, use 7 cups water, 7 tbsp oil, and 6 of everything else (sugar, salt, yeast), adjusting flour as needed.
- Prep Time: 3 hours 30 minutes
- Cook Time: 30 minutes
- Method: Baking
- Cuisine: American
Step-by-Step Guide to Making Mamaw’s Bread Perfectly
Preparing the Dough – Mixing and Kneading
Making Mamaw’s Homemade Bread begins with a few key steps that lay the foundation for success. Start by combining lukewarm water, sugar or honey, and salt in a large mixing bowl. Water temperature matters here—aim for slightly warm to the touch, around 100°F to 110°F. This activates the yeast without killing it.
Once you’ve sprinkled the active dry yeast over the water mixture, let it rest for 5–10 minutes. During this time, bubbles may start forming, a good sign your yeast is alive and ready to work.
Next, stir in the vegetable or olive oil, then begin adding bread flour one cup at a time. After 6 cups, check the texture. The dough should start pulling away from the sides of the bowl but still feel soft. From here, continue adding flour in small amounts while kneading.
Kneading is crucial—it develops gluten, giving the bread its classic structure. Knead the dough for 6–8 minutes until smooth and elastic. You can do this by hand on a floured surface or in a stand mixer with a dough hook.
To test readiness, pinch off a piece of dough and roll it between your palms. If it doesn’t stick and feels pliable, you’ve nailed it.
First Rise – Letting the Dough Work
After kneading, shape the dough into a ball and place it in a lightly oiled bowl. Turn the dough once to coat it with oil, which prevents drying out. Cover the bowl with a clean towel or plastic wrap and place it somewhere warm and draft-free.
Let the dough rise for about one hour or until it has doubled in size. You can check by gently pressing a finger into the dough—if the indentation remains, it’s ready.
This first rise gives the yeast time to ferment, developing flavor and volume. Don’t rush this part. The transformation during this phase is what makes Mamaw’s bread so airy and rich-tasting.
Second Rise – Punching Down and Rebuilding
Once the dough has doubled, oil your hands and the inside of the bowl, then gently punch down the dough. This releases trapped gas and redistributes the yeast and moisture, preparing the dough for a second rise. Cover it again and let it rise for another hour.
This extra rise may seem optional, but it’s not. It enhances the final texture, ensuring the crumb is light and the crust forms properly during baking.
By now, the dough should feel even more elastic and smooth, ready to be shaped into loaves.
Shaping the Loaves and Final Proof
Divide the dough into two equal parts and gently flatten out any large air bubbles. Form each half into a loaf shape and place into oiled bread pans. Press the dough into the corners of the pans for even baking.
Let the loaves sit, covered, for about 30 minutes. This final proof allows the dough to rise slightly again, giving your bread a better oven spring and final shape.
This step can be done while your oven is preheating to 375°F.
Baking and Finishing Touches
Once the loaves have risen slightly above the edge of the pans, they’re ready to bake. Place them in the oven and bake for 30 minutes or until the tops are golden brown and sound hollow when tapped.
Optionally, as soon as they come out of the oven, brush the tops with butter. This step adds flavor and keeps the crust soft.
Remove the loaves from the pans and let them cool on a wire rack. Cooling is essential—cutting too soon can release steam, making the texture gummy.
Scaling Mamaw’s Homemade Bread for Bigger Batches
Adapting the Recipe for More Loaves
One of the best things about Mamaw’s Homemade Bread is how easily it scales. Whether you’re baking for a family gathering or planning ahead for the week, you can increase quantities without overcomplicating the process.
The key to scaling is this simple rule: for every loaf you want to make, increase the water and oil by one measurement above the loaf count, while keeping the other ingredients in equal ratios to the number of loaves.
Here’s a quick reference chart to help:
| Number of Loaves | Water (cups) | Oil (tbsp) | Sugar (tbsp) | Salt (tsp) | Yeast (tsp) | Flour (cups, approx) |
|---|---|---|---|---|---|---|
| 2 (standard) | 3 | 3 | 2 | 2 | 2 | 6–8 |
| 3 | 4 | 4 | 3 | 3 | 3 | 9–12 |
| 4 | 5 | 5 | 4 | 4 | 4 | 12–16 |
| 6 | 7 | 7 | 6 | 6 | 6 | 18–24 |
Each increase in volume means you’ll need a bit more flour to reach the right dough consistency, but follow the same touch test—if the dough no longer sticks to your fingers and rolls smoothly, you’ve added enough.
Using the Right Equipment
When doubling or tripling the recipe, you’ll need to adjust your equipment accordingly. Larger mixing bowls, extra loaf pans, and maybe even a sturdy stand mixer can help streamline the process. You can knead larger batches by hand, but it takes more effort—expect 10–12 minutes of steady kneading for bigger dough portions.
Make sure to stagger your rising bowls and pans if your oven can’t accommodate all the loaves at once. Let the first batch rise while shaping the next, then rotate through baking.
Also, remember to increase proofing time slightly with larger dough portions. The more dough you have, the longer it takes to warm and rise evenly.
Why Scaling Doesn’t Change the Taste
Because Mamaw’s bread is based on simple, balanced ingredients, scaling doesn’t throw off the flavor. The bread maintains its same soft interior and golden crust whether you’re baking two loaves or ten. As long as the yeast-to-flour ratio stays consistent, and you give each batch time to rise properly, the end result is just as delicious.
Troubleshooting and Pro Tips for Perfect Bread Every Time
Common Dough Issues and How to Fix Them
Even though Mamaw’s Homemade Bread is a forgiving recipe, bread baking can be finicky at times. If something seems off, it usually comes down to the dough’s moisture level, rising environment, or yeast performance. Here’s how to fix the most common problems:
- Sticky dough that won’t smooth out: This usually means too little flour. Add flour ¼ cup at a time while kneading until the dough no longer clings to your hands or the bowl. It should feel soft, not dry.
- Dense or flat loaves: Your yeast might be expired, the water was too hot and killed the yeast, or the dough didn’t rise long enough. Always use fresh yeast and lukewarm water. Make sure the dough doubles in size in both rises.
- Uneven or cracked top: This could mean the dough dried out during the rise or the oven was too hot. Always cover your dough during rising, and stick to 375°F for baking unless your oven runs hot.
- Over-proofed bread: If your dough rises too long, it might collapse in the oven. Stick to the timing and test by lightly pressing your finger into the dough. If the dough springs back slowly, it’s ready. If it doesn’t spring at all, it’s over-proofed.
How to Know If Your Dough Is Just Right
This part takes practice, but there are a few reliable indicators. When properly kneaded and rested, good dough should:
- Stretch without tearing
- Feel smooth and elastic
- Bounce back when pressed gently
- Not stick to your fingers or work surface
Another popular test is the windowpane test: pinch off a small piece of dough and gently stretch it. If you can pull it into a thin, translucent “window” without it tearing, the gluten is well-developed.
Making the Most of Rising Time
One trick to get better rise is placing your bowl in a slightly warm oven (turned off), or near a warm spot in the kitchen. You can also microwave a mug of water, place it in the oven next to your covered bowl, and shut the door. The warm steam helps speed up rising without overheating the dough.
Another tip is to oil your hands when working with risen dough to avoid deflating it too much while shaping. A gentle hand preserves those air pockets that create the bread’s signature texture.
Don’t Skip the Cooling Process
Fresh from the oven, your bread smells amazing—but resist the temptation to slice too soon. Let the loaves cool on a wire rack for at least 30 minutes. This allows steam to escape and the interior to finish setting. Cutting too early can result in gummy slices and a misshapen loaf.
Storing, Freezing, and Reheating Mamaw’s Homemade Bread
Best Practices for Keeping Bread Fresh
Once you’ve pulled those golden loaves from the oven and let them cool properly, it’s time to store them right. Homemade bread doesn’t contain preservatives, so it won’t last as long as store-bought, but you can easily keep it fresh for several days with the right steps.
- Room temperature: Wrap the fully cooled loaf in a clean cotton towel or parchment paper, then place it in a bread box or loosely sealed plastic bag. This keeps the crust from going soggy while preventing it from drying out. It stays fresh for up to 3–4 days at room temperature.
- Avoid the fridge: Refrigerating homemade bread actually speeds up staling. It draws moisture from the bread and alters the texture. Keep it in a cool, dry pantry instead.
How to Freeze for Later Use
Mamaw’s Homemade Bread freezes beautifully. You can freeze whole loaves or sliced portions depending on your needs.
- For whole loaves: Once cooled, wrap the loaf tightly in plastic wrap, then add a second layer of foil or place in a heavy-duty freezer bag. Label with the date. It stays fresh in the freezer for up to 3 months.
- For slices: Slice the loaf and layer pieces with parchment paper between each slice. Store in a zip-top freezer bag. This allows you to grab one or two pieces at a time without thawing the entire loaf.
To thaw, place frozen bread on the counter, still wrapped, for a few hours or overnight. You can also warm it in a low oven (300°F) for 10–15 minutes to restore some of that just-baked freshness.
Reheating Without Drying Out
To reheat bread slices, pop them in the toaster or warm in the oven wrapped in foil. For full loaves, lightly dampen the crust with water and wrap in foil before baking for 10–15 minutes at 300°F. This keeps the inside soft and the outside perfectly crisp.
If you plan to use the bread for sandwiches or toast later in the week, freezing in slices is the easiest and most practical solution.
Delicious Ways to Enjoy Mamaw’s Homemade Bread
Simple Meals Made Better
Mamaw’s Homemade Bread is more than just a side item—it’s the star of the table when served right. Its soft crumb and golden crust pair effortlessly with a wide range of comforting meals. Whether you’re enjoying it fresh or using leftovers creatively, the possibilities are endless.
- Toasted with butter and jam: Sometimes the simplest combinations are the best. A thick slice, toasted until golden, slathered with butter and your favorite fruit spread, makes a perfect breakfast.
- Hearty sandwiches: The sturdy texture of this bread makes it ideal for stacking. Load up with fresh vegetables, cheeses, or roasted meats and you’ll have a satisfying, homemade sandwich that beats any deli option.
- Dipping in soups and stews: Tear or slice the bread and dip it into bowls of hot soup or stew. Its soft center soaks up broths beautifully, and the crust holds its shape without going mushy.
Turn Leftovers Into Something New
If your bread is getting a little dry after a few days, don’t toss it—turn it into something amazing.
- Homemade croutons: Cube the bread, toss with a little oil and your favorite seasonings, and bake until crisp. Great for topping salads or soups.
- Stuffing base: Dry bread cubes are the perfect start for classic stuffing. Add broth, herbs, and sautéed veggies for a rustic side dish.
- French toast: Day-old slices soak up custard batter beautifully. Pan-fry until golden for a weekend treat that’s crisp outside and soft inside.
- Bread pudding: This comforting dessert breathes new life into slightly stale bread. Combine with milk, eggs, sugar, and spices, then bake until golden and custardy.
Serving for Special Occasions
Mamaw’s Homemade Bread also brings a special touch to holidays, potlucks, and family dinners. Serve in a bread basket wrapped in a towel to keep it warm, or slice ahead of time and arrange it with flavored butters or jams for guests.
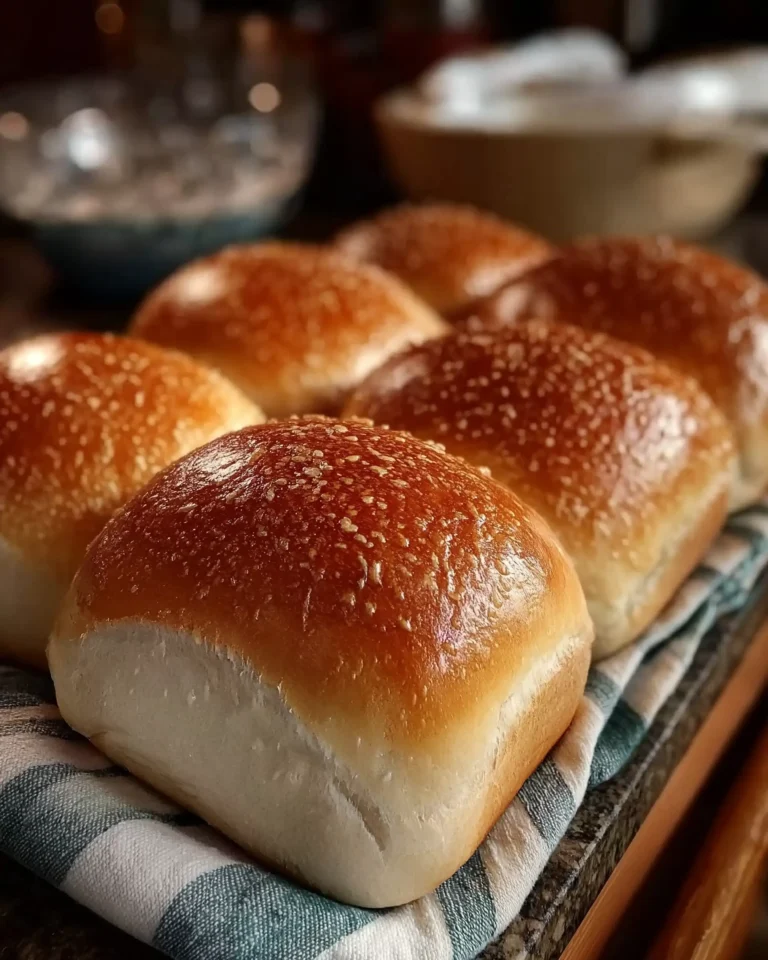
You can even form the dough into rolls instead of loaves. After the second rise, divide into small balls, place them on a baking sheet, let them rise again, and bake for 20–25 minutes. Perfect for dinner parties or holiday feasts.
Conclusion: Bringing Tradition Back with Every Loaf
Mamaw’s Homemade Bread isn’t just about flour and yeast—it’s about reviving a sense of tradition, feeding the soul, and celebrating the comforting simplicity of homemade food. With just a few basic ingredients and a little time, you can create something that fills your kitchen with warmth and your table with joy.
Whether you’re baking two loaves for a quiet weekend or scaling up for a family reunion, this bread recipe is endlessly adaptable and reliably delicious. From sandwiches and toast to stuffing and desserts, Mamaw’s Bread proves that the best meals often start with the simplest ingredients.


