Craving something that combines the buttery layers of a croissant with the cozy structure of a muffin? Meet your new baking obsession — the cruffin. This guide will walk you through the ultimate Homemade Cruffins Recipe, a luxurious laminated pastry that’s easier to make at home than you might think. With crispy golden layers on the outside and soft, sugary swirls inside, cruffins are the kind of treat that turns your kitchen into a professional patisserie.
We’ll explore each part of the recipe, from making the soft yeasted dough to the laminating process that gives it that signature flaky texture. Whether you’re filling yours with cinnamon sugar, Nutella, or lemon curd, this comprehensive guide breaks down each step, making it approachable even if you’ve never laminated dough before. Let’s dive into the magic of homemade cruffins.
Mastering the Dough – The Foundation of Perfect Cruffins
Why Yeast Matters in a Cruffin Dough
Yeast is more than just a rising agent — it’s what gives cruffins their light, airy texture. For this recipe, instant or active dry yeast can be used. Whichever you choose, the process starts the same: warm whole milk, sugar, and yeast are combined and left to bloom. The foamy layer that forms is your sign that the yeast is alive and ready to work. This step is essential to achieve the lift that defines a well-baked cruffin.
Instant yeast activates faster, while active dry yeast may need a few more minutes. Either way, ensuring the milk is warm (about 110°F or 43°C) — not hot — is critical to avoid killing the yeast. Once bloomed, the yeast is ready to mingle with flour and butter to create a dough that’s soft, flexible, and easy to laminate later.
Blending Wet and Dry Ingredients for a Supple Dough
Once the yeast mixture is ready, the softened butter, salt, and two-thirds of the flour are added. Using a stand mixer with a dough hook will streamline the process, but mixing by hand with a wooden spoon works too. The remaining flour is added gradually, allowing the dough to form slowly into a slightly sticky but pliable ball.
The dough should clean the sides of the mixing bowl but still be soft to the touch. If it’s too sticky, a tablespoon or two of flour will help. The key here is patience — don’t rush the kneading. Whether you knead with a mixer or your hands, give it five solid minutes. This step activates the gluten, giving the dough elasticity and strength that will support all those beautiful laminated layers later on.
Testing for Readiness – The Windowpane and Bounce-Back Test
After kneading, test the dough with a poke. If it slowly bounces back, it’s ready to rise. For a more technical test, try the windowpane method. Tear off a piece of dough and stretch it gently — if it doesn’t tear and light passes through, the gluten structure is just right.
These simple checks ensure the dough will rise properly and develop a beautiful crumb once baked. Dough readiness directly affects the texture of the final cruffin, so don’t skip these important indicators.
First Rise – Letting the Dough Develop Flavor and Strength
Place the dough into a lightly oiled bowl, turn it once to coat all sides, and cover it tightly. It should rise in a warm, draft-free area until nearly doubled in size — usually about two hours. This stage not only puffs up the dough but also allows flavors to deepen as fermentation occurs.
If your kitchen is cold, place the bowl in a turned-off oven with the light on. The consistent warmth will help encourage a good rise without overheating the dough. You’re looking for a smooth, pillowy texture that retains the finger indent when pressed.
Print
Homemade Cruffins Recipe
- Total Time: 5 hours, 45 minutes
- Yield: 12 cruffins
- Diet: Vegetarian
Description
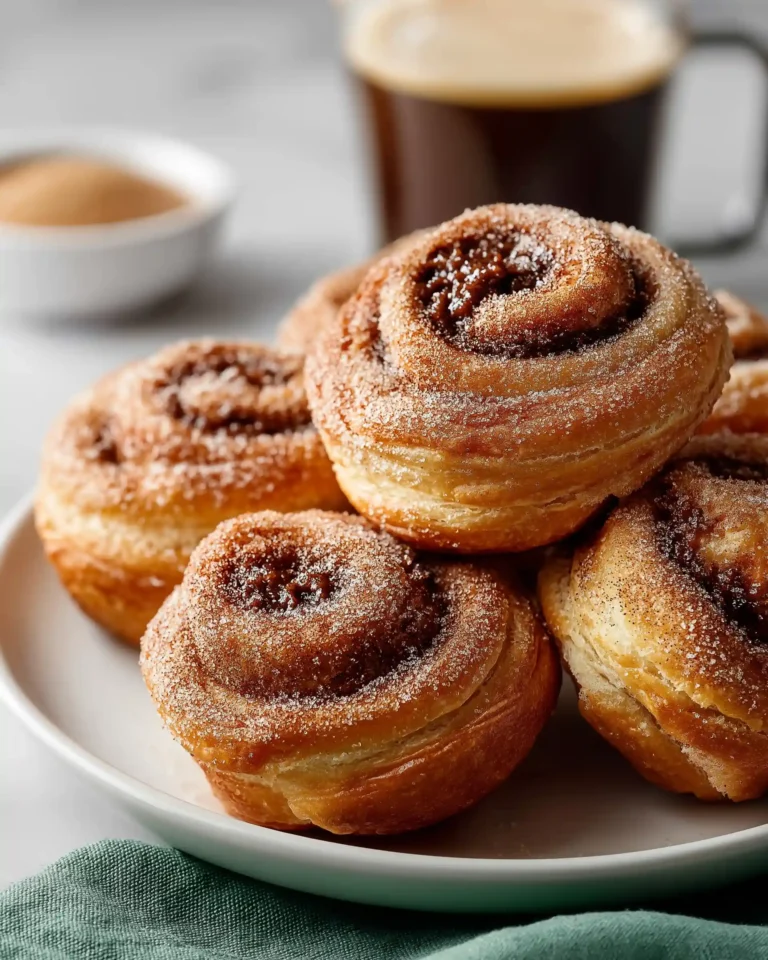
Soft, buttery, flaky cruffins made with laminated dough and coated in cinnamon sugar. These cruffins are baked to golden perfection and can be optionally filled with Nutella, jam, or lemon curd.
Ingredients
Dough:
1 cup (240ml) whole milk, warmed to 110°F (43°C)
2 and 1/4 tsp (7g) instant or active dry yeast
3 Tbsp (38g) granulated sugar
3 Tbsp (43g) butter, softened
3 cups (375g) all-purpose flour
1 and 1/4 tsp salt
Lamination:
1 cup (226g) salted butter, slightly softened
1 Tbsp all-purpose flour
Filling & Coating:
3/4 cup (150g) granulated sugar
1 Tbsp ground cinnamon
Optional: 6 Tbsp Nutella, jam, lemon curd, or pastry cream
Instructions
1. Whisk warm milk, yeast, and sugar. Let sit until foamy.
2. Add butter, 2 cups flour, and salt. Mix 2 mins.
3. Add remaining flour and mix until soft dough forms.
4. Knead 5 mins until elastic. Let rise 2 hours.
5. Punch down and flatten into a 10×14-inch rectangle. Chill 20 mins.
6. Prepare lamination butter by beating with flour.
7. Spread butter on center of dough. Fold like a letter.
8. Roll to 9×12 inches, fold again. Chill 20 mins.
9. Repeat lamination 2 more times (total 3), chilling between.
10. Divide dough into 3 parts. Roll each to 8×12 inches.
11. Sprinkle with cinnamon sugar. Cut into 12 1-inch strips.
12. Stack 3 strips, roll into spirals, place in muffin tin.
13. Let rise 1 hour. Bake at 350°F (177°C) for 25–28 mins.
14. Roll warm cruffins in cinnamon sugar. Fill if desired.
15. Serve warm or cool. Store up to 3 days.
Notes
You can refrigerate shaped cruffins overnight before final rise.
To freeze, cool fully, wrap individually, and freeze up to 3 months.
Use European-style salted butter for best flavor and results.
Avoid freezing before lamination, as it affects layering.
For taller cruffins, use popover pan with 2-inch strips.
- Prep Time: 4 hours, 45 minutes
- Cook Time: 25 minutes
- Method: Baking
- Cuisine: American
Lamination – Creating Signature Cruffin Layers
What Lamination Is and Why It Matters
Lamination is the process that creates those irresistibly flaky, layered textures you find in croissants — and in our case, cruffins. It involves folding layers of butter into the dough multiple times, then chilling the dough between folds to keep the butter from melting. When baked, these layers puff and separate, giving you that golden, crispy exterior and soft, ribboned interior.
Cruffins use a simplified lamination method compared to traditional puff pastry, making it easier for home bakers without compromising on results. With patience and attention to detail, you’ll transform a soft yeasted dough into a masterpiece of texture.
Preparing the Butter for Lamination
The butter used for lamination should be slightly softened but still cool — ideally between 60°F and 64°F (15–18°C). This temperature ensures the butter is pliable enough to spread but firm enough not to seep out during rolling. Beat the butter with a tablespoon of flour to make it easier to work with and to help it integrate into the dough without melting too fast.
European-style butter like Kerrygold is recommended for its higher fat content and richer flavor. It also makes the lamination smoother and the dough more elastic during rolling. The butter should be easy to spread, not crumbly or overly soft.
Chilling the Dough Before Lamination
Before beginning lamination, the dough must chill for 20 minutes. This brief refrigeration firms up the dough just enough to handle the butter without tearing. Place the flattened dough rectangle on a silicone baking mat or parchment-lined sheet to make the process smooth and mess-free. This short chilling time is crucial — extending it could make the dough too stiff and difficult to roll.
First Lamination Fold – The Business Letter Technique
Take the chilled dough and place the butter mixture down the center third. Then fold one side of the dough over the butter, followed by the other side — like folding a business letter. Pinch the ends to seal the butter in. With the long edge facing you, roll the dough out gently into a rectangle about 9×12 inches.
Keep your work surface and rolling pin lightly floured to prevent sticking. If the dough resists rolling, flip it over or give it a short rest before continuing. Avoid forcing it, which could tear the dough and expose the butter.
Fold the dough again like a letter and chill for another 20 minutes.
Second and Third Laminations – Building More Layers
Repeat the lamination process twice more. Each time, rotate the dough horizontally before rolling, then fold it into thirds and refrigerate. These additional folds multiply the layers exponentially. By the end of the third lamination, your dough will be beautifully structured and ready for shaping.
It’s important not to over-refrigerate between folds, as the dough may over-proof slightly or stiffen too much, making it hard to roll. Sticking to 20-minute rests ensures a balance between chill and flexibility.
Tips to Prevent Butter Breakage or Dough Tearing
Laminated dough is delicate. To prevent butter from breaking through the dough, keep it cool, and work quickly but gently. Always flour exposed butter if it begins to show. If the dough becomes too soft or warm, return it to the fridge briefly before continuing.
By the end of the lamination steps, you’ll have a dough that’s layered with buttery folds, ready to shape into beautiful spirals that bake up into golden, sugar-dusted cruffins.
Shaping, Proofing, and Baking Cruffins to Perfection
Cutting and Rolling the Dough for Spiral Cruffins
Once your dough has been fully laminated and chilled after the third fold, it’s time to divide and shape. First, cut the dough into three equal sections. Each section will make four cruffins, giving you a total of twelve.
Start by rolling out one dough portion into an 8×12-inch rectangle. If the dough keeps shrinking back while rolling, let it rest for five minutes so the gluten relaxes. This makes the rolling smoother and prevents tearing. Keep your work surface and rolling pin lightly floured throughout to maintain ease and precision.
After rolling, sprinkle the surface evenly with two tablespoons of the cinnamon-sugar mixture. Press the mixture lightly into the dough using the back of a spoon or a spatula. This step ensures that the cinnamon-sugar stays in place while rolling and adds flavor to every swirl.
Creating the Cruffin Spirals
With your dough rectangle covered in cinnamon-sugar, use a sharp knife or pizza cutter to slice it into twelve 1-inch strips. For consistent results, you can measure and mark the cuts with a ruler. Working with three strips at a time, layer them on top of one another and roll them into a tight spiral. Tuck the loose end underneath and place the roll into a greased muffin tin cup.
Repeat the same process with the other two dough sections until you have twelve cruffins, each nestled into its muffin cup. If you want a taller, more dramatic appearance, consider using a popover pan and cutting 2-inch wide strips instead of one.
Final Rise – Proofing the Cruffins Before Baking
Once all cruffins are shaped and in the muffin tin, lightly cover them and allow them to rise at room temperature for about one hour. You’ll know they’re ready when they look puffier and feel lighter. The dough should spring back slightly when touched.
This final proofing stage is crucial for achieving that soft, fluffy inside. If the environment is cool, extend the rise time slightly. Avoid over-proofing, as it can cause the cruffins to collapse or bake unevenly.
For overnight convenience, you can refrigerate the shaped cruffins instead. Let them sit covered in the muffin tin for up to 12 hours. The next day, let them come to room temperature and rise for an additional hour before baking.
Baking the Cruffins – Getting the Perfect Golden Crust
Preheat your oven to 350°F (177°C). Bake the cruffins for 25 to 28 minutes, or until the tops are golden brown and the internal temperature hits 200°F (93°C). An instant-read thermometer is helpful here to ensure the center is fully baked without overcooking the outer layers.
Once out of the oven, place the muffin pan on a cooling rack and allow the cruffins to rest for a few minutes before handling. Their crisp, flaky edges are delicate when hot and will settle slightly as they cool.
At this stage, your kitchen will be filled with the warm scent of buttery pastry and cinnamon. The texture should be crisp on the outside, tender and spiraled inside, and beautifully layered throughout.
Coating and Filling – Adding the Final Touches
Rolling Cruffins in Cinnamon Sugar for Classic Flavor
Once the cruffins are cool enough to handle — warm, but not hot — it’s time for the finishing touch that adds irresistible flavor and texture. In a shallow bowl, combine the remaining cinnamon and sugar. One by one, gently roll each cruffin in the mixture, coating all sides.
The residual warmth of the pastry helps the sugar adhere beautifully, creating a crisp, sweet shell on the outside. This coating is a signature element of the cruffin, adding crunch and just the right amount of sweetness without overpowering the buttery layers inside.
Rolling while the cruffins are slightly warm helps the sugar stick better. If they’ve cooled too much, you can brush them lightly with a touch of melted butter to encourage the coating to cling.
Optional Fillings – Elevating Your Cruffins
If you’re ready to take your cruffins to the next level, consider filling them with a creamy center. Some popular options include:
- Nutella
- Lemon curd
- Raspberry jam
- Vanilla pastry cream
To fill the cruffins, use a piping bag fitted with a long, narrow tip, such as the Wilton #230. Insert the tip about three-quarters of the way into the center of the cruffin. Squeeze gently until the filling begins to push back slightly, signaling that the center is full. You can fill from the top or the side — either way works beautifully.
This step adds a burst of flavor and a surprise element inside each cruffin. Keep in mind, fillings like lemon curd or jam offer a tart contrast to the sweet outer coating, creating a balanced bite.
Serving Suggestions for Freshly Made Cruffins
Cruffins are best enjoyed fresh, ideally within a few hours of baking, while their layers are still crisp. Serve them with coffee or tea, or simply on their own as a sweet breakfast or afternoon treat.
If you’re entertaining or gifting, a dozen cruffins displayed in a bakery-style box or basket makes for an elegant and delicious presentation. Dust them with a bit of powdered sugar if you want to elevate the look even more.
Storing and Freezing Leftovers
If you happen to have leftovers, store them at room temperature in an airtight container for up to three days. You can gently reheat them in a warm oven to revive some of the crispness.
To freeze, wait until the cruffins have fully cooled. Wrap each one individually in plastic wrap, then place them in a freezer-safe container. They’ll stay fresh for up to three months. To enjoy again, thaw at room temperature and reheat in a 300°F (150°C) oven for 8–10 minutes.
While you can freeze baked cruffins, freezing the raw dough or shaped but unbaked cruffins is not recommended, as it can disrupt the lamination and prevent proper puffing during baking.
Expert Tips, Troubleshooting & Smart Variations for Homemade Cruffins
Pro Tips for Flaky, Foolproof Cruffins Every Time
Even though this homemade cruffins recipe might feel like a project, following these tips ensures you get bakery-style results with less stress:
- Use the right butter: European-style salted butter, like Kerrygold, works best due to its higher fat content and pliable texture. It creates richer flavor and smoother lamination.
- Temperature control is key: Keep both the dough and the butter between 60°F and 64°F during lamination. If the butter’s too soft, it’ll leak. If it’s too hard, it’ll break through the dough.
- Rest the dough if it resists: If the dough shrinks back while rolling, give it 5–10 minutes to relax. Letting the gluten rest prevents tearing and makes shaping easier.
- Use a silicone mat: It’s easier to work on, helps with sticking, and allows seamless rolling and folding without sliding on the counter.
Perfecting these small but critical steps sets you up for cruffins that are flaky, golden, and evenly shaped.
Common Mistakes and How to Avoid Them
Even experienced bakers can run into trouble with laminated dough. Here are the most common problems and their solutions:
| Problem | Cause | Fix |
|---|---|---|
| Butter leaking during baking | Butter was too soft or dough tore | Keep butter cool, flour exposed spots |
| Dough too stiff to roll | Over-chilled or overworked dough | Let rest at room temp 5–10 minutes |
| Cruffins didn’t rise enough | Yeast wasn’t active or proofing was short | Check yeast freshness, allow full proof time |
| Cruffins fell or collapsed | Over-proofed before baking | Bake as soon as they become puffy and ready |
| Dough stuck to counter | Not enough flour or warm butter seeped out | Use silicone mat and chill between steps |
Adjustments for Dietary Needs and Kitchen Tools
While this recipe works best as-is, here are a few options for common dietary and equipment substitutions:
- Dairy-free: Use unsweetened oat or almond milk in place of whole milk, and vegan butter suitable for lamination (with at least 80% fat content). Results may be slightly softer, but still delicious.
- No stand mixer? Mix dough with a wooden spoon and knead by hand. It takes a bit more elbow grease but still yields great results.
- No piping tip? Use a plastic zip bag with a snipped corner for filling cruffins. It won’t be as precise but gets the job done.
- Egg wash option: While not required, brushing the tops with an egg wash before baking gives a glossy, golden finish. Just whisk 1 egg with 1 tablespoon milk.
Popover Pan for Taller Cruffins
For extra height and a dramatic look, use a popover pan instead of a standard muffin pan. Simply cut 2-inch wide strips instead of 1-inch ones and swirl only 2 strips per cruffin. Bake time is nearly the same — just add an extra 1–2 minutes and check for doneness at 200°F internal temperature.
Conclusion
Making cruffins at home might seem like a complex pastry project, but once you understand each step — from preparing a soft yeast dough to the lamination, shaping, and final sugary coating — the process becomes manageable and even enjoyable. This homemade cruffins recipe delivers everything you love about croissants and muffins in one beautiful, spiraled bite: buttery layers, a tender interior, and a sweet, crisp finish.
Whether you fill them with Nutella, lemon curd, or enjoy them plain with cinnamon sugar, cruffins are a showstopping treat for any time of day. With a bit of planning, the right ingredients, and attention to technique, you’ll create bakery-quality pastries right in your own kitchen. And once you bake your first batch, don’t be surprised if these golden swirls become a weekend tradition.


