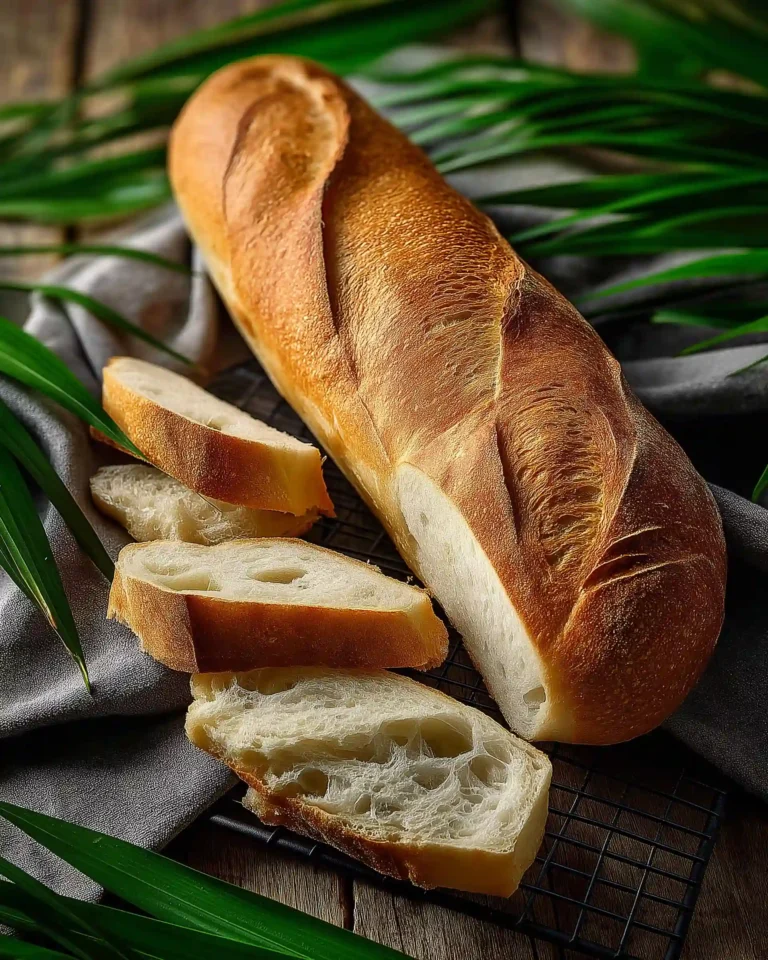
Cuban bread is one of those unforgettable staples that instantly transports you to the heart of Cuban cuisine. With its golden crust, tender interior, and rich flavor, this bread has become a favorite in kitchens beyond the borders of Florida. Perfect for sandwiches, breakfast toast, or simply served warm with a pat of butter, a well-made Cuban loaf is always a treat.
In this article, we’ll take a deep dive into a tried-and-true Cuban bread recipe, explore its history, walk through the precise process step by step, and offer helpful tips for getting the texture and flavor just right. Whether you’re a seasoned home baker or a complete novice in the kitchen, this guide is your ultimate companion to making authentic Cuban bread at home.
We’ll also address some of the most common questions people have when making Cuban bread for the first time. But before we get there, let’s start with the foundation: what makes Cuban bread unique and how to prepare the perfect dough.
Understanding Cuban Bread and Its Cultural Roots
What Is Cuban Bread?
Cuban bread is a white bread similar to French or Italian loaves but with a few unique characteristics. It’s typically made with bread flour, lard, yeast, water, sugar, and salt. The inclusion of lard adds a subtle richness and tenderness to the crumb, while a crisp golden crust gives the bread its signature texture.
One of the most distinct aspects of traditional Cuban bread is the use of a palmetto frond. This is laid across the top of the loaf before baking, leaving a small indentation and helping control the way the crust cracks. If you can’t get your hands on palmetto fronds, there are alternatives like baker’s twine or simply scoring the dough with a sharp blade.
A Brief History of Cuban Bread
Cuban bread, known locally as pan Cubano, has roots going back to the early 20th century in Tampa and Miami. It’s believed to have been first baked in Cuban-American neighborhoods, often by immigrant communities who were seeking to preserve their culinary heritage.
Unlike many European-style breads that require lengthy fermentation, Cuban bread is known for its faster rising time, making it ideal for home baking. The use of steam during baking contributes to its light, airy crumb and crusty shell, which is perfect for making Cuban sandwiches, though the bread itself is a delicious snack on its own.
Why Cuban Bread Is Different from Other White Breads
There are a few things that make Cuban bread stand out:
- Lard for flavor and tenderness: Unlike traditional French bread that uses no fat, Cuban bread uses a small amount of melted lard which provides a rich, soft interior.
- Shaping and baking technique: Rolled from a rectangle to form a longer loaf, Cuban bread is shaped in a distinct way.
- Palmetto frond: This traditional element adds authenticity and a unique look to the bread.
- Steamed baking method: The use of steam enhances crust development while keeping the inside soft and chewy.
Ingredients and Tools You Need for Cuban Bread
Essential Ingredients for Authentic Cuban Bread Recipe
To make a truly authentic Cuban bread recipe, you only need a handful of pantry staples. Here’s a breakdown of each ingredient and its role in the dough:
- Bread Flour (4 cups, sifted): This high-protein flour provides the structure needed for a chewy yet light crumb. Make sure to weigh it accurately using a kitchen scale for the best results.
- Lard (¼ cup, melted): Traditional Cuban bread uses lard to create a tender texture and rich flavor. It’s essential for authenticity.
- Water (1 ¼ cups, room temperature): Acts as the base for activating the yeast and hydrating the flour. Use room-temperature water to encourage even yeast development.
- Fast-Action Yeast (2 ¼ teaspoons): Helps the bread rise faster. This type of yeast is ideal for home bakers who want to speed up the fermentation process.
- Granulated Sugar (2 teaspoons): Feeds the yeast and adds a slight sweetness that balances the salty flavor.
- Salt (2 teaspoons): Enhances the overall flavor and strengthens the dough structure.
Each ingredient has a specific purpose and contributes to the final result. Skimping on one or mismeasuring another could alter the texture or flavor of the bread.
Recommended Tools for Baking Success
While you don’t need professional bakery equipment, having the right tools makes a big difference in achieving bakery-quality results at home. Here’s what you’ll need:
- Mixing Bowls: Use at least two — one for the initial mixing, and another for letting the dough rise.
- Kitchen Scale: Critical for weighing flour accurately to avoid a dense loaf.
- Measuring Cups and Spoons: Needed for all the other ingredients.
- Plastic Wrap: To cover the dough during its resting periods.
- Baking Sheets (11×17-inch): These will hold the shaped loaves during proofing and baking.
- Parchment Paper: Prevents the loaves from sticking to the trays.
- Palmetto Fronds or Baker’s Twine: A traditional touch that helps maintain the classic appearance and controls cracking.
- Oven-Safe Metal Dish: Used to create steam in the oven, essential for achieving a crispy crust.
- Meat Thermometer: Ensures your bread is fully cooked by checking the internal temperature (200°F).
- Wire Rack: For cooling the loaves evenly after baking.
With these ingredients and tools in place, you’re ready to begin the hands-on part of making your own Cuban bread recipe from scratch. Let’s roll up our sleeves and get started.
Print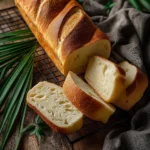
Cuban Bread Recipe
- Total Time: 2 hours 50 minutes
- Yield: 2 loaves (serves 8)
- Diet: Vegetarian
Description
This authentic Cuban Bread Recipe is soft, crusty, and rich with traditional flavor, made with lard and steamed baking for perfect texture.
Ingredients
4 cups bread flour, sifted
¼ cup lard, melted
1 ¼ cups water, room temperature
2 ¼ teaspoons fast-action yeast
2 teaspoons granulated sugar
2 teaspoons salt
Instructions
1. Weigh and sift the bread flour. Melt the lard in the microwave or saucepan.
2. Stir together the water, yeast, and sugar until dissolved.
3. Add melted lard and half of the flour. Mix to form a wet paste.
4. Add salt and the rest of the flour gradually to make a sticky dough.
5. Knead on a floured surface for 10–15 minutes until smooth and elastic.
6. Test with the windowpane method. If not ready, knead longer and retest.
7. Shape into a ball, place in a bowl, cover with plastic wrap, and let rise 1–1.5 hours.
8. Sanitize palmetto fronds, dry them, and set aside. Use baker’s twine if needed.
9. Punch down the risen dough and divide into two equal parts.
10. Shape each into a rectangle, roll tightly, and seal the seam and ends.
11. Roll each loaf to 18 inches. Press in the frond and flip the loaf so the frond is on the bottom.
12. Cover with plastic wrap and let proof 45–60 minutes until nearly doubled.
13. Preheat oven to 425°F with a metal pan on the bottom rack.
14. Flip the loaves again so the fronds are on top.
15. Slide into the oven, pour water into the hot metal pan for steam, and close the oven.
16. Bake for 25–30 minutes or until golden brown with a 200°F internal temp.
17. Remove water pan during the final 5 minutes. Cool on wire rack 45–60 minutes before slicing.
Notes
Weighing ingredients ensures accuracy and consistency.
Use King Arthur bread flour for best texture.
Humidity can affect flour absorption. Adjust flour quantity as needed.
Do not skip the cooling step — it finishes the baking process inside.
For best proofing, place dough in a cool oven with a pan of boiling water on the shelf beneath.
- Prep Time: 40 minutes
- Cook Time: 25 minutes
- Method: Baking
- Cuisine: Cuban
Step-by-Step Process of Making the Dough
Preparing and Activating the Yeast
The dough begins with activating the yeast, an important step to ensure a successful rise. In a mixing bowl, stir together the room-temperature water, fast-action yeast, and granulated sugar. Let it sit for a few minutes until you see some bubbling or foaming — this indicates that the yeast is active and ready to work.
Adding sugar helps jumpstart the yeast activity. Make sure your water isn’t too hot or too cold. Water that’s too warm can kill the yeast, while cold water may delay fermentation.
Mixing the Dough Components
Once the yeast mixture is foamy, stir in the melted lard followed by half of the sifted bread flour. Mix well until a wet, sticky paste begins to form. At this point, add the salt and gradually stir in the remaining flour, a little at a time.
Don’t rush this part. Add flour only until the dough becomes slightly sticky. You may not need the full 4 cups if your environment is dry, or you may need a touch more if it’s humid.
Kneading for Strength and Texture
Transfer the dough onto a lightly floured surface. Knead it for 10 to 15 minutes, using a rhythmic push, fold, and turn motion. You’re looking for a dough that becomes smooth and elastic, with no sticky spots remaining.
Use the windowpane test to check the gluten development: pinch off a small ball of dough and stretch it between your fingers. If it stretches thin enough to let light through without tearing, you’ve kneaded enough.
First Rise: Bulk Fermentation
Form the kneaded dough into a ball and place it in a clean, greased bowl. Cover tightly with plastic wrap and let it rise at room temperature until doubled in size. This usually takes 1 to 1 ½ hours.
A trick to speed up the proofing process: place the bowl in a cool oven with a pan of hot water on the shelf below. The gentle steam creates a warm, moist environment that encourages faster fermentation without overheating the dough.
After this first rise, you’re ready to shape and prepare the loaves for baking. This stage sets the foundation for the bread’s final texture and crumb.
Shaping and Final Proofing for Cuban Bread
Dividing and Shaping the Dough
Once your dough has doubled in size, turn it out onto a lightly floured surface. Gently punch it down all over to release the built-up gas pockets. Divide the dough into two equal pieces using a sharp knife or bench scraper.
Take one piece at a time and shape it into a rectangle. From one of the long sides, roll the dough up tightly like a jelly roll, tucking as you go. Once rolled, pinch the seam closed and seal both ends by tucking them underneath. Roll it gently with your palms to form an even loaf about 18 inches long. Repeat the process with the second piece.
This method creates the loaf’s final shape and helps with even baking. Be careful not to use too much flour during shaping — it can make the surface dry and difficult to seal.
Using Palmetto Fronds or Alternatives
Traditionally, a palmetto frond is pressed across the top of the loaf to encourage uniform cracking as it bakes. To do this, cut and split two fronds lengthwise, then wash and sanitize them thoroughly in hot water with dish soap.
Place the sanitized frond gently on top of each shaped loaf and press it slightly into the surface. If you can’t find palmetto fronds, use baker’s twine or simply score the top of the loaves with a sharp blade (lame or razor) before baking.
After placing the fronds, flip the loaves over so the frond is now on the bottom. This step ensures a subtle, natural split during baking when you flip them back later.
Final Proofing Before Baking
Place each loaf on a parchment-lined baking sheet, cover lightly with plastic wrap, and allow them to rise for 45 minutes to 1 hour. During this time, the loaves should almost double in size again and spring back gently when touched with a fingertip.
While they’re proofing, preheat your oven to 425°F. Place a metal casserole dish on the bottom rack to preheat — this will be used later to generate steam. The steam will help develop a crisp crust and support the final oven spring.
Once the loaves have finished proofing, you’re ready to move on to the final and most satisfying part of the process: baking.
Baking Cuban Bread to Golden Perfection
Creating Steam in the Oven
Right before placing your loaves in the oven, gently flip them over so the palmetto fronds are now facing up. If the dough deflates slightly during this process, don’t panic. The oven heat will help it rise again — this is known as oven spring.
Place your baking trays on the center rack of the preheated oven. Carefully pour 1 to 2 cups of hot water into the preheated metal dish on the bottom rack. Quickly shut the oven door to trap the steam.
The burst of moisture creates a humid environment that allows the bread to expand fully before the crust sets. This technique is key to achieving that thin, crispy crust Cuban bread is known for.
Baking Time and Internal Temperature
Bake the loaves for 25 to 30 minutes, checking for a rich, golden brown color and a slightly blistered surface. The internal temperature of the bread should reach 200°F, which confirms it is fully baked. Use a meat thermometer inserted into the center of the loaf to check.
In the last 5 minutes of baking, carefully remove the pan of water to allow the crust to firm up further. This final dry heat stage helps develop the classic crunch without burning the bottom of the loaf.
Once the loaves are done, transfer them to a wire rack and let them cool for 45 minutes to 1 hour. This cooling period lets the bread finish cooking inside and prevents it from becoming gummy when sliced. It might be tempting to cut in right away, but patience will reward you with a perfect texture.
Storing, Serving
Best Ways to Store Homemade Cuban Bread
Fresh Cuban bread is best enjoyed the day it’s made. That said, if you need to store it, wrap the completely cooled loaves in a clean kitchen towel or parchment paper, then place them in a paper bag or loosely sealed plastic bag. This helps preserve the crust’s crispness while preventing excess moisture buildup.
For longer storage, you can freeze the loaves. Wrap each one tightly in plastic wrap and place it in a freezer-safe bag. When you’re ready to enjoy it again, thaw the bread at room temperature, then reheat in a warm oven for 5 to 7 minutes to revive its texture.
Avoid storing Cuban bread in the refrigerator, as this tends to make it go stale faster due to moisture loss.
How to Serve Cuban Bread
This bread is incredibly versatile and serves as the foundation for many Cuban and Latin-American dishes. Here are a few classic and creative ways to serve it:
- Warm with butter: A simple and comforting side for any meal.
- Toasted slices: Ideal for breakfast or afternoon snacks.
- Side for soups or stews: Use it to soak up flavorful broths.
- Sandwich base: While traditionally used in Cuban sandwiches, it also pairs well with a variety of spreads and roasted vegetables.
When sliced, Cuban bread has a light, airy crumb that holds up well without being overly dense. It’s excellent for mopping up sauces, slathering with butter or jam, or using as the centerpiece of a hearty sandwich.
Conclusion: Bring Cuban Tradition into Your Kitchen
Mastering a Cuban bread recipe at home isn’t just about baking bread — it’s about embracing a cultural classic that has stood the test of time. From its humble ingredient list to the traditional baking methods like using steam and fronds, Cuban bread brings authenticity, flavor, and a sense of heritage to the table.
Whether you’re slicing it warm to accompany a family meal or using it to build your favorite sandwich, this bread offers unbeatable taste and texture. With just a bit of patience and attention to detail, you can bake a loaf that’s golden, crisp, and full of heart — just like it’s made in the bakeries of Tampa or Miami.
Ready to make your kitchen smell like a Cuban bakery? Preheat that oven and get started. Cuban bread doesn’t wait, and once you taste it fresh from your oven, you won’t either.


