Creating the perfect batch of soft dinner rolls is a cherished kitchen ritual that brings warmth and comfort to any table. Whether you’re serving them alongside a hearty meal or enjoying them with a drizzle of honey butter, these rolls are a staple in any home baker’s repertoire. This guide will take you through everything you need to know to achieve golden, fluffy rolls every time, even if you’re new to baking. From prepping your ingredients to mastering the rise and getting that golden top just right, every step matters. Let’s dive into how you can make these pillowy soft rolls with ease and confidence.
Understanding the Basics of a Soft Dinner Rolls Recipe
Why Ingredients Matter in Soft Dinner Rolls
The magic of soft dinner rolls starts with a handful of essential ingredients. Each one plays a critical role in the dough’s texture, rise, and flavor.
- Milk: Using whole milk adds richness and helps produce a soft crumb thanks to its fat content. It should be warmed to about 110°F, which activates the yeast without killing it.
- Yeast: Instant yeast, especially Platinum Yeast from Red Star, is highly reliable. It helps the dough rise consistently and quickly.
- Sugar: Divided into two parts, sugar not only sweetens the rolls subtly but also feeds the yeast, which helps the dough rise.
- Egg: The egg adds structure and softness, helping the rolls hold together while staying tender.
- Butter: Softened butter gives the rolls their signature buttery flavor and contributes to a tender crumb.
- Salt: Essential for balance, salt enhances flavor while controlling yeast activity.
- Flour: Bread flour yields a slightly chewier texture, while all-purpose flour is more accessible and still results in a fluffy roll.
Tools You’ll Need for Soft Dinner Rolls Success
To make this process as smooth as possible, having the right tools can make a significant difference.
- Stand Mixer with Dough Hook: This is ideal for mixing and kneading the dough effortlessly.
- Mixing Bowl and Wooden Spoon: If you’re going manual, these are all you need.
- Baking Pan: A 9×13 inch glass baking dish is preferred for even browning.
- Bench Scraper: Perfect for dividing and handling sticky dough.
- Pastry Brush: Handy for applying the optional honey butter topping.
What Makes Dinner Rolls Soft and Fluffy?
The key to achieving that cloud-like texture lies in a few technical but straightforward baking principles:
- Hydration: The balance of liquid to flour needs to be just right. A slightly sticky dough leads to a softer interior.
- Kneading: Proper kneading develops gluten, which gives the dough its structure and elasticity.
- Rising Time: Allowing the dough to double in size not once but twice ensures that the rolls bake up airy rather than dense.
- Oven Position: Baking the rolls on a lower oven rack prevents over-browning, helping them bake evenly through the center.
These foundational principles will set you up for consistent success, even if it’s your first time baking bread at home.
Print
Soft Dinner Rolls Recipe
Description
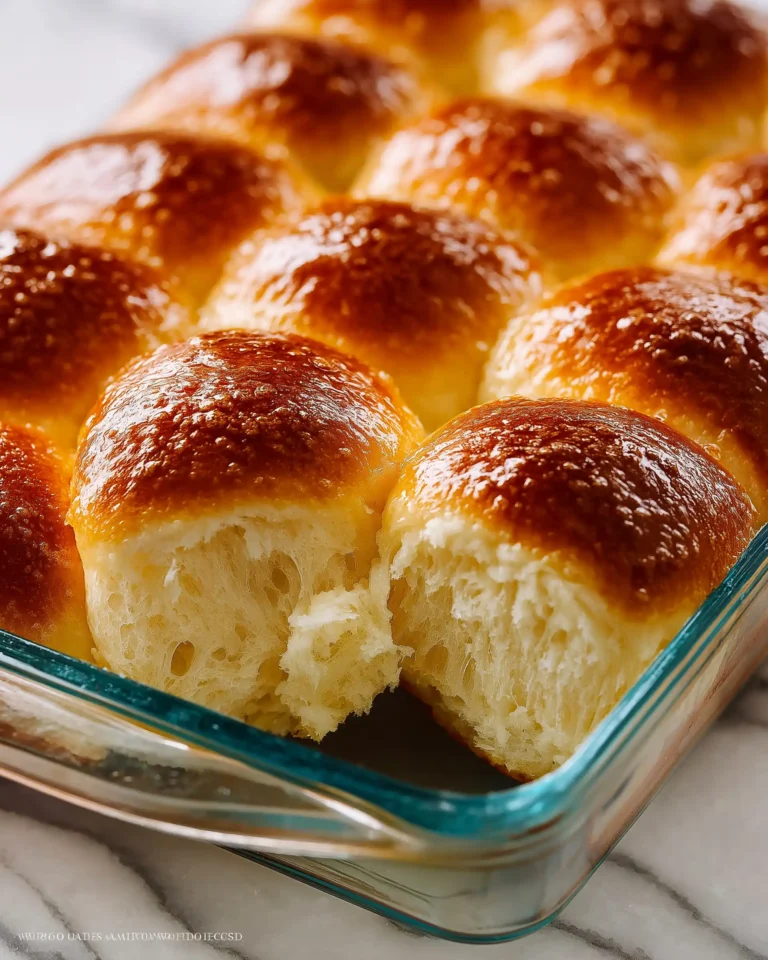
These homemade soft dinner rolls are fluffy, buttery, and perfect for any meal. Made with simple pantry ingredients, this foolproof recipe guarantees golden, tender rolls every time.
Ingredients
1 cup (240ml) whole milk, warmed to about 110°F (43°C)
2 and 1/4 teaspoons Platinum Yeast from Red Star (1 standard packet)
2 tablespoons granulated sugar, divided
1 large egg
1/4 cup (4 Tbsp; 56g) unsalted butter, softened to room temperature and cut into 4 pieces
1 teaspoon salt
3 cups (390g) all-purpose flour or bread flour (spooned & leveled)
Optional topping: 2 tablespoons melted unsalted butter mixed with 1 tablespoon honey
Instructions
1. Whisk warm milk, yeast, and 1 tablespoon sugar in a bowl. Cover and let sit for 5 minutes until foamy.
2. Add remaining sugar, egg, butter, salt, and 1 cup flour. Mix on low speed for 30 seconds.
3. Scrape down bowl sides and add remaining flour. Beat on medium speed until dough comes together and pulls from sides.
4. Knead for 5 minutes by mixer or by hand until smooth and slightly sticky.
5. Place dough in greased bowl, cover, and let rise for 1–2 hours or until doubled.
6. Punch dough down, divide into 14–16 equal pieces, and shape into balls.
7. Place in greased 9×13-inch pan. Cover and let rise for another hour until puffy.
8. Preheat oven to 350°F (177°C) on lower rack. Bake for 20–25 minutes until golden brown, rotating pan halfway through.
9. Optional: Brush warm rolls with honey butter topping.
10. Cool slightly before serving. Store covered at room temperature for 2–3 days or refrigerate up to 1 week.
Notes
To freeze unbaked rolls, shape and freeze for up to 3 months. Thaw and rise 4–5 hours before baking.
To freeze baked rolls, cool completely and freeze up to 3 months. Reheat in oven at 300°F (149°C) for 10 minutes.
Overnight prep: Shape rolls and refrigerate for up to 15 hours. Let rise 1–2 hours at room temperature before baking.
- Category: Dinner Recipes
Preparing the Dough for Soft Dinner Rolls
Activating the Yeast for a Reliable Rise
Starting with yeast activation is essential for ensuring your rolls rise properly. Begin by whisking warm milk, instant yeast, and 1 tablespoon of sugar together. The temperature of the milk should be around 110°F, warm to the touch but not hot. After mixing, cover the bowl and let it sit for 5 minutes. You’ll know your yeast is active if you see bubbles or foam on the surface. This indicates that the yeast is alive and ready to leaven the dough.
If you’re using active dry yeast instead of instant yeast, expect the rise times to be slightly longer, but the process remains nearly the same.
Mixing the Dough: Stand Mixer or By Hand
Once the yeast is activated, you’re ready to add the rest of your ingredients:
- The remaining sugar
- Egg
- Butter, softened and cut into four pieces
- Salt
- 1 cup of flour
Begin mixing with a dough hook or paddle attachment on low speed for 30 seconds. Scrape down the sides with a silicone spatula to ensure even mixing. Add the remaining flour gradually and switch to medium speed. Keep mixing until the dough starts to come together and pulls away from the sides. The dough should be soft and slightly sticky, not overly wet.
If you’re mixing by hand, use a large wooden spoon or silicone spatula. It will take more arm strength and effort, but the result will be the same. Avoid using hand mixers because the sticky dough can clog the beaters.
Adjusting for Texture: Flour as Needed
If your dough is too wet to handle, don’t worry. You can beat in more flour 1 tablespoon at a time until it becomes workable. You want a dough that is tacky but not too sticky, which you can knead without too much flour on your hands.
Resist the urge to add too much flour all at once. Over-flouring can dry out the dough, leading to tough or crumbly rolls.
Kneading the Dough for Gluten Development
To knead with a stand mixer, let it run on medium speed for 5 full minutes. If you’re kneading by hand, turn the dough out onto a lightly floured surface and use the heel of your hands to push and fold the dough repeatedly for the same amount of time.
Check your dough with a poke test—if it slowly bounces back after pressing with your finger, it’s ready. Another method is the windowpane test. Tear off a small piece of dough and stretch it thin. If light can pass through without the dough tearing, gluten is well developed.
First Rise: Letting the Dough Double
Transfer the kneaded dough into a lightly greased bowl, turning it so it’s coated on all sides. This prevents sticking and keeps the dough moist. Cover the bowl with a clean towel, foil, or plastic wrap.
Place the bowl in a warm, draft-free spot and let it rise for 1 to 2 hours, or until it has doubled in size. The warmth helps the yeast ferment and produce gases that cause the dough to expand. If your kitchen is cool, place the bowl near a warm appliance or inside an unheated oven with the light on.
Soft, pillowy dinner rolls depend on this stage, so don’t rush it. Letting the dough rise fully builds flavor and texture that will shine through in your final bake.
Shaping and Proofing the Soft Dinner Rolls
Punching Down and Dividing the Dough
Once your dough has doubled in size, it’s time to shape the rolls. First, gently punch down the dough to release built-up gas. This doesn’t require brute force—just press your fist into the center to collapse it. The dough should feel soft and elastic, slightly airy but easy to handle.
Transfer the dough to a lightly floured surface. Use a bench scraper or a sharp knife to divide it into 14 to 16 equal pieces. Don’t stress over precision—just eyeball the sizes so they’re roughly the same. If you’re going for uniformity, you can weigh each piece on a kitchen scale for consistency.
How to Shape the Dough into Smooth Balls
Now, take each dough piece and shape it into a tight, smooth ball. Tuck the edges underneath, then roll gently between your palms or on the countertop to seal the bottom seam. This helps create surface tension, which gives the rolls a neater, rounder appearance when baked.
Keep your hands lightly floured if the dough is sticking. Avoid using too much flour, though, as it can dry out the exterior.
Arranging the Rolls in the Pan
Prepare a greased 9×13 inch baking pan, or use two 9-inch round or square pans. A glass baking dish is often preferred because it promotes even browning without scorching the bottoms.
As you place the dough balls in the pan, space them evenly but close enough that they’ll expand and touch during the second rise. This contact helps produce those soft, pillowy sides that make dinner rolls irresistible.
Second Rise: Creating That Signature Fluff
Once shaped and arranged, cover the rolls with plastic wrap, foil, or a clean kitchen towel. Let them rise in a warm spot for about 1 hour, or until noticeably puffy. This second rise is essential. It relaxes the gluten and allows the rolls to become airy and tender before baking.
They’re ready when they’ve almost doubled in size and feel soft when gently poked. If they deflate when touched, they may have over-proofed, so keep an eye on them during this final rise.
This stage is where the transformation happens—what was once a sticky dough becomes structured, soft, and nearly ready to turn golden in the oven. Skipping or shortening this proofing step can result in dense or tough rolls, so patience pays off here.
Baking the Soft Dinner Rolls to Golden Perfection
Preheating the Oven Correctly
While your rolls finish their second rise, it’s time to preheat your oven to 350°F (177°C). It’s best to adjust your oven rack to a lower position, especially if you’re using a metal baking pan. This ensures that the tops of your rolls don’t brown too quickly while the insides are still baking. The lower rack helps them cook evenly and avoid burning on top.
Preheating the oven fully before the rolls go in is crucial. An under-heated oven won’t produce that immediate lift known as oven spring, which is what helps give rolls their volume and airy centers.
Bake Time and Monitoring for Doneness
Place your baking dish on the lower rack and bake for 20 to 25 minutes. Around the halfway point, rotate the pan to ensure even baking, especially if your oven has hot spots.
You’ll know the rolls are done when the tops are golden brown and the internal temperature (if you’re checking) reaches about 190°F (88°C). If you notice the tops darkening too fast before the centers are done, loosely tent the rolls with a sheet of foil. This will protect the tops while allowing the heat to finish cooking the inside.
Optional Honey Butter Glaze for Extra Flavor
As soon as the rolls come out of the oven, while they’re still hot, brush them with the optional honey butter topping. Just mix 2 tablespoons of melted unsalted butter with 1 tablespoon of honey. This gives the rolls a beautiful shine, a hint of sweetness, and an extra layer of flavor.
If you prefer to keep them plain, they’ll still taste soft and delicious with a naturally buttery flavor from the dough.
Cooling and Serving
Let the rolls cool for a few minutes in the pan before serving. This allows the structure to set and makes them easier to handle. They’re best enjoyed warm, fresh from the oven, but can also be reheated later.
These rolls are incredibly soft, slightly sweet, and wonderfully fluffy—ideal for any meal, whether you’re serving a holiday spread or a weekday dinner. With just the right amount of golden crust and tender crumb, they hit all the right notes.
Storage, Freezing, and Make-Ahead Options for Soft Dinner Rolls
How to Store Leftover Rolls for Freshness
Soft dinner rolls stay fresh for a few days if stored correctly. After baking and cooling completely, place the rolls in an airtight container or wrap them tightly with plastic wrap or aluminum foil.
- At room temperature: They’ll stay soft for 2 to 3 days.
- In the refrigerator: Store them for up to 1 week, but be aware refrigeration can dry out bread slightly. To revive, just warm them in the oven wrapped in foil for a few minutes.
For best flavor and texture, bring chilled rolls back to room temperature or reheat before serving.
Freezing Unbaked Rolls
Planning ahead? You can freeze the shaped dough balls before baking:
- After shaping the rolls (but before the second rise), place them in a greased baking pan and cover tightly.
- Freeze for up to 3 months. Once frozen solid, you can transfer them to a freezer-safe bag or container if you’re saving space.
- On baking day, arrange the frozen rolls in a pan, cover, and thaw/rise for 4 to 5 hours at room temperature before baking.
This method gives you freshly baked rolls with zero rush on the day you need them.
Freezing Baked Rolls
If you’ve already baked the rolls, you can still freeze them:
- Cool them completely first to avoid condensation in the storage bag.
- Place in a freezer-safe container or bag and freeze for up to 3 months.
- To serve, thaw overnight in the refrigerator or at room temperature, then reheat in a 300°F (149°C) oven for 10 minutes, lightly covered.
The texture stays surprisingly fluffy, and the flavor remains intact if frozen properly.
Overnight Dough Instructions
You can also prep your dough the night before:
- Complete the recipe through shaping the rolls, then cover tightly and refrigerate for up to 15 hours.
- About 3 hours before baking, remove from the fridge and let the rolls rise on the counter until puffy, about 1 to 2 hours.
Alternatively, let the dough have its first rise in the refrigerator overnight. The next day, let it finish rising for 2 more hours at room temp before shaping and baking.
This overnight option makes holiday or weekday baking more manageable, especially when time is tight. With these storage and make-ahead strategies, you can always have soft, fluffy dinner rolls on hand without last-minute stress.
Troubleshooting Common Soft Dinner Rolls Problems
Why Didn’t My Dough Rise?
One of the most common issues home bakers face is dough that doesn’t rise properly. Here are key reasons this might happen and how to fix them:
- Inactive Yeast: If your yeast is old or expired, it might not activate. Always check the expiration date and look for bubbles after mixing it with warm milk and sugar. If there’s no foam, your yeast may be dead.
- Wrong Milk Temperature: If the milk is too hot, it can kill the yeast. Aim for about 110°F (43°C). Use a thermometer if possible, especially if you’re new to baking.
- Room Temperature Too Cold: Yeast needs warmth to thrive. If your kitchen is chilly, place the bowl inside an oven (turned off) with the light on, or near a warm appliance.
My Dough Is Too Sticky or Too Dry
Finding the right dough texture is crucial for soft dinner rolls.
- Too Sticky? Add more flour—but only 1 tablespoon at a time. The dough should be slightly tacky, not overly wet.
- Too Dry? If the dough feels stiff and cracks while kneading, add a tiny splash of milk (1 teaspoon at a time) and knead until it becomes soft and pliable.
You want a dough that’s soft, slightly elastic, and easy to knead without constantly sticking to your hands.
Rolls Didn’t Turn Out Soft or Fluffy
Several factors affect softness:
- Over-Flouring: Too much flour can make the rolls dry. Always spoon and level your flour instead of scooping.
- Under-Kneading: If the dough isn’t kneaded enough, gluten won’t develop properly. This results in dense rolls. Knead for a full 5 minutes, and check with the windowpane test.
- Under-Proofing: Rolls need enough time to rise. If you bake them before they’ve puffed up during the second rise, they’ll be dense.
My Rolls Burned or Baked Unevenly
Burnt or overly browned tops can be frustrating. Here’s how to prevent that:
- Lower Oven Rack: Baking on a lower rack helps keep the tops from burning while the centers finish baking.
- Foil Tent: If tops brown too fast, lightly cover the pan with foil during the last 10 minutes of baking.
- Glass Pan Advantage: Glass pans distribute heat more evenly than metal, which can scorch bottoms quickly.
Rolls Aren’t Holding Their Shape
If your rolls spread out or flatten, it may be because:
- The Dough Was Too Warm: Over-proofed or warm dough can collapse. Try shaping and chilling briefly before baking.
- They Were Placed Too Far Apart: Rolls should be arranged close enough to touch slightly after rising, which supports their shape during baking.
Troubleshooting helps you master the method and gain confidence with each bake. Even with small missteps, this soft dinner rolls recipe is forgiving and designed to guide you toward consistent, delicious success.
Conclusion
Soft dinner rolls are more than just a side dish—they’re a heartwarming, homemade touch that can elevate any meal. With the right balance of ingredients, proper kneading, and patient rising, you can achieve tender, fluffy rolls that rival bakery-quality results. Whether you’re making them fresh for dinner, freezing for later, or prepping the night before a big holiday, this recipe offers flexibility without compromising on texture or taste. Once you master the method, these golden rolls will become a dependable favorite in your kitchen, always ready to bring warmth and comfort to your table.


