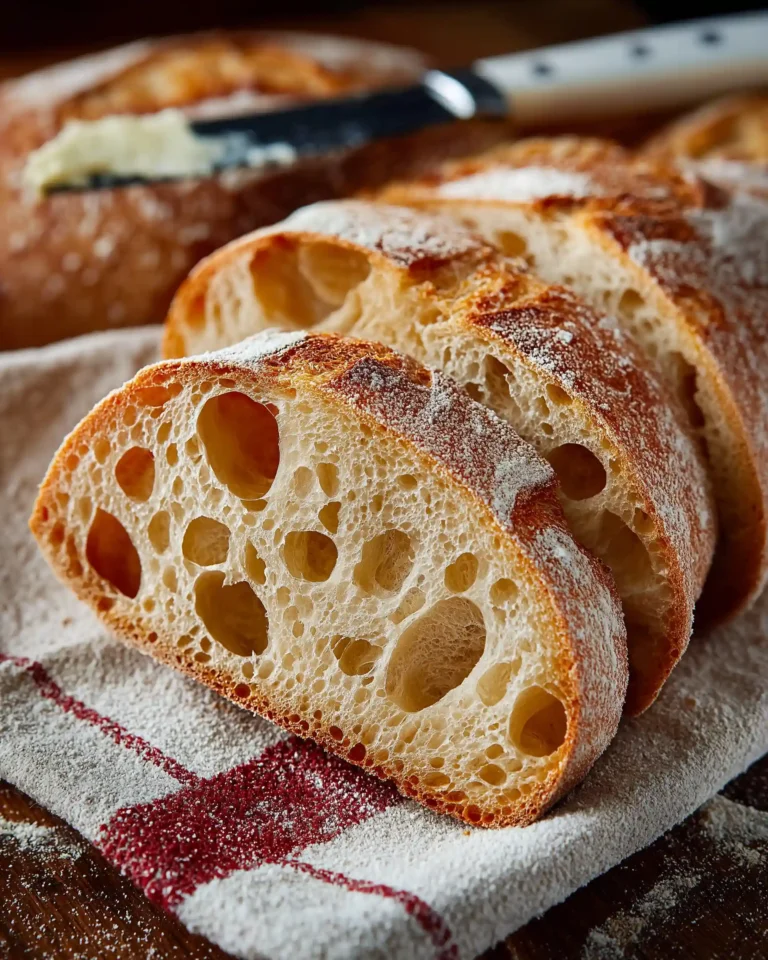
If you’ve ever wandered past an artisan bakery, captivated by the rustic charm of golden ciabatta loaves, you’re not alone. That soft, airy interior and crisp exterior are enough to make anyone crave a slice slathered in butter or topped with fresh herbs and roasted vegetables. But what if you could achieve that same bakery-style ciabatta at home, without fancy tools or kneading for hours?
This guide breaks down how to make Bakery-Style No-Knead Ciabatta Bread in a stress-free, beginner-friendly way. From choosing the right flour to perfecting the fermentation process, we’ll walk you through each essential step for achieving bakery-level quality. All you need is a bit of time, patience, and the right technique.
In this article, we’ll cover:
- Why no-knead ciabatta is ideal for beginners
- The science behind fermentation and flavor development
- Shaping techniques for that signature ciabatta texture
- Step-by-step baking instructions
- Storage tips and serving ideas
- Frequently asked questions for successful results
Why No-Knead Ciabatta Bread is a Game-Changer
No-Knead Method Simplifies Artisan Breadmaking
Traditional breadmaking often intimidates home bakers. The idea of kneading for twenty minutes or using a stand mixer can make people hesitate. But no-knead recipes turn that fear into fascination. With this method, time and fermentation do the work for you, developing gluten and flavor naturally.
This makes it ideal for beginners who want high-quality results with minimal effort. The dough stays untouched for about 18 hours, during which it slowly ferments, builds structure, and creates that classic ciabatta taste and open crumb.
The Origins of Ciabatta Bread
Ciabatta, which means “slipper” in Italian due to its flat, wide shape, originated in the 1980s as Italy’s answer to French baguettes. The bread was developed specifically to create an Italian sandwich bread with a light, open crumb and chewy texture.
This no-knead version stays true to that philosophy, focusing on simplicity while delivering the same authentic results you’d find in an Italian bakery.
Key Differences Between Ciabatta and Other Breads
Unlike sandwich loaves or baguettes, ciabatta is:
- Higher in hydration, making the dough much wetter
- Shaped more freely to encourage irregular holes
- Crisp on the outside but soft and chewy on the inside
This unique combination is what gives ciabatta its charm and sets it apart from everyday loaves.
Who Should Try No-Knead Ciabatta?
Anyone who:
- Wants to try artisan bread without advanced skills
- Prefers a rustic, hand-shaped look
- Likes crusty exteriors with light, holey interiors
- Has time to let the dough rest overnight
Whether you’re new to baking or just short on time, this recipe delivers maximum reward for minimum effort.
Print
Bakery-Style No-Knead Ciabatta Bread Recipe
- Total Time: 18 hrs 35 mins
- Yield: 2 loaves
- Diet: Vegetarian
Description
A bakery-style no-knead ciabatta bread with a crispy crust, airy crumb, and deep flavor – made effortlessly with an overnight rise.
Ingredients
3 ½ cups (17 ½ oz/496g) white bread flour
½ cup (2 ½ oz/71g) whole wheat flour
1 ½ teaspoon salt
¼ teaspoon instant yeast
2 cups (16 floz/450ml) lukewarm water
1 tablespoon olive oil
Instructions
1. In a large bowl, mix together the flours, salt, and yeast.
2. In a separate jug, mix the lukewarm water and olive oil.
3. Add the wet ingredients to the dry and mix into a wet, sticky dough.
4. Scrape down the bowl, cover with plastic wrap and a towel, and ferment at room temperature for 18 hours.
5. Line one baking sheet with a floured towel and another with parchment paper.
6. Turn the dough out, form it into a ball, divide in two, and place on the floured towel.
7. Cover and let proof for 2 hours until bubbly and risen.
8. Preheat the oven to 425°F (210°C).
9. Flip each dough piece and gently stretch into a 16-inch loaf, then transfer to the parchment-lined baking sheet.
10. Bake for 35–40 minutes until golden brown and crusty.
11. Cool completely on a wire rack before slicing and serving.
Notes
Bread flour creates a stronger, chewier texture than all-purpose flour.
Do not knead the dough at any point – the long fermentation builds gluten naturally.
Store in a paper bag at room temperature or freeze sliced loaves for up to 2 months.
- Prep Time: 30 mins
- Cook Time: 35 mins
- Category: Bread
- Method: No-Knead
- Cuisine: Italian
Preparing the Perfect Dough for Bakery-Style No-Knead Ciabatta Bread
Selecting the Right Flours for Texture and Flavor
The combination of white bread flour and whole wheat flour creates the perfect balance in both texture and flavor. White bread flour contains more protein than all-purpose flour, which helps build the structure and chewiness ciabatta is known for. Whole wheat flour, although used in a smaller amount, deepens the flavor and adds a rustic touch to the crumb.
Here’s what you’ll need:
- 3 ½ cups (496g) white bread flour: Builds a strong gluten network for better structure.
- ½ cup (71g) whole wheat flour: Enhances flavor complexity and adds nutrients.
While you can substitute all-purpose flour for the white bread flour, expect a slightly softer, less chewy loaf. The bread will still rise well, but the crust and holes may not be as dramatic.
Why Instant Yeast Works Best in No-Knead Recipes
Unlike active dry yeast, instant yeast doesn’t need to be proofed. It dissolves directly into the flour mixture, which is perfect for long fermentation processes. In this recipe, just ¼ teaspoon of instant yeast is all it takes to kick-start the slow rise overnight.
Because the dough sits at room temperature for 18 hours, the yeast has ample time to multiply and create the signature airy pockets of ciabatta. There’s no rush and no need to worry about overproofing. The result is a deeply flavorful dough with minimal effort.
Incorporating Salt for Balance and Structure
Salt isn’t just about taste. It plays a critical role in regulating yeast activity and strengthening gluten. In this recipe, 1 ½ teaspoons of salt enhance the bread’s overall flavor and help control the slow fermentation.
Too little salt, and the dough may rise too quickly. Too much, and the yeast might stall. Stick to the measured amount for the best result.
Adding Liquids: The Role of Water and Olive Oil
Hydration is crucial in ciabatta dough. The high water content — 2 cups (450ml) of lukewarm water — is what makes the dough sticky and soft, allowing for large holes in the final bake.
1 tablespoon of olive oil adds a bit of fat, which tenderizes the crumb and helps with dough elasticity. Though subtle in taste, it contributes to a softer bite and helps the crust brown beautifully in the oven.
Mixing the Dough: How to Combine Ingredients Properly
Here’s how to bring the dough together:
- In a large mixing bowl, whisk together both flours, salt, and yeast until well distributed.
- In a separate jug or measuring cup, mix the lukewarm water and olive oil.
- Pour the liquid mixture into the dry ingredients and stir using a wooden spoon or spatula until no dry flour remains. The dough will look wet, loose, and sticky — that’s exactly how it should be.
There’s no kneading, folding, or shaping involved at this point. Just a simple stir to hydrate the flour.
Overnight Fermentation: Letting the Dough Rest
Once combined, scrape down the sides of the bowl and cover it tightly with plastic wrap or a shower cap. Drape a kitchen towel over the top to insulate it and keep out drafts.
Let it rest at room temperature for about 18 hours. During this time:
- The dough ferments slowly, building flavor naturally
- Gluten develops without kneading
- Bubbles begin forming, giving the bread its open crumb
You’ll know it’s ready when the surface is covered in bubbles and the dough has doubled in size.
Shaping and Proofing Your No-Knead Ciabatta Dough
Handling Sticky Dough Without Deflating It
After 18 hours of fermentation, your dough will be bubbly, soft, and full of air. It will also be very sticky, and that’s completely normal for ciabatta. The trick is to handle it gently and minimally. Avoid overworking or kneading the dough at this stage.
Before touching the dough, dust your hands and work surface with flour. Lightly flour a clean countertop and gently scrape the dough from the bowl onto it. Use a dough scraper or spatula to help release it without tearing.
Now, with floured hands, fold the dough over itself a few times to create a rough ball. Don’t worry about perfection — rustic is what ciabatta is all about.
Dividing and Resting for Better Shape Control
Once you’ve formed the dough ball, use a floured bench scraper to divide it into two equal portions. The dough is too loose to be shaped traditionally, so instead of rolling or tightening it, simply move each half onto a heavily floured kitchen towel.
Here’s how:
- Line one baking sheet with a clean kitchen towel and dust it liberally with flour.
- Place each dough piece side by side on the floured towel.
- Gently fold part of the towel between the loaves to give them room to rise separately.
This gentle technique helps the dough maintain its shape and keeps it from spreading too wide.
The Importance of the Final Proof
The final proof allows the dough to rise again and get ready for baking. Cover the loaves lightly with the remaining towel and let them sit for about 2 hours at room temperature.
During this stage:
- The gluten relaxes and the dough becomes easier to stretch
- Air bubbles continue to form, making the crumb lighter
- The surface dries slightly, creating a thin skin that helps with oven spring
You’ll know the loaves are ready when they feel puffed and airy, and slight bubbles are visible through the towel. Avoid pressing the dough too hard — it’s delicate and can deflate easily.
Preparing Baking Sheets for Seamless Transfer
While the dough proofs, prepare your baking sheets:
- Line one clean baking sheet with parchment paper to prevent sticking during baking
- Make sure it’s large enough to accommodate two 16-inch loaves
Having the baking sheets ready ensures a quick and smooth transition from towel to tray. This is essential, as the dough is soft and difficult to move once shaped.
Stretching to the Classic Ciabatta Shape
This step gives ciabatta its iconic slipper shape:
- Uncover the loaves and, one at a time, gently turn each dough piece over onto the parchment-lined baking sheet.
- Carefully stretch each loaf to about 16 inches in length, pulling slightly from both ends.
- Twist and turn gently as you stretch — think of it as encouraging the shape, not forcing it.
Be careful not to deflate the dough. The air inside is what gives ciabatta its signature holes and chewiness.
Baking Your Bakery-Style No-Knead Ciabatta to Golden Perfection
Getting the Oven Temperature Just Right
A successful ciabatta bake depends heavily on a properly preheated oven. For this recipe, set your oven to 425°F (210°C) and allow it to preheat fully before the loaves go in. Don’t rush this step — a consistent, high heat is essential for a crisp crust and good oven spring.
If your oven runs hot or cool, use an oven thermometer to confirm accuracy. A hot baking surface is also helpful, so placing a baking stone or preheating a baking tray can help increase bottom crust development, although it’s optional.
Transferring the Dough Without Deflation
Because ciabatta dough is so fragile, transferring it can be tricky. The key is to keep its structure intact and handle it as little as possible.
If you haven’t done it already:
- Gently flip each loaf from the floured towel onto the parchment-lined baking sheet, seam side down.
- As you flip, allow the dough to stretch naturally to around 16 inches in length.
- Use the parchment paper to guide the dough if needed — lifting from the sides can help shape it without pressing down.
Avoid adjusting or smoothing the loaves once placed. That loose, rustic form is part of what makes ciabatta so charming.
Baking Time and Texture Expectations
Place the tray in the center of the oven and bake for 35 to 40 minutes, or until the loaves are:
- Deep golden brown
- Crisp on the outside
- Hollow-sounding when tapped on the bottom
Don’t open the oven too early. The initial 20 to 25 minutes are crucial for oven spring, as the internal steam helps create those large holes and that airy structure.
If you’re unsure whether the loaves are done, insert an instant-read thermometer into the center of the loaf. A finished ciabatta should register around 200°F (93°C).
Cooling for Best Crumb and Flavor
As tempting as it may be to slice right in, resist cutting until the bread is fully cool. Ciabatta continues to cook slightly as it cools, and cutting too early can lead to a gummy interior.
Allow the loaves to rest on a wire rack for at least 45 minutes. During this time:
- The crumb sets
- Steam escapes
- Flavor develops further
Once cool, you’ll be rewarded with a chewy, hole-filled interior and a crisp, golden crust — the hallmark of true bakery-style ciabatta.
Storing, Serving, and Enjoying Your Homemade Ciabatta Bread
How to Store Ciabatta for Freshness
Homemade ciabatta is best enjoyed the day it’s baked, but if stored correctly, it can maintain its quality for a few more days. The goal is to preserve the crust while preventing the inside from drying out.
Here’s how to do it:
- Short-term (1–2 days): Wrap the cooled loaves loosely in a clean kitchen towel, then place them in a paper bag. This keeps the crust crisp without trapping moisture.
- Medium-term (up to 3 days): Transfer to a bread box or wrap in parchment and then plastic wrap. Avoid airtight containers unless you plan to toast the bread later, as they soften the crust.
- Long-term (up to 2 months): Slice the bread first, place parchment paper between slices, and store in a freezer-safe bag. Reheat from frozen in a toaster or a 375°F oven for 10 minutes.
Never refrigerate ciabatta — the cool environment dries the bread out quickly and damages the texture.
Creative Serving Suggestions for Any Meal
Ciabatta is incredibly versatile, making it a perfect companion to almost any dish or occasion. Here are some popular and creative ways to serve it:
- Fresh with Butter: As simple as it gets. A warm slice with butter melts hearts at any table.
- Toasted for Garlic Bread: Rub with fresh garlic, drizzle with olive oil, and toast until golden.
- Panini or Sandwich Base: Its sturdy texture and open crumb make it ideal for hot or cold sandwiches.
- Served With Soup or Salad: Ciabatta’s chewiness holds up beautifully when dipped into broth or served with hearty greens.
- Bruschetta Base: Toast slices and top with diced tomatoes, basil, and a splash of olive oil for a classic Italian starter.
- Croutons or Bread Cubes: Dice leftover ciabatta, toss with olive oil and herbs, and bake until crisp for homemade croutons.
How to Revive Day-Old Ciabatta
If your ciabatta starts to go stale, don’t toss it. With a little heat and moisture, you can bring it back to life.
Try this:
- Lightly sprinkle the crust with water.
- Wrap the loaf in foil.
- Warm in a 350°F oven for 10–12 minutes.
The result? A crust that’s re-crisped and a crumb that’s soft again — almost as good as fresh.
Conclusion: Mastering the Art of Bakery-Style No-Knead Ciabatta Bread
Baking your own Bakery-Style No-Knead Ciabatta Bread is not only possible at home, it’s genuinely satisfying. With simple ingredients, no need for kneading, and just a little patience, you can achieve those artisan-style loaves with crispy crusts and tender, hole-riddled interiors — right from your own kitchen.
From mixing to fermenting, shaping, baking, and serving, every step plays a role in building flavor and texture. The long fermentation does all the heavy lifting, so you don’t need any fancy tools or advanced skills to get bakery-level results.
Whether you’re slathering it with butter, dipping it into soup, or building the perfect sandwich, this ciabatta is a versatile, impressive bread that makes any meal feel special. Best of all, the no-knead method makes it accessible to everyone — even first-time bakers.


